Stratus Guides - Sucuri DNS Setup
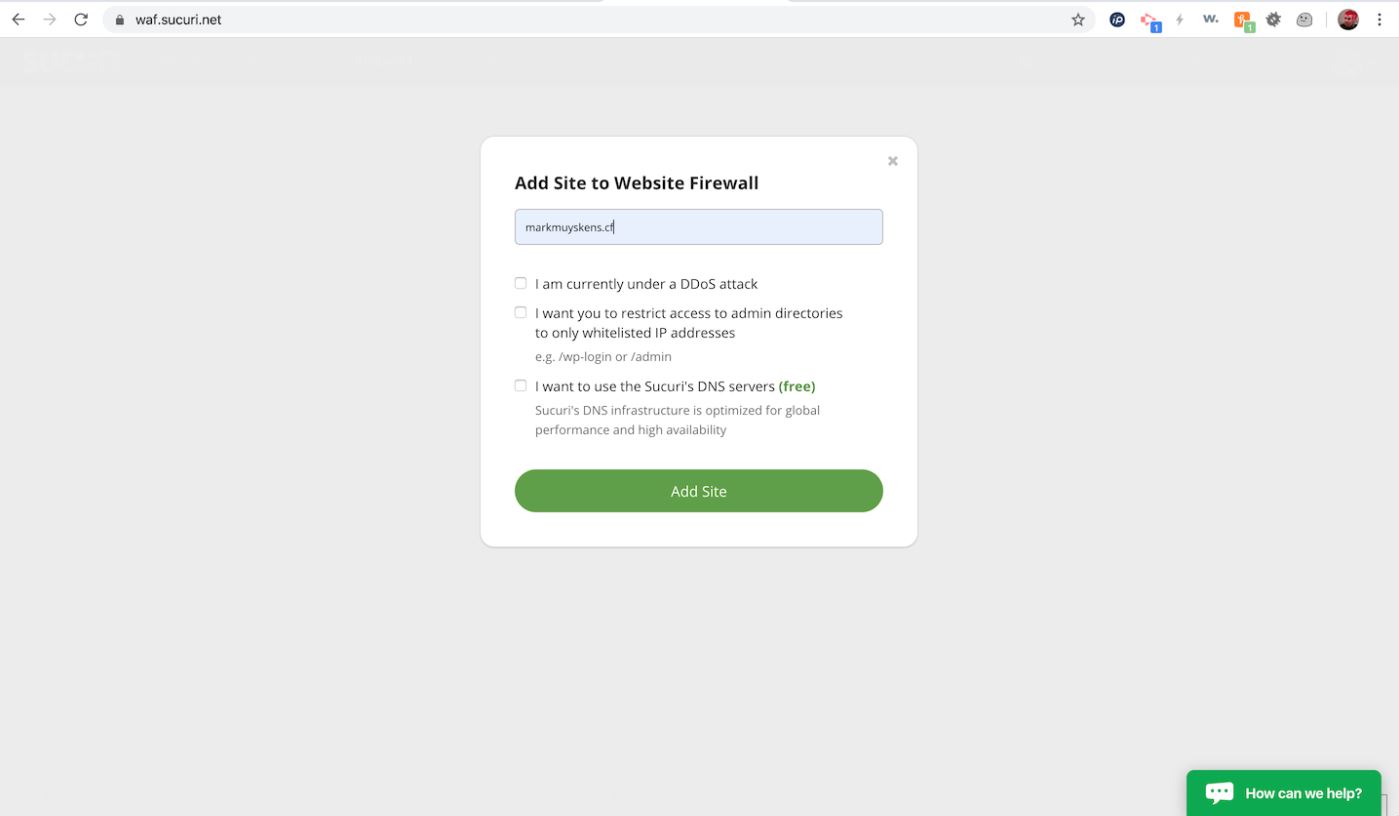
While entering a domain, there will be no need to select the other options provided. Click Add Site to add the domain to Sucuri.
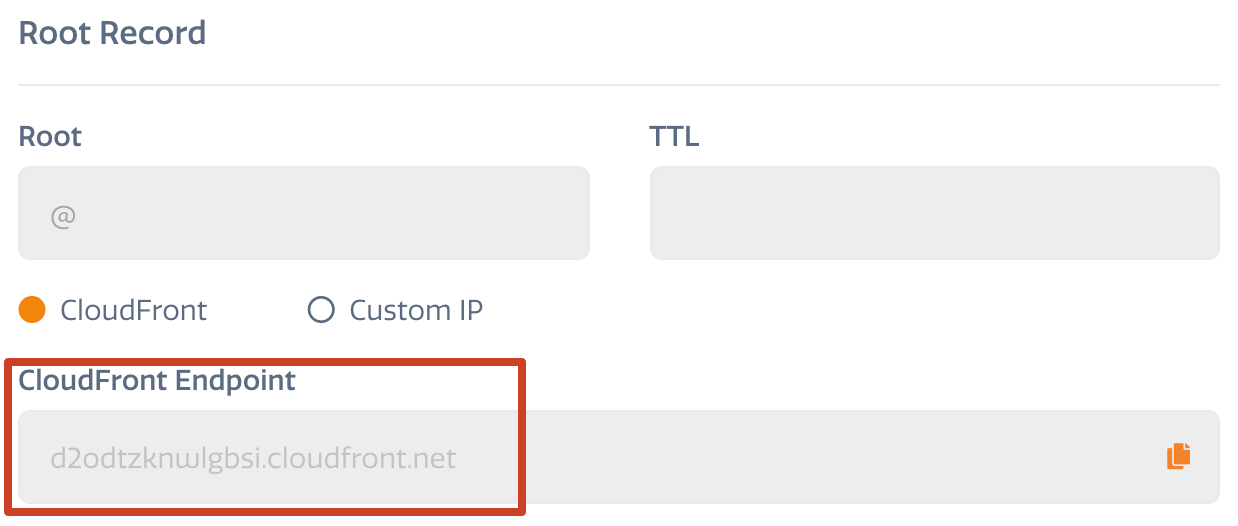
Sucuri will automatically grab the IP address for a specific CloudFront edge server. While workable, it does introduce a single point of failure. To avoid this, provide Sucuri with the CNAME for the CloudFront Endpoint. This can be retrieved from the DNS panel of STRATUS.
-
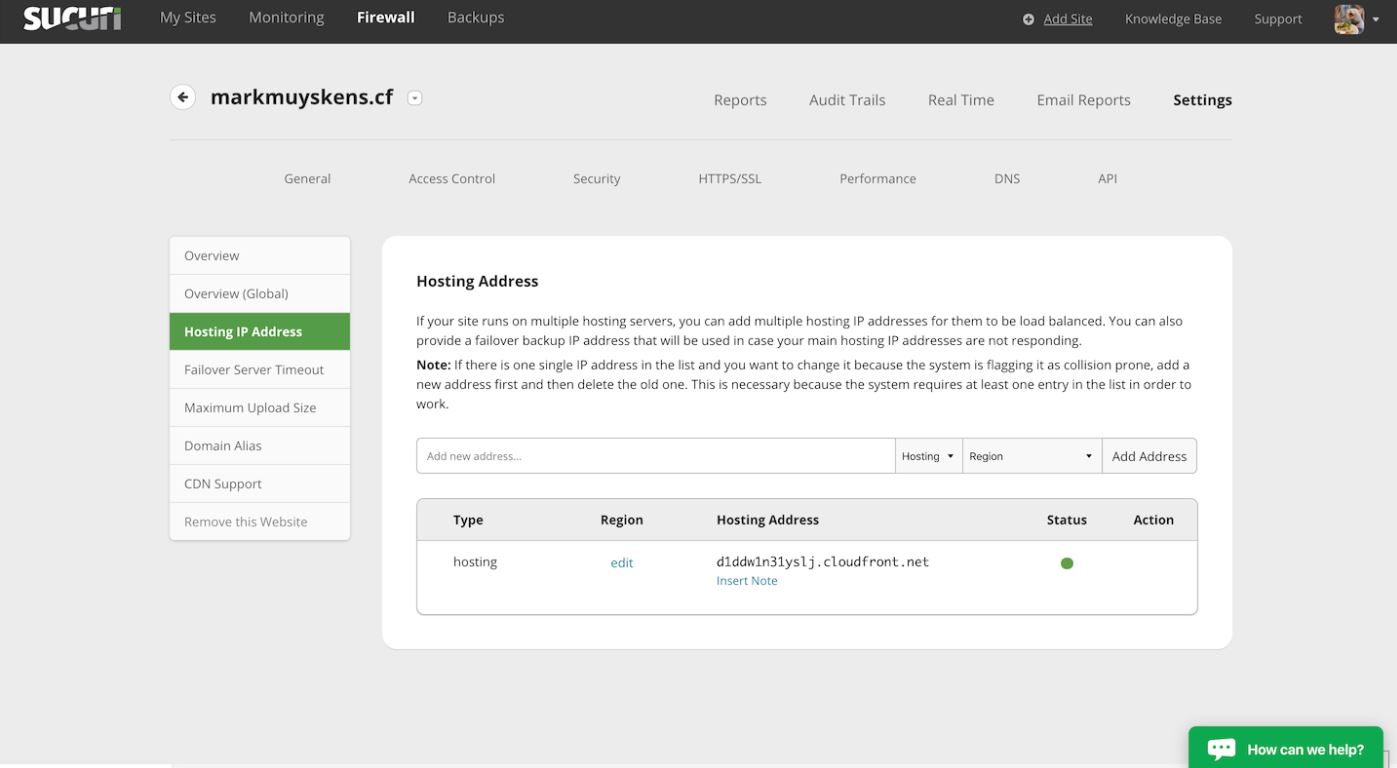
Modify the Hosting IP Address section of Sucuri. Add the CNAME record from the STRATUS panel and removing the single IP address that Sucuri detected.
-
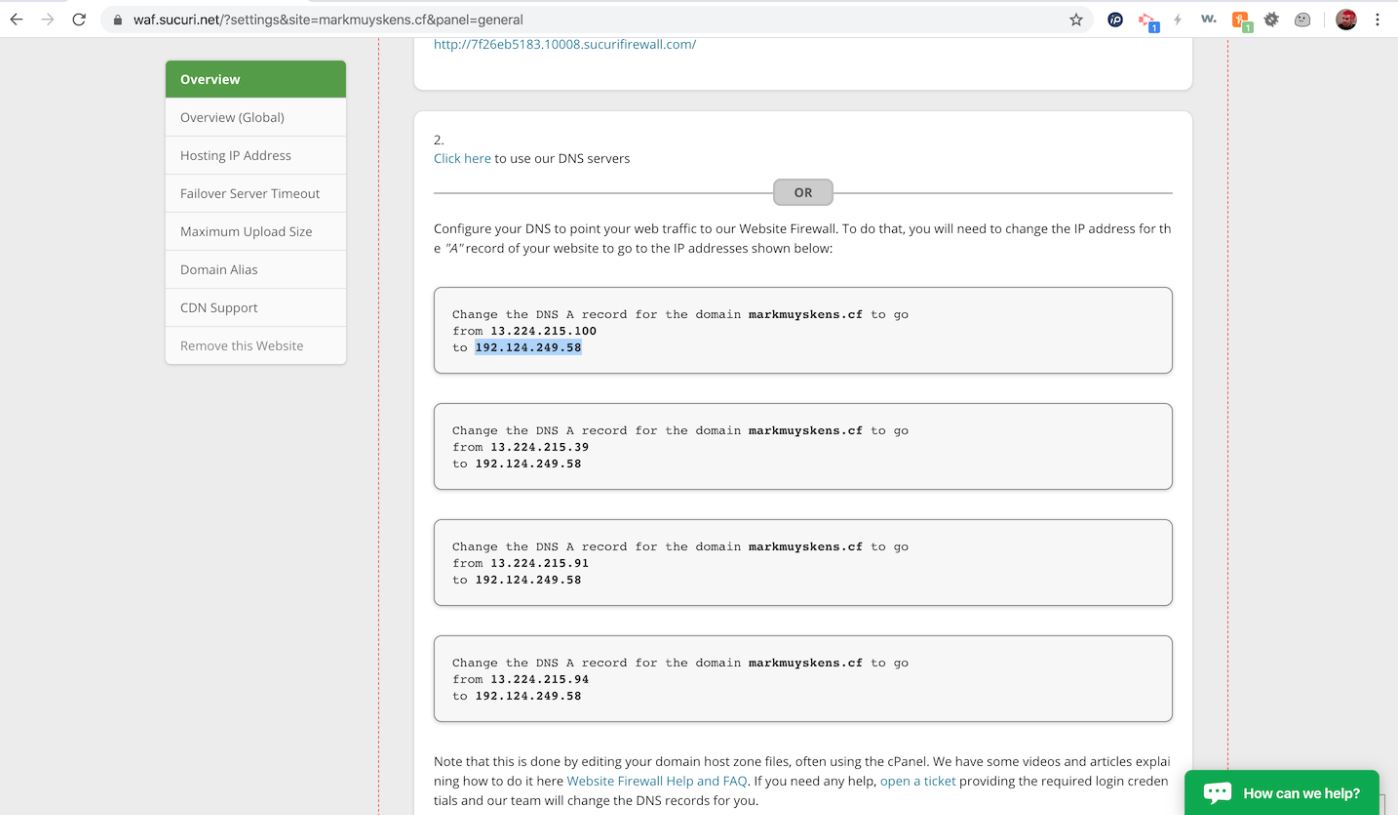
Get the IP address of Sucuri which is provided in their overview section.
-
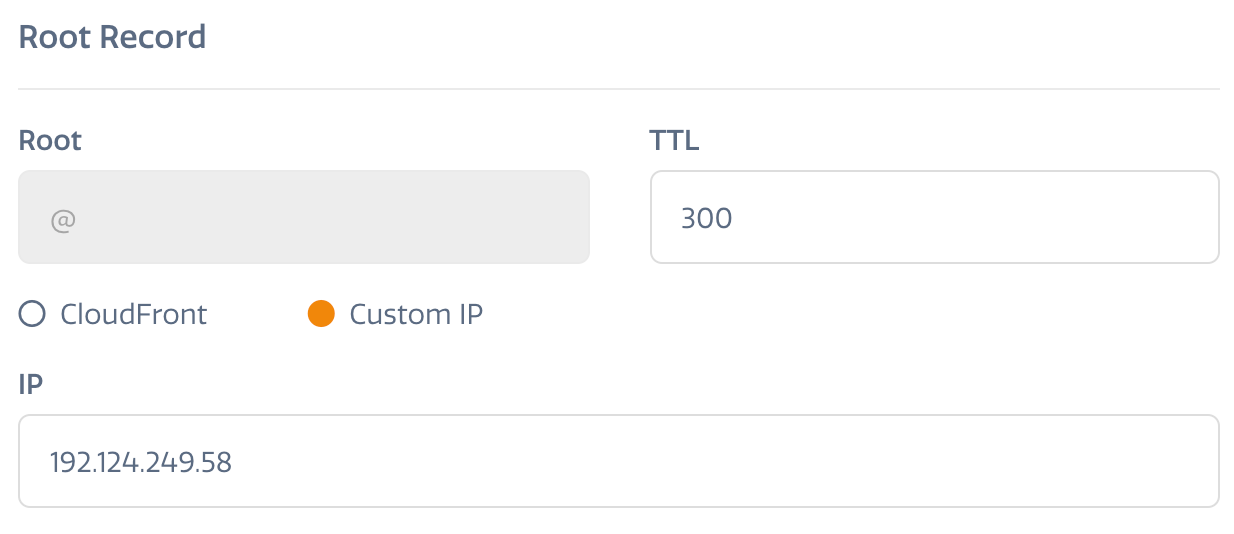
In the DNS panel, change the entry point to CloudFront to the custom IP that was provided by Sucuri.
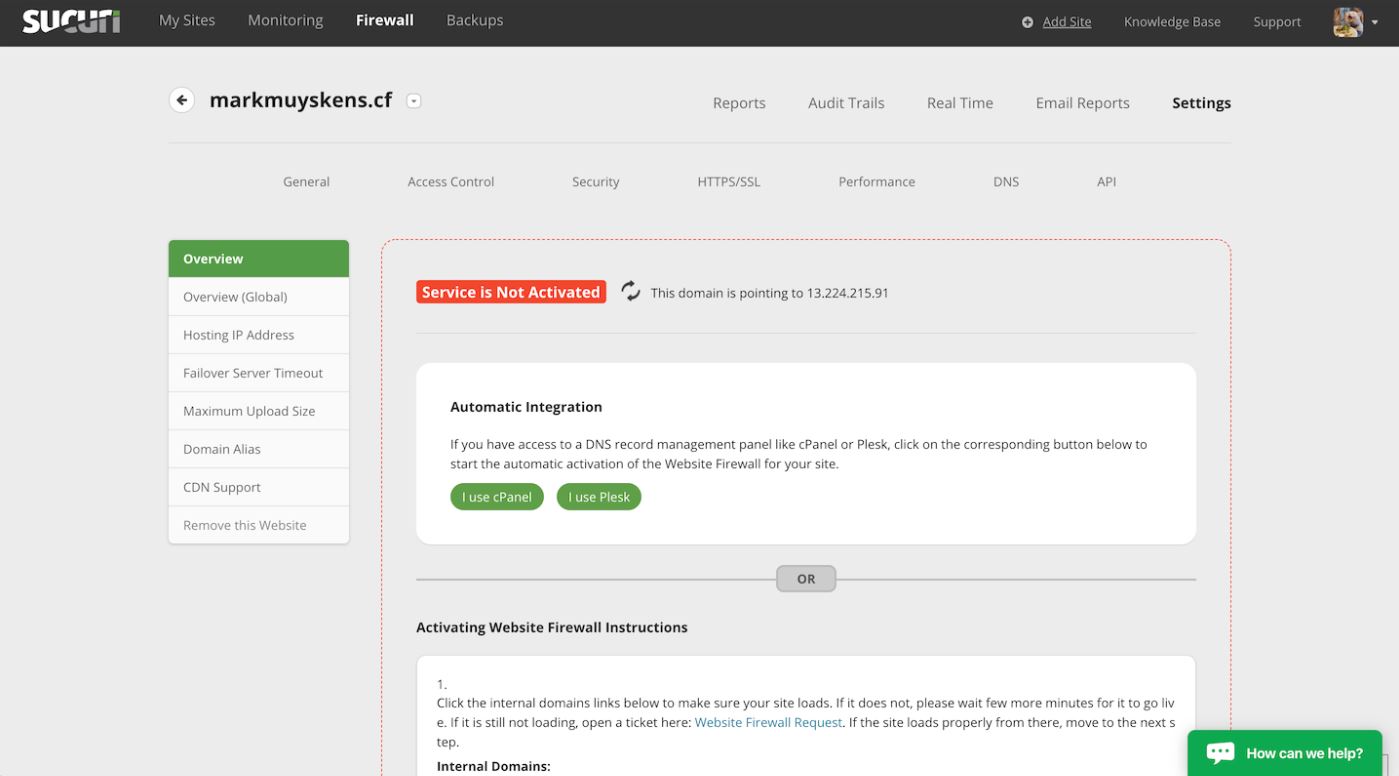
With this complete, the integration is basically finished! If the Sucuri Overview screen shows Service is Not Activated, wait a few minutes then click the Refresh Icon button to update the Overview.
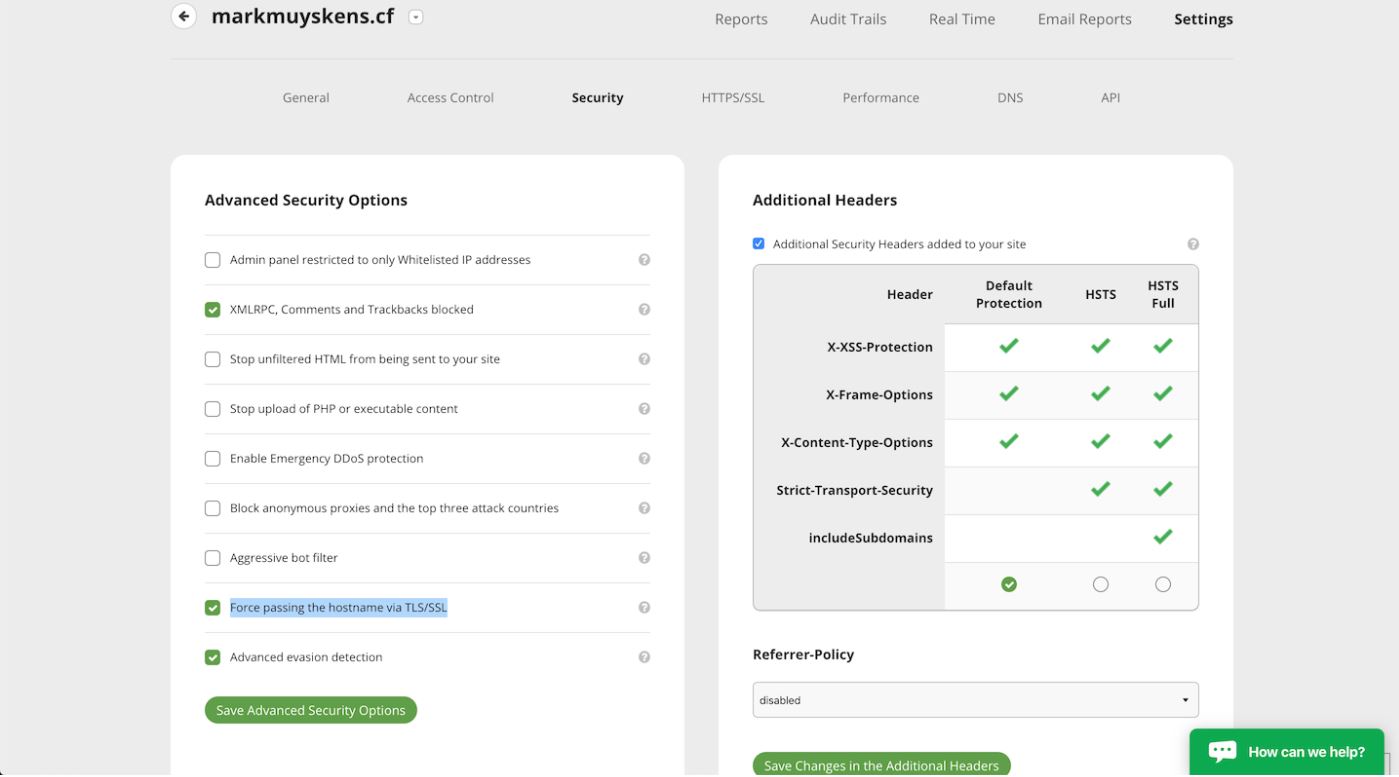
The last setting to change is in Sucuri under the Security section. Enable the option Force passing the hostname via TLS/SSL.
When using Sucuri’s option that adds a JS protector in front of the site, whitelist this path for Google Analytics validation to work properly.
Feedback
Was this page helpful?
Glad to hear it! Have any more feedback? Please share it here.
Sorry to hear that. Have any more feedback? Please share it here.