Installing SSL Certificates
E-commerce sites require encrypted connections to remain PCI complaint and accept credit card data. Encryption ensures secure transmission of credit card details, which prevents bad actors from intercepting the information. To encrypt connections for your website, you must have an SSL (TLS) certificate installed for your site. (“SSL” and “TLS” are widely-used acronyms for “Secure Sockets Layer” and “Transport Layer Security.” SSL is now deprecated. TLS is the successor of SSL.)
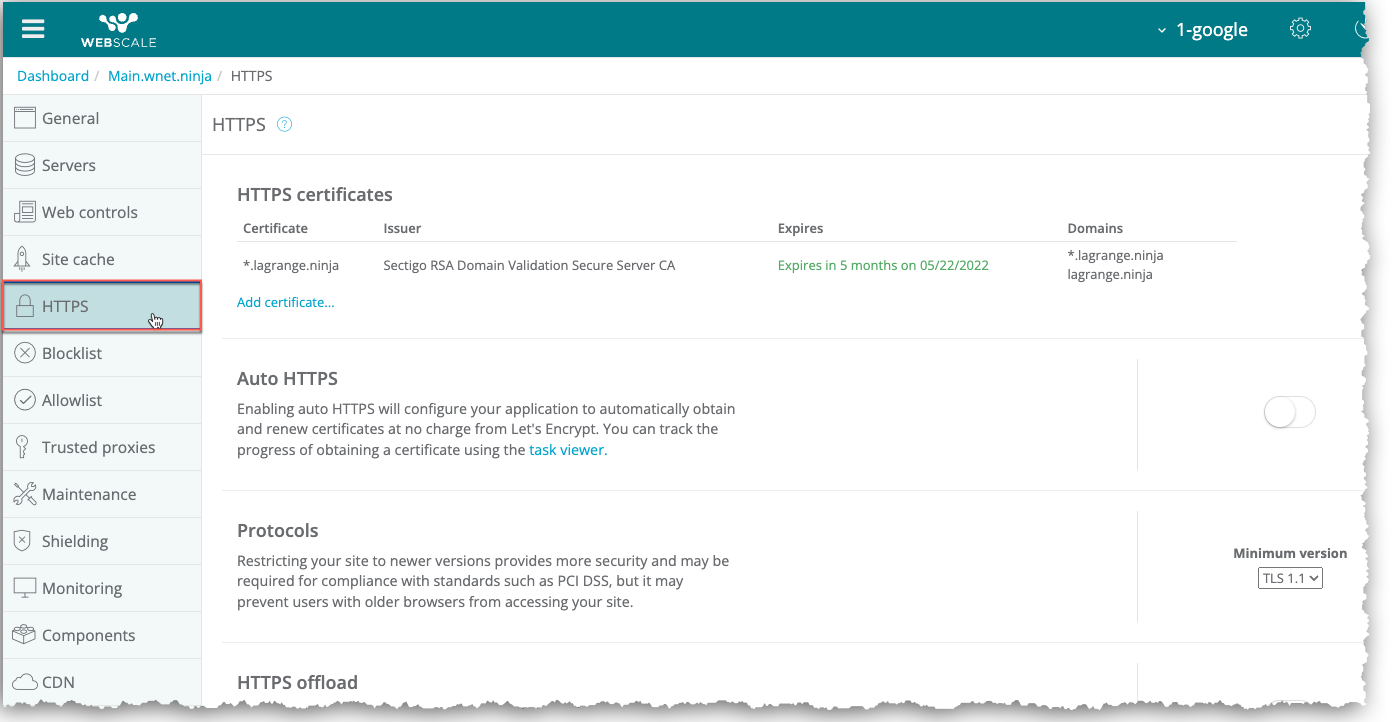
Through the HTTPS page for your application, you can install or upload your own certificate. Alternately, you can enable the Auto HTTPS feature, so Webscale automatically obtains, installs, and maintains Let’s Encrypt certificates for your site.
When you have valid and signed certificates for your application, HTTPS is enabled for it.
You can also use this page to choose other certificate options, including enabling HSTS (HTTP Strict Transport Security) to ensure full encryption and compliance.
You can use the HTTPS page to perform the following operations.
- Install or upload a SSL certificate
- Enable the Auto HTTPS feature
- Restrict your site to only accept newer versions of certificates
- Offload HTTPS to terminate all HTTPS traffic at the data plane
- Prompt Webscale to validate your origin server’s certificate
- Enable HSTS for your application
If you are using self-signed certificates on your origin server, do not enable the Origin validation setting.
If you enable HTTPS, the traffic between Webscale and your origin servers will be unencrypted.
Access the HTTPS page
To access the HTTPS page
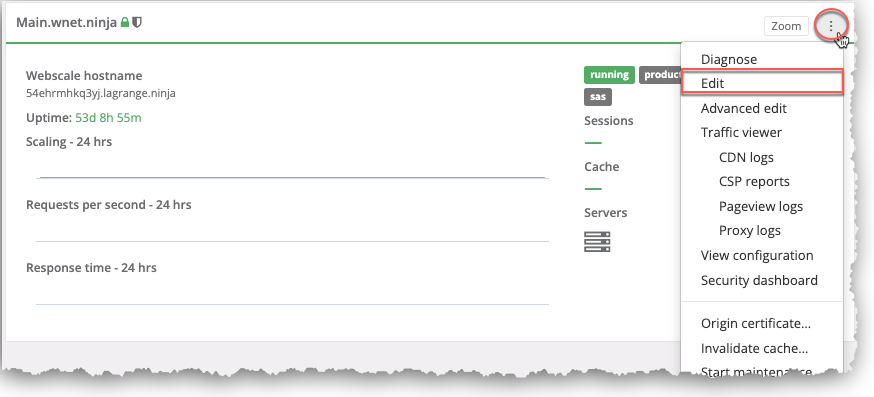
Click the three vertical dots menu icon on the upper-right corner of the application box and select Edit.
-or-
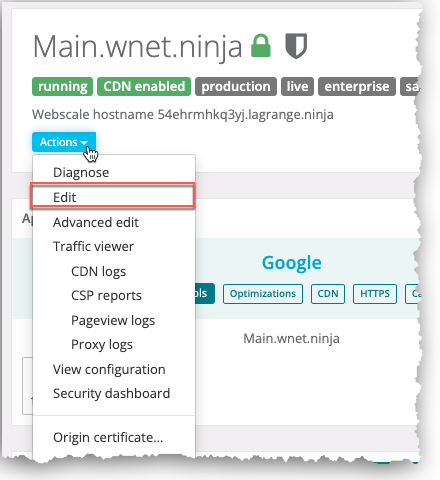
On your application page, click the Actions menu icon and select Edit.
On the sidebar menu, select HTTPS.
The HTTPS page displays.
Install your own SSL certificate
To install an SSL (TLS) certificate for an application, paste the contents of a certificate and its key and chain into the Certificate content box. Or, you can upload one or more certificate files for your application. You must also upload the key files for the certificates. A single certificate can protect all of your domains. If you have multiple domains, you can install a certificate for each one.
To install an SSL certificate
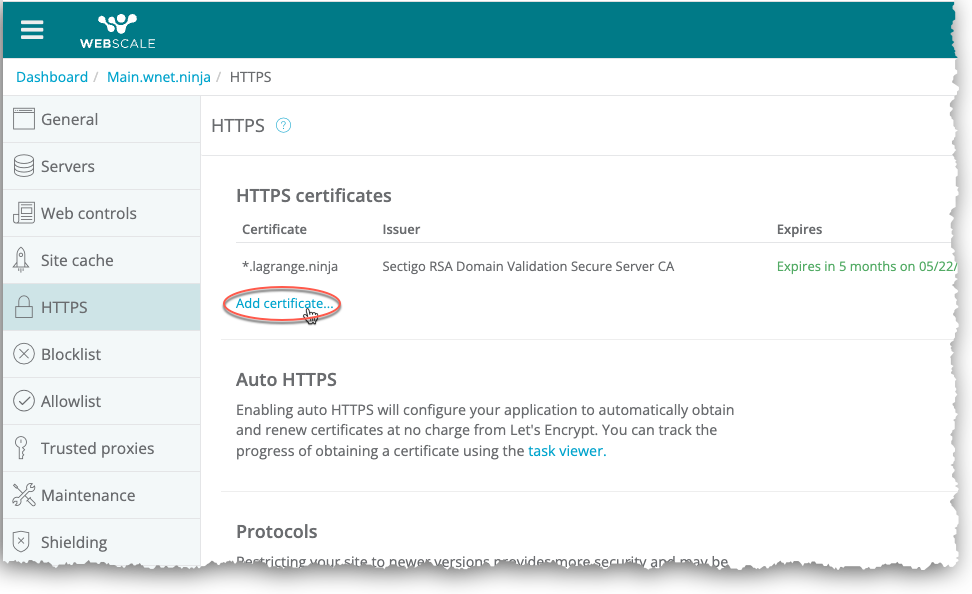
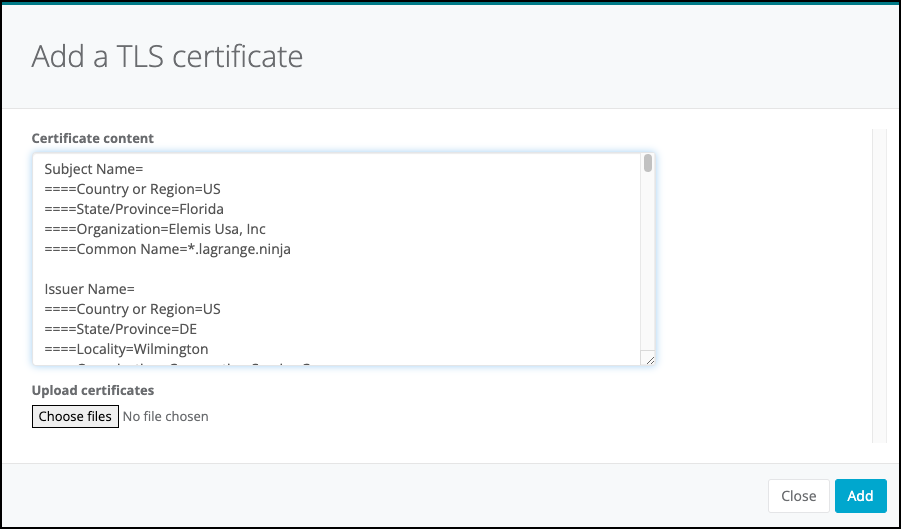
In the HTTPS certificates section, click the Add a certificate link. The Add a TSL certificate dialog box displays.
In the Certificate content box, paste the contents of your SSL certificate, key, and chain files. Or, click Choose files to upload the certificate, key, and chain files.
Click Add. The certificate then displays in the HTTPS certificates list of certificates.
Click Apply.
You must also install and update SSL certificates for other end points, such as web and redirect servers. Contact support if you want Webscale to complete this step.
Enable the Auto HTTPS feature
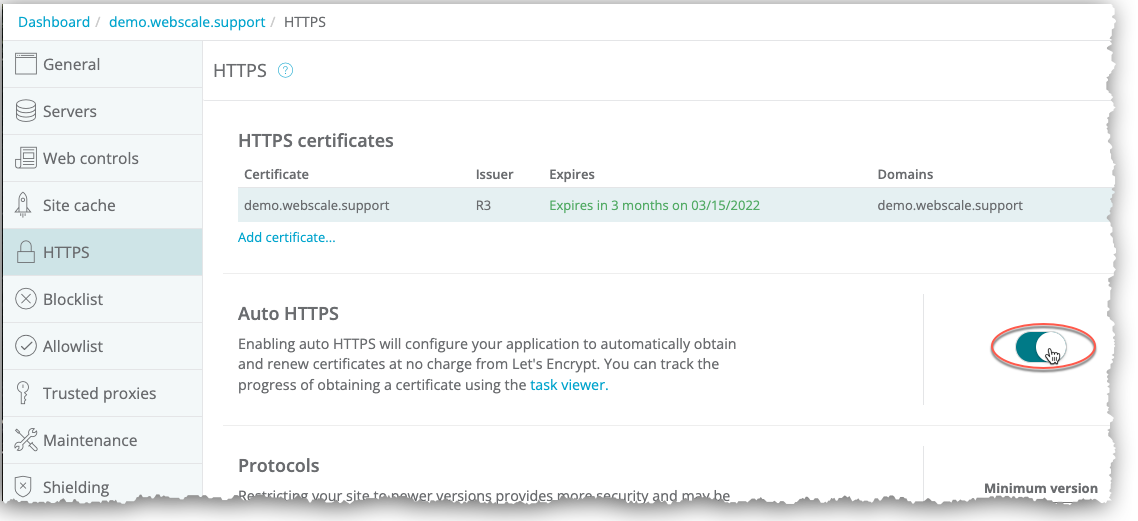
If you don’t own an SSL certificate or want to leverage the Auto HTTPS feature, you can enable this feature so Webscale will manage your certificates. For each application domain, Webscale will obtain and install a free Let’s Encrypt SSL certificate. To do so, it requests the certificates and creates the challenge files necessary to create them.
Let’s Encrypt certificates expire after 90 days. Webscale automatically renews and updates each certificate.
If Let’s Encrypt does not automatically obtained your certificate within a few hours, contact support .
To enable the Auto HTTPS feature
In the Auto HTTPS section of the HTTPS page, click the toggle to enable or disable the Auto HTTPS feature.Enabling this feature starts the certificate request and installation task.
Click Apply.
You can verify that you have successfully enabled this feature by viewing the status of the corresponding tasks and through the following procedure.
a. On the Webscale Control Panel page, click the menu icon on upper left of the screen.
c. Click the Obtain certificate task to view information on the task status, certificate order, and HTTPS and DNS challenges.
b. Click Tasks on the sidebar menu to view the Tasks page. A list of current and recent tasks displays.
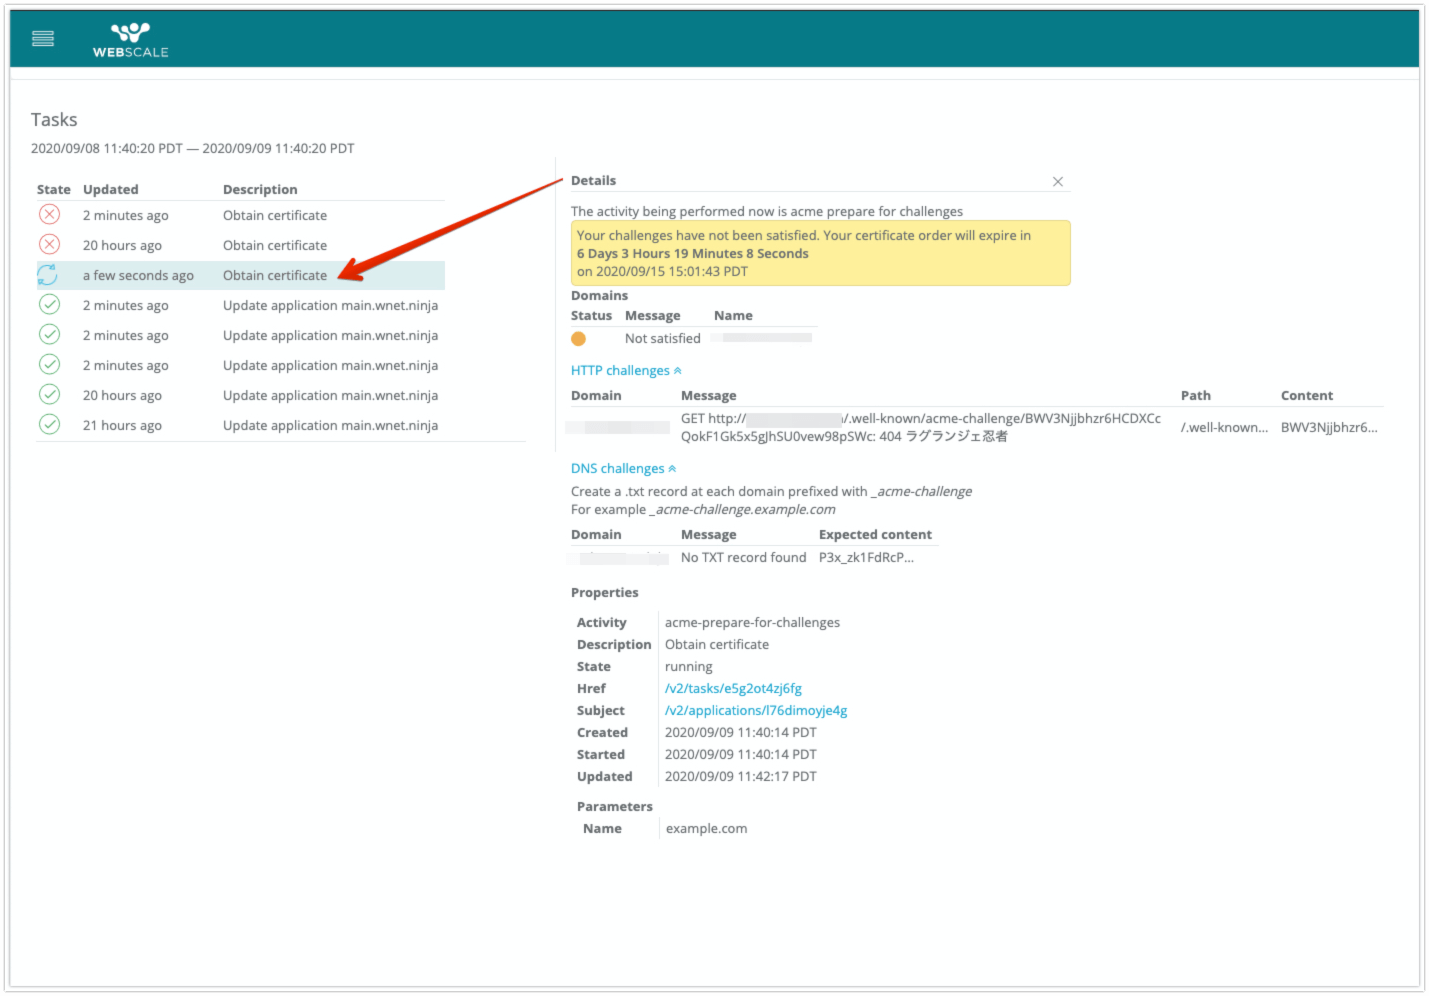
The task will expire. If Let’s Encrypt cannot verify the challenges within the specified expiration period, Webscale must make a new request. Contact support for assistance or if you have questions.
Enable or disable HSTS
HTTPS (HyperText Transfer Protocol Secure), an encrypted version of the HTTP protocol, is a web security policy mechanism that helps protect websites against man-in-the middle attacks. These attacks include protocol downgrade attacks and cookie hijacking. It uses SSL or TLS to encrypt all communication between a client and a server. Through this secure connection, clients can safely exchange sensitive data with a server, such as when performing banking activities or online shopping.
When you enable HSTS, you increase the security of your application.
To enable or disable HSTS
- In the HTTP Strict Transport Security (HSTS) section of the HTTPS page, click the toggle to enable or disable HSTS.
- Click Apply.
Enabling HSTS can break your website if you have links to external sites that do not have corresponding HTTPS URLs. Test all links on a staging or dev site before making this change. You must understand the risks before enabling HSTS.
Enable or disable other HTTPS settings
You can use the following instructions to enable or disable the Protocols, HTTPS offload, and Origin validation settings.
To enable or disable the other HTTPS settings
- For each HTTPS setting, click the toggle to enable or disable it in the section for the setting.
- Click Apply.
Further reading
- How to Contact Support
- Let’s Encrypt (external link)
- HTTP Strict Transport Security (HSTS) (external link)
Last modified on June 3, 2026