Managing Maintenance Mode
Maintenance mode provides the ability to temporarily replace your application with a simple microsite in order to perform maintenance or otherwise make changes to your site. A microsite displays to inform users that the site is in maintenance mode and temporarily unavailable.
Microsites are standalone websites that display for your application. A microsite package file (also known as a microsite file) contains the files for one or more microsites. There are five microsites that can display for standard usages, including maintenance mode. For more information about microsites, see Working with Microsites.
Maintenance Web Controls are Web Controls that run during maintenance mode. Through them, Webscale executes a set of pre-defined actions. Depending on configuration, there may be conditions that must be met before the actions can execute.
There is a default maintenance Web Control that manages the microsite that displays during maintenance mode. You can optionally add, edit, and delete maintenance Web Controls.
The Maintenance web controls page enables you to define the one-page microsites that Webscale will serve by selecting the microsite files that contain these standard microsites. It also enables you to access maintenance Web Controls.
Topics
- Start and stop maintenance mode
- Standard microsites
- Access the Maintenance web controls page
- Default microsite file
- Replace associated microsite file
- Maintenance Web Controls
Start and stop maintenance mode
You can place your application in and out of maintenance mode through the Webscale Control Panel.
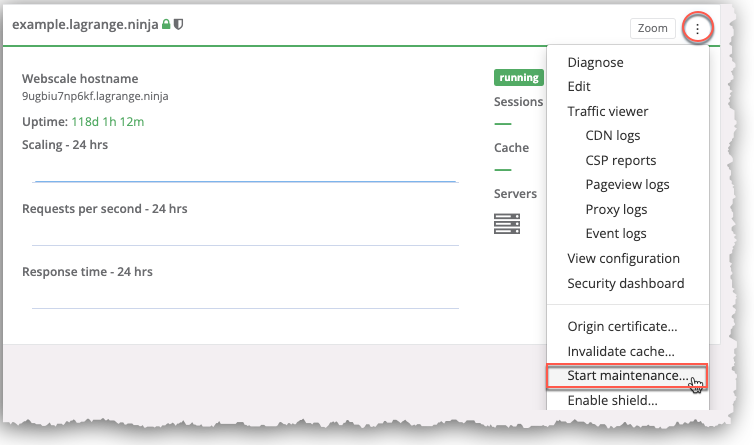
To start maintenance mode
-
Click the three vertical dots menu icon on the upper-right corner of the application box and select Start maintenance.
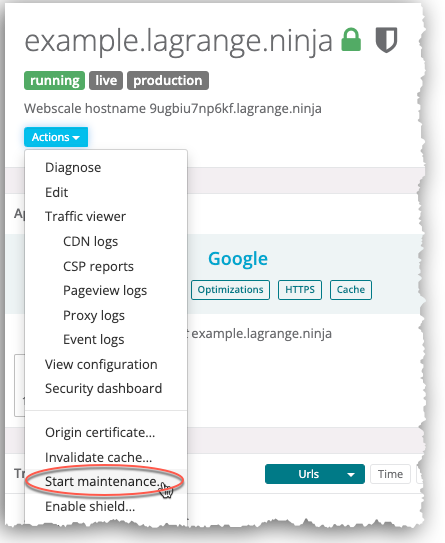
-or-
On your application page, click the Actions menu icon and select Start maintenance.
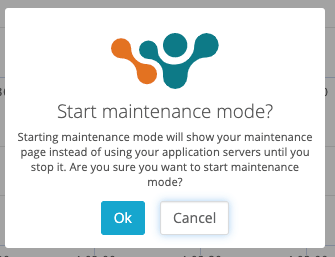
-
In the confirmation box, click Ok.
-
Click Ok. A maintenance mode page displays for site users.

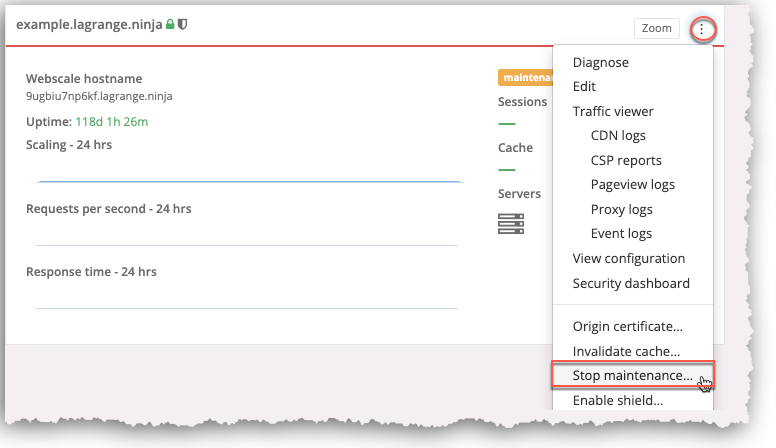
To stop maintenance mode
-
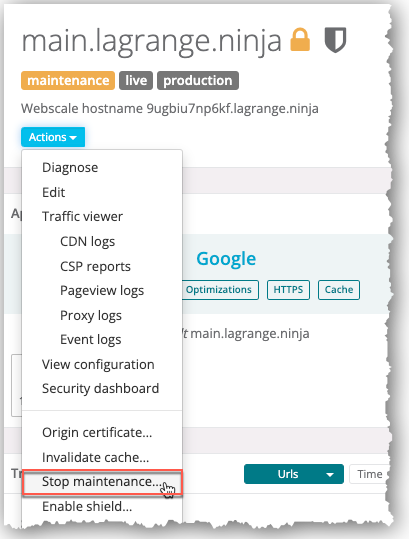
Click the three vertical dots menu icon on the upper right corner of the application box and select Stop maintenance.
-or-
On your application page, click the Actions menu icon and select Stop maintenance.
-
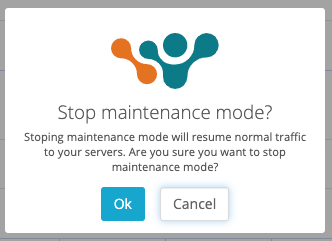
In the confirmation box, click Ok.
-
Click Ok. The maintenance mode page no longer displays.
Automatically start and stop maintenance mode
When using Managed Deployments, you can configure any applications associated with a cluster to automatically enter and exit maintenance mode during deployments of that cluster. Do this by checking the Enable maintenance during deployments checkbox during cluster setup. In the event of a deployment failure, the application(s) will remain in maintenance mode.
Standard microsites
Following are the files names and usage of the standard microsites, which are all one-page microsites.
captcha.html: Displays for user challengesindex.html: Displays in lieu of all standard microsite files except forcaptcha.htmlmaintenance.html: Displays when your application is in maintenance modequeued-reject.html: Displays when Webscale rejects a deferred proxy request because the proxy request queue is fulltimeout.html: Displays when a request times out
For more information about standard microsites, see Standard microsites in Working with Microsites.
General usages
A maintenance Web Control designates and serves the maintenance mode microsite unless no maintenance Web Controls exist.
There is also a microsite package file that is selected on the Maintenance web controls page and associated with it. The microsites that this file contains determine the pages that automatically display for rejected queued proxy requests and timeouts. If there is a request Web Control with the Challenge user action, it uses the captcha microsite for the file. If the microsite file does not include a captcha.html file, the default Webscale captcha displays.
If there are no maintenance Web Controls, Webscale uses a microsite from the microsite file selected on the page as the maintenance mode page.
For more information on captcha microsites, see Captcha pages in Working with Microsites. For more information on creating a request Web Control with the Challenge User action, see Protecting Your Site with a Captcha.
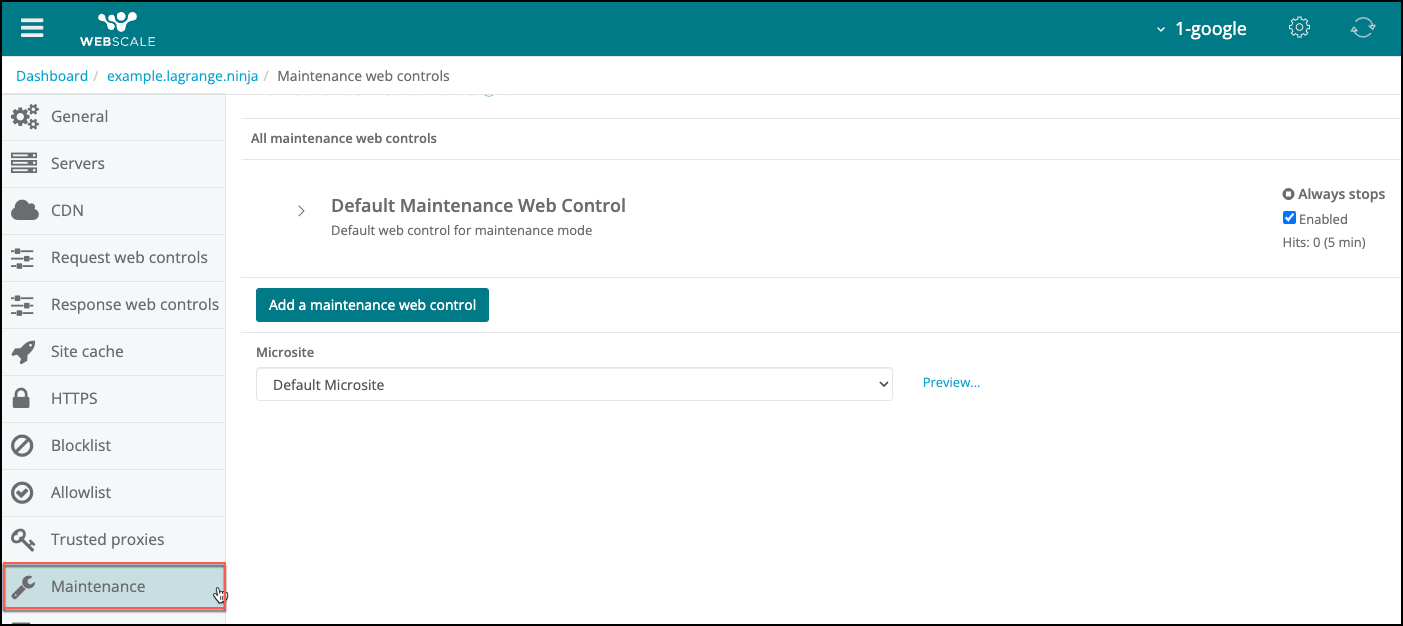
Access the Maintenance web controls page
After you access the Maintenance web controls page, you can work with the microsite file associated with the page and maintenance Web Controls.
To access the Maintenance web controls page
-
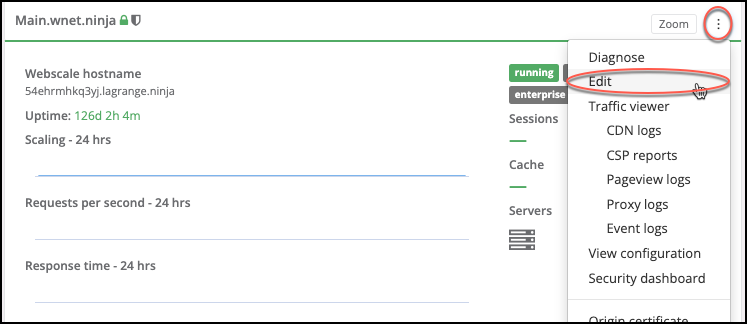
Click the three vertical dots menu icon on the upper-right corner of the application box and select Edit.
-or-
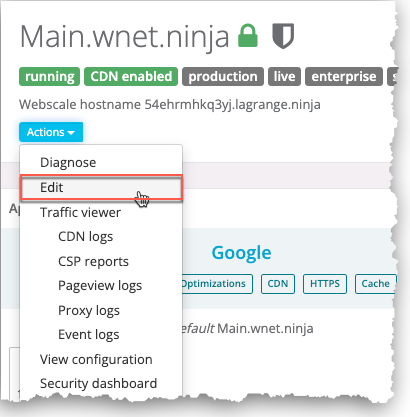
On your application page, click the Actions menu icon and select Edit.
-
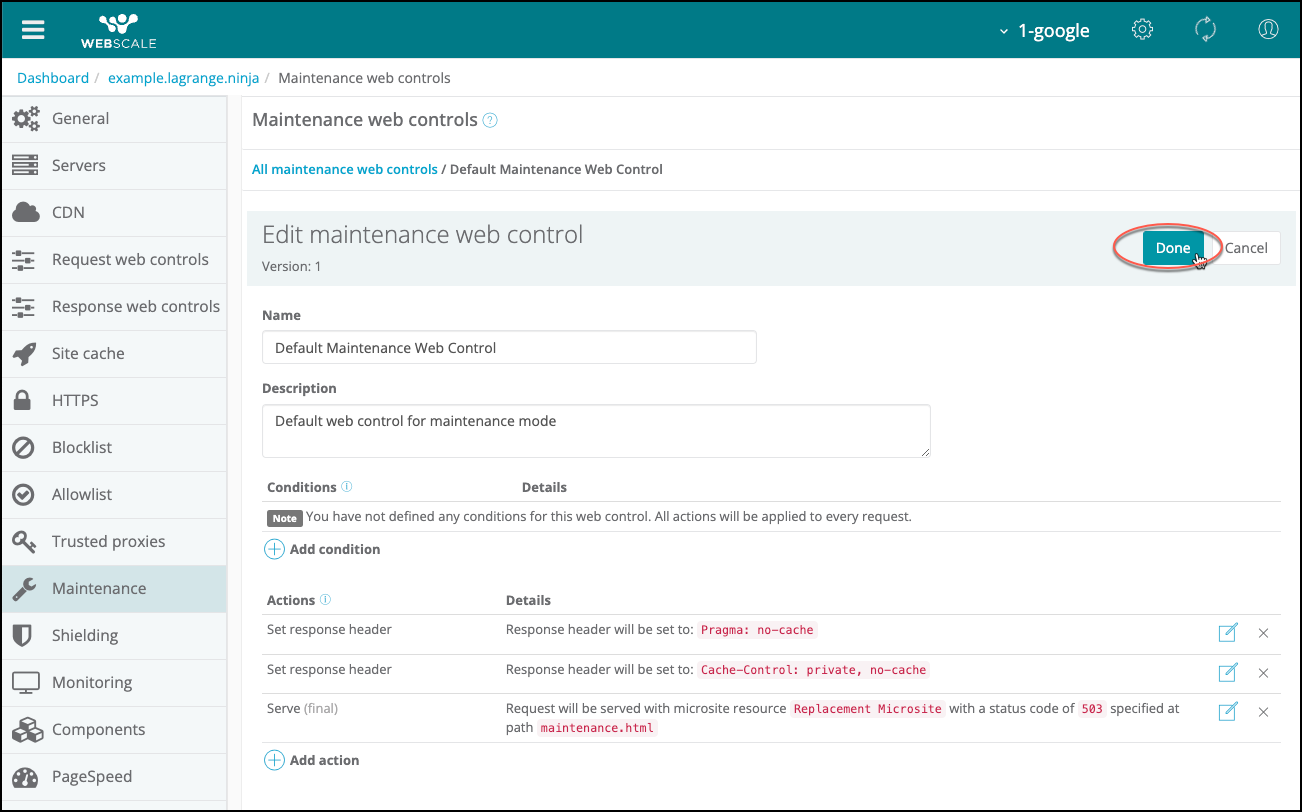
On the sidebar menu, click Maintenance. The Maintenance web controls page displays.
Default microsite file
Webscale provides a microsite default file that contains the standard microsite files. (Though the microsite file names are different for this default microsite file, the same microsite displays for maintenance mode, rejected queued requests, and timeouts.)
Initially, the default file is selected for the Maintenance web controls page and default maintenance Web Control. You can replace the default microsite file with another uploaded microsite file. The microsite files for the page and maintenance Web Control can be different.
Replace the associated microsite file
You can replace the microsite file selected for the Maintenance web controls page, which might be the default microsite file, with a new uploaded file. The new file can contain microsites that are specific to each condition and customized for your business. For instance, the timeout microsite could include wording referencing a timeout and your branding.
A microsite file might have only one HTML file. If it is named index.html and located at the root directory of the package file, the single file will display for both rejected queued proxy requests and timeouts. If you use it for a maintenance Web Control to serve as the maintenance mode page, or there are no maintenance Web Controls, the index file microsite will function as the maintenance mode page.
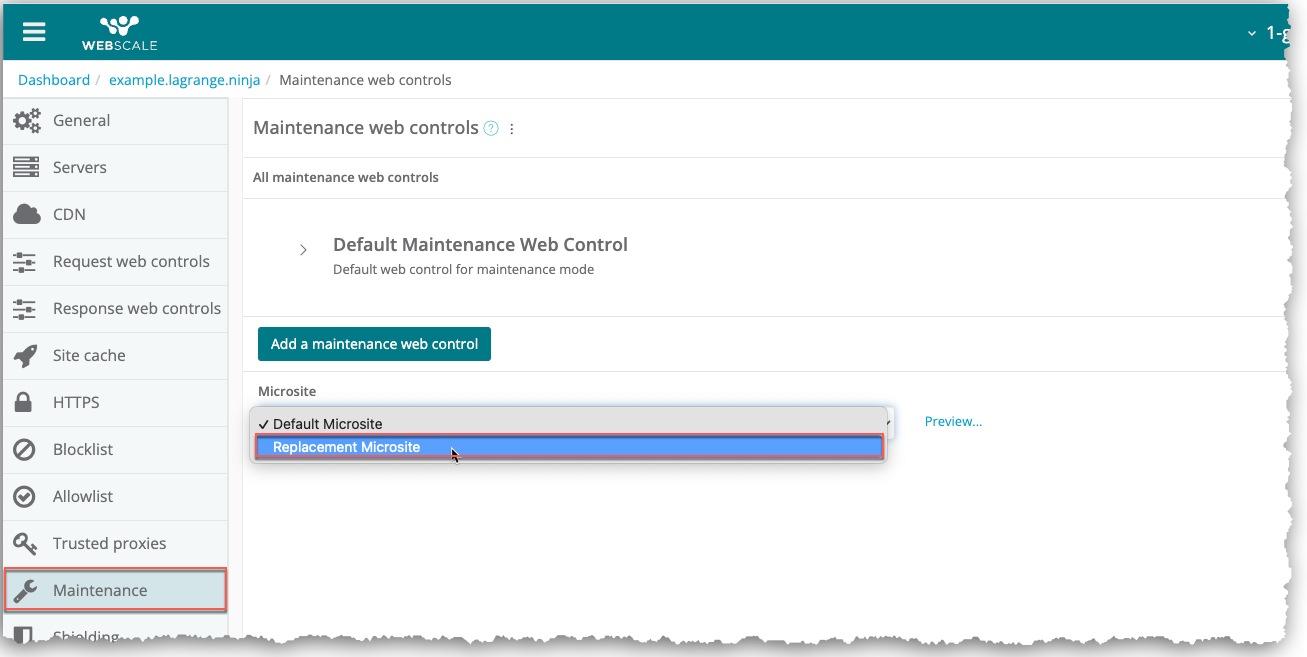
To replace a microsite file
-
In the Maintenance web controls page, select the new microsite file from the Microsite drop-down menu.
-
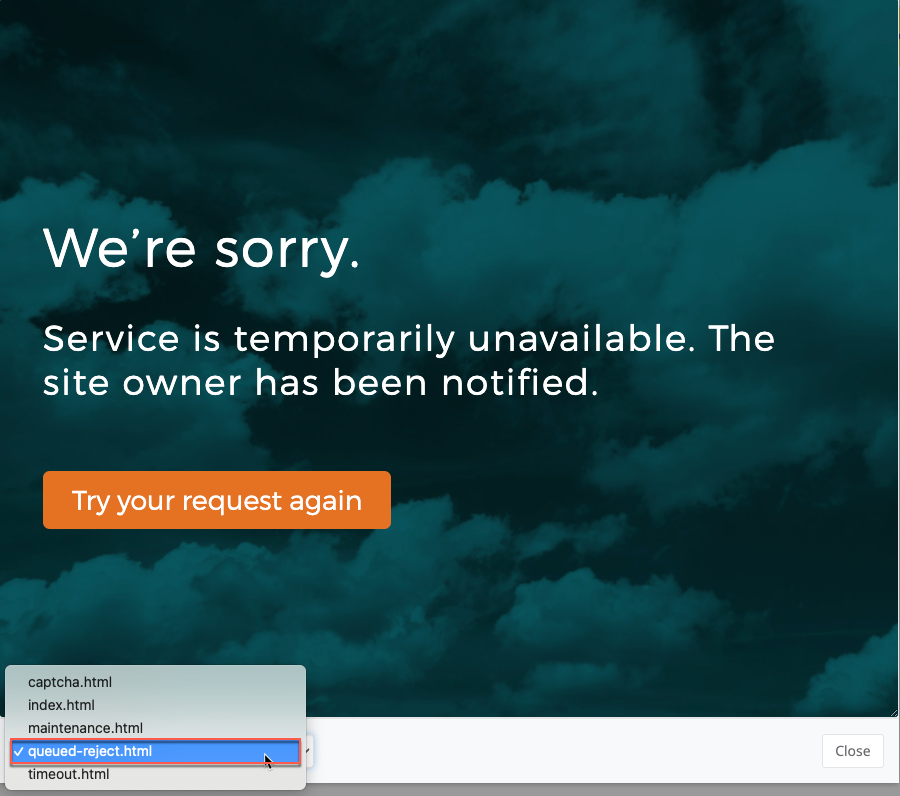
To preview a microsite that the microsite file contains: a. Click Preview. b. In the preview dialog box, select the microsite from the microsite file drop-down menu.
c. Click Close to return to the Maintenance web controls page.
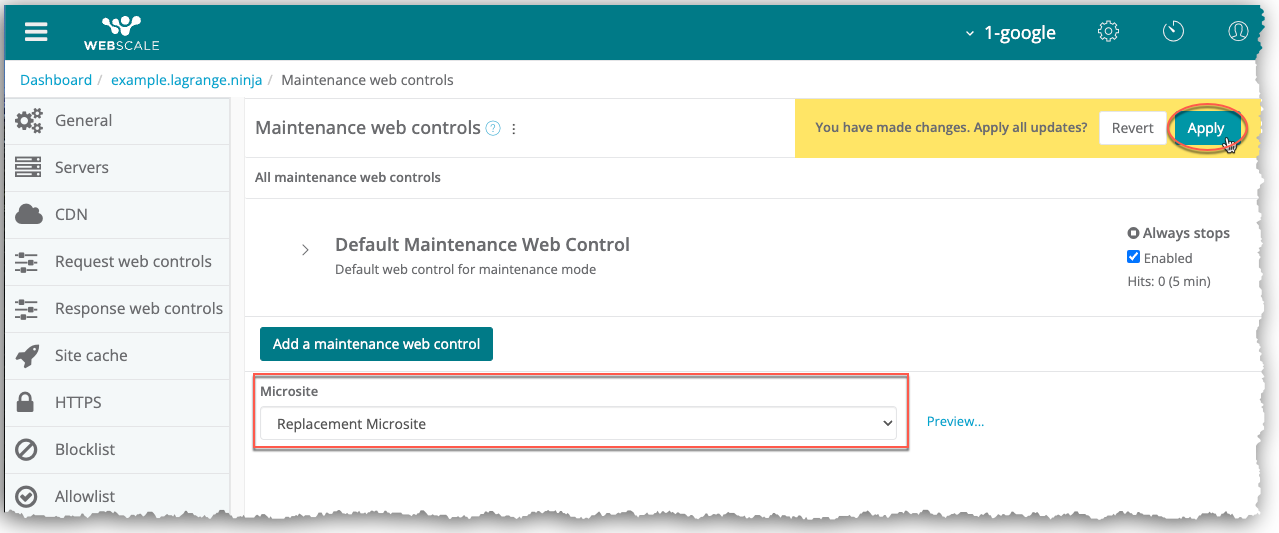
-
Click Apply.
Maintenance Web Controls
Web Controls consist of configured rule sets that match individual request conditions. Based on the conditions, Web Controls automatically execute a set of pre-defined actions. When one or more specified conditions are met, Webscale applies all configured actions to the request.
The maintenance Web Controls only operate during maintenance mode. Just as with other types of Web Controls, you can edit conditions and actions and add and delete these Web Controls.
If you have more than one maintenance mode web control, they behave the same way that multiple request web controls do. This includes the order in which actions execute.
The primary purpose of maintenance Web Controls is to serve the maintenance mode page during maintenance mode.
For more information on creating Web Control conditions and actions, see Creating Web Controls. For information on working with more than one Web Control, see Managing Web Controls.
Default maintenance Web Control
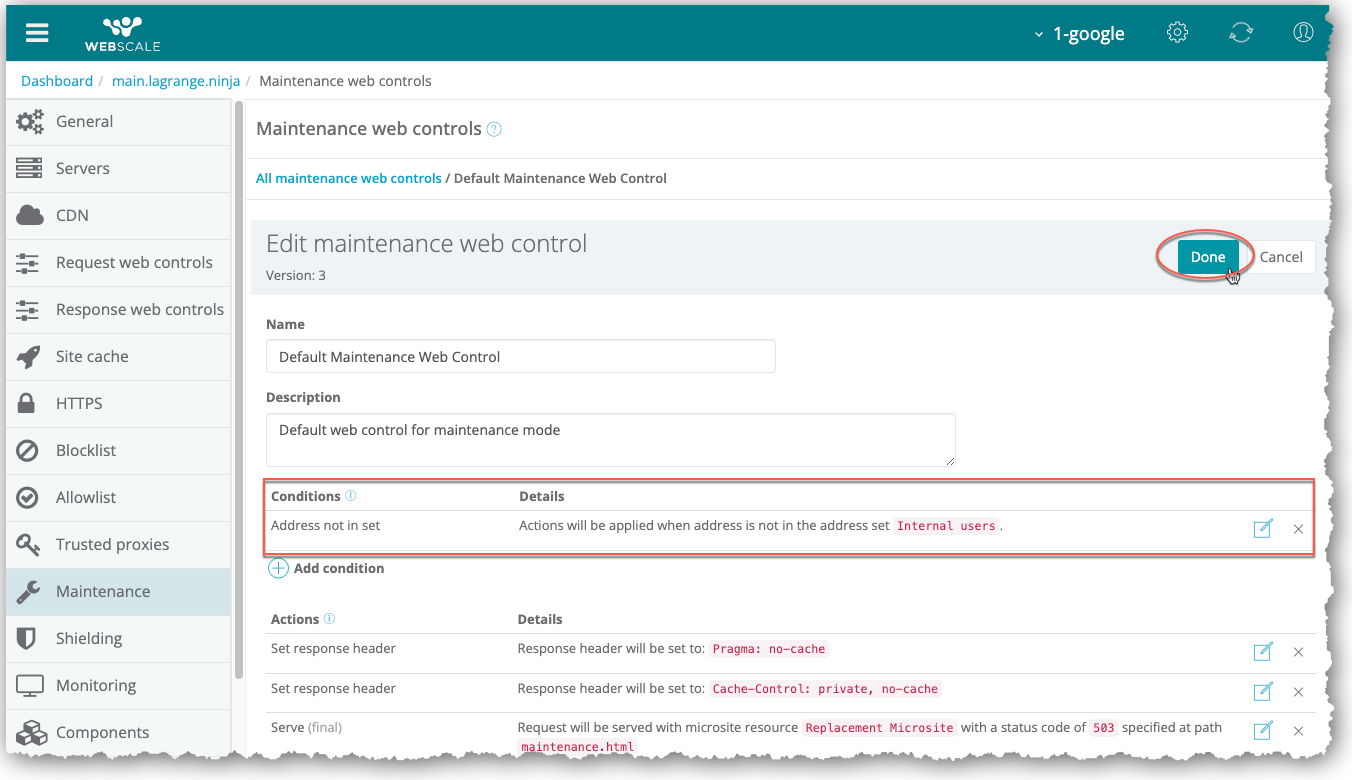
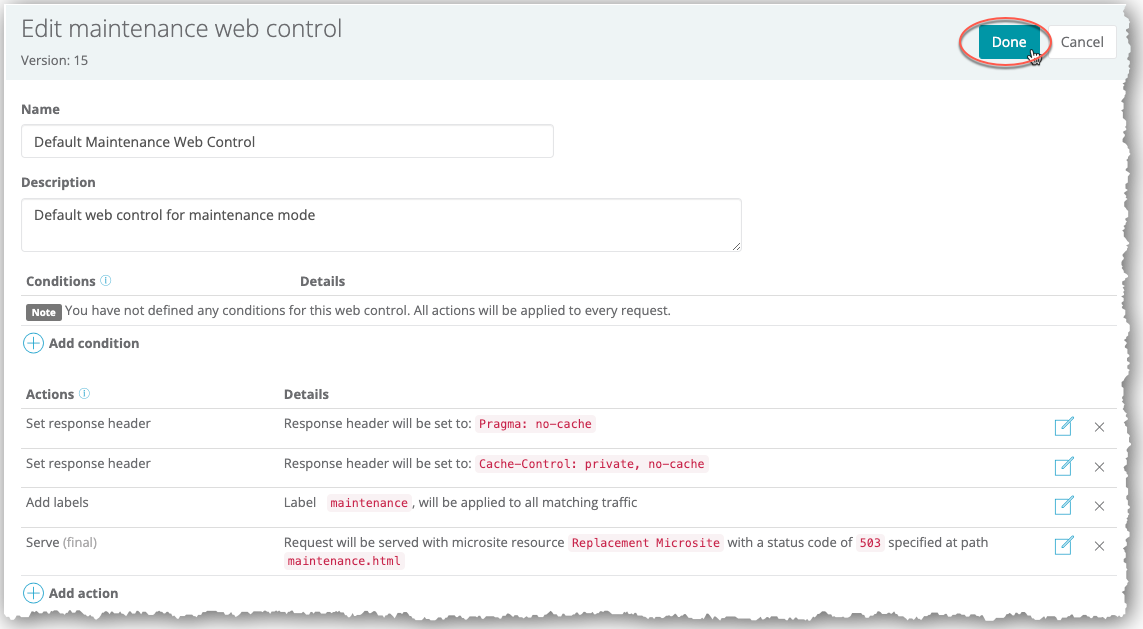
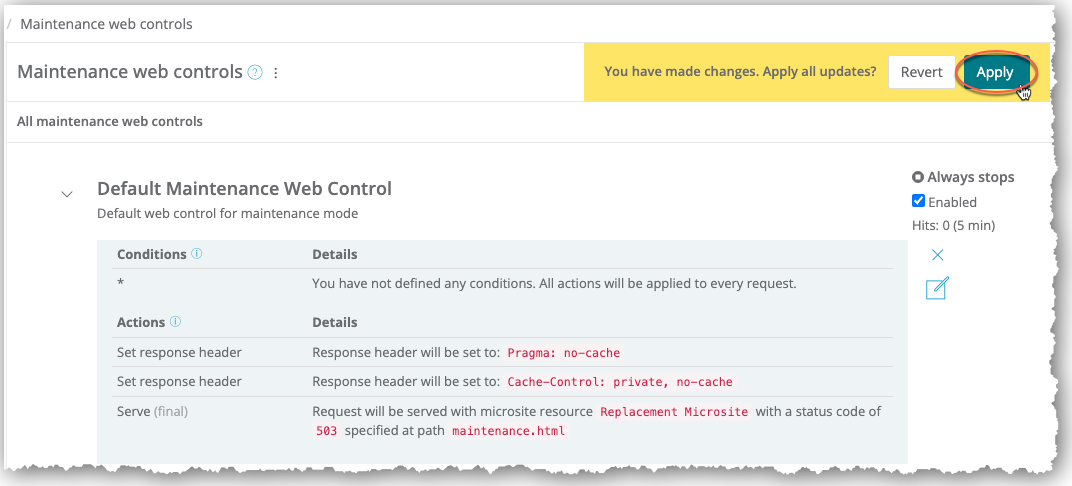
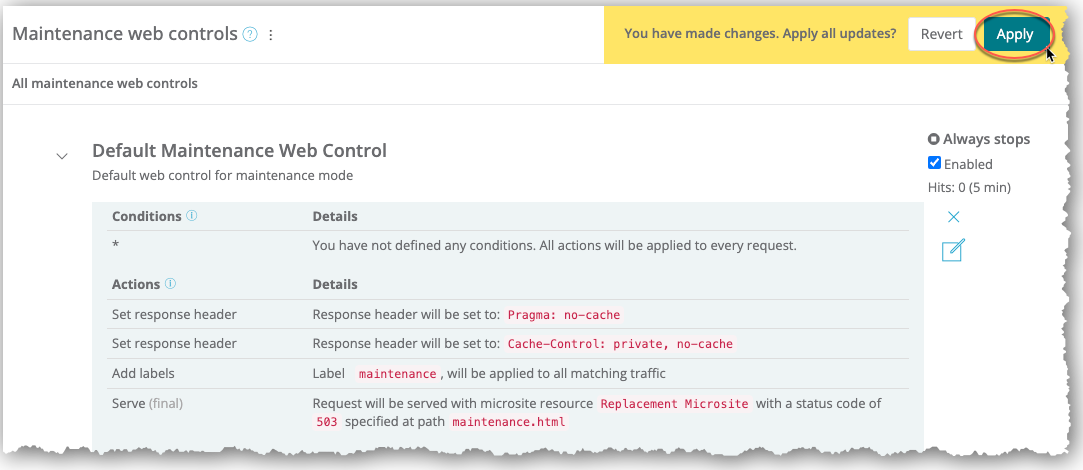
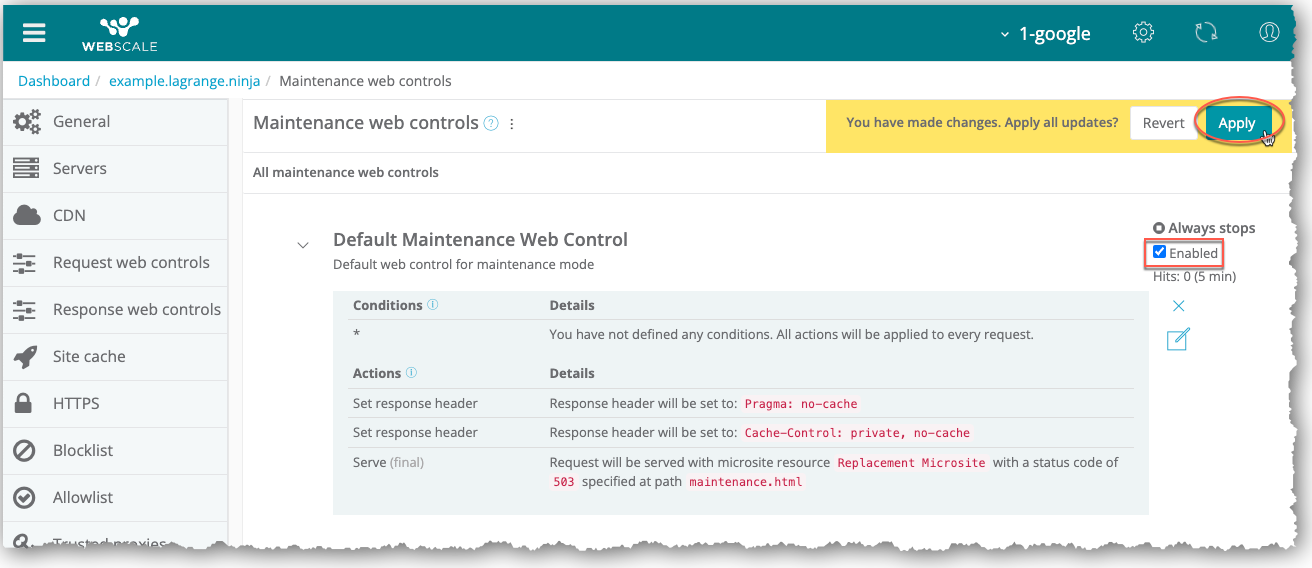
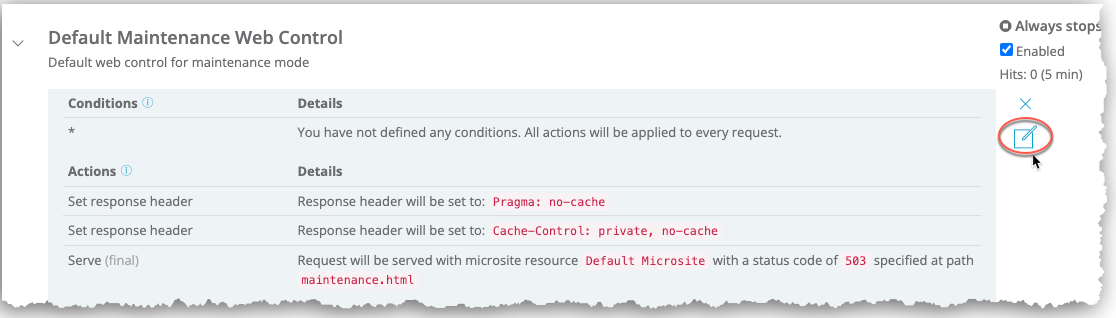
The default maintenance Web Control has the following pre-configured actions.
-
Set response header: Response header will be set to:
Pragma: no-cache -
Set response header: Response header will be set to:
Cache-Control: private, no-cache -
Serve (final): Request will be served with microsite resource
Default Micrositewith a status code of503specified at pathmaintenance.html
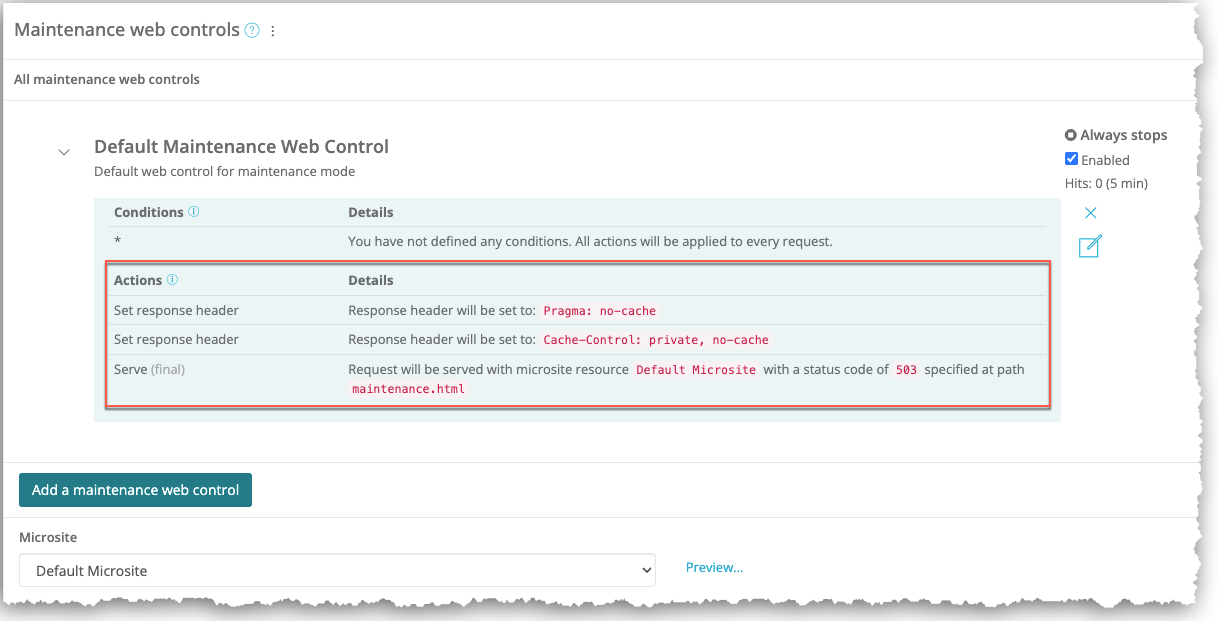
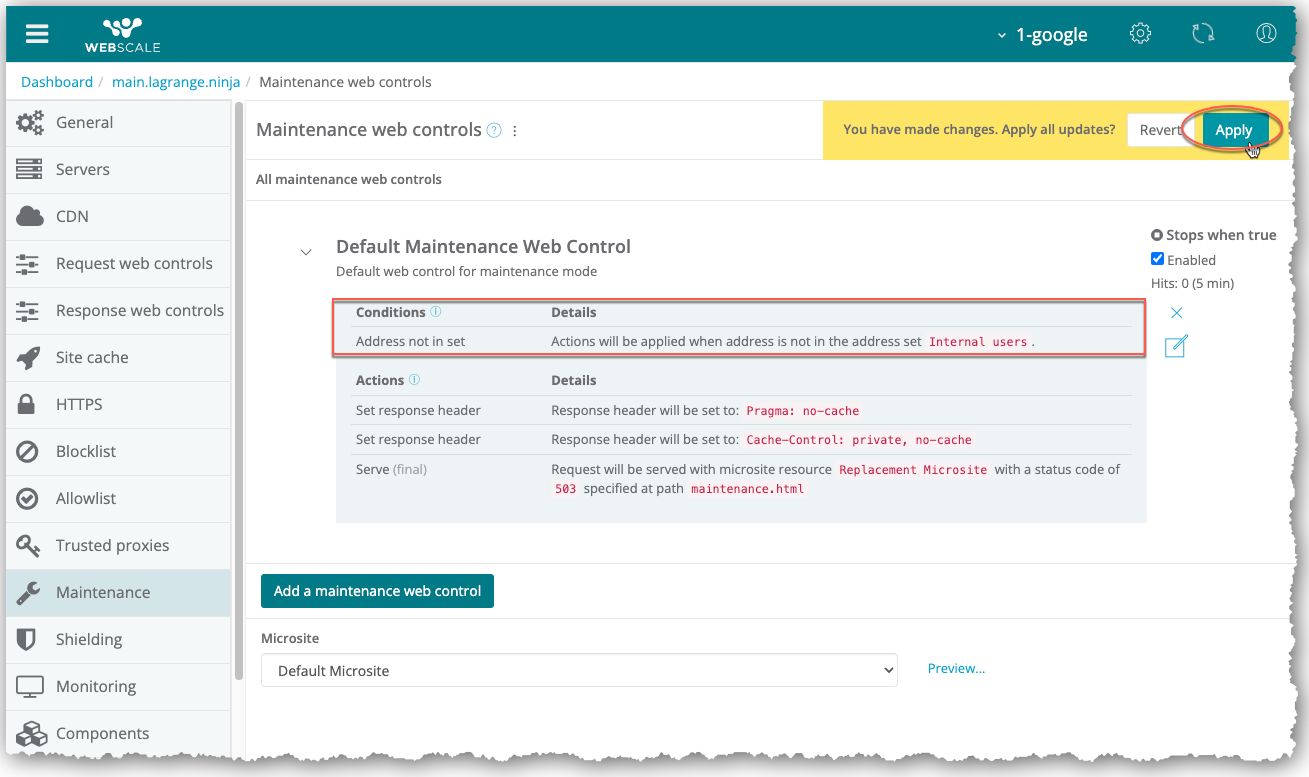
Until you change these settings or delete the default maintenance Web Control, whenever you put your site into maintenance mode, Webscale executes the above actions in the following way.
- Sends responses with headers that instruct browsers to not cache the maintenance mode page
- Displays the maintenance mode page from the specified microsite file with the HTTP 503 status code (service unavailable). As the final action, these steps will always take place after all other maintenance Web Controls actions run.
For more information on HTTP request headers and status codes, see HTTP Headers and Status Codes.
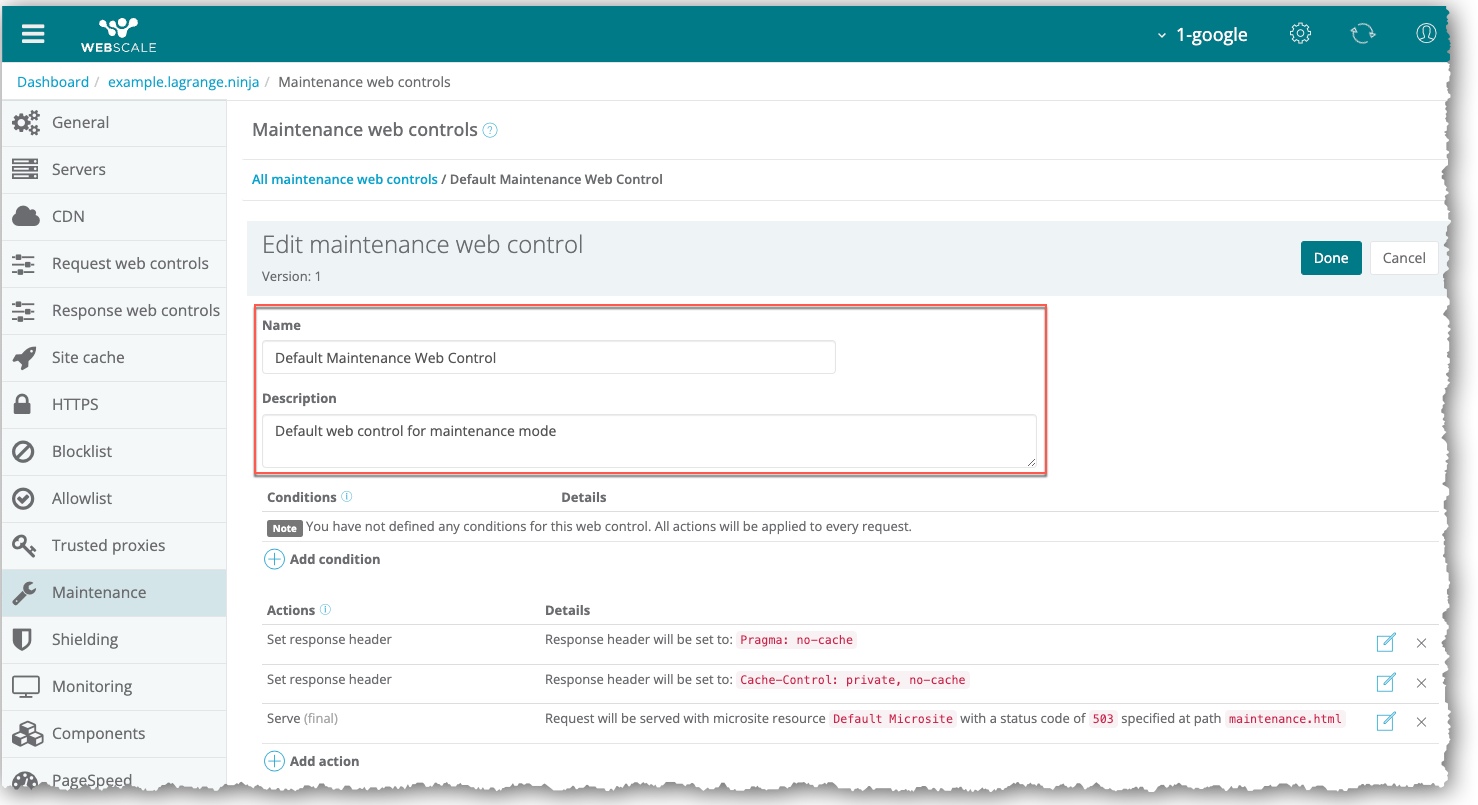
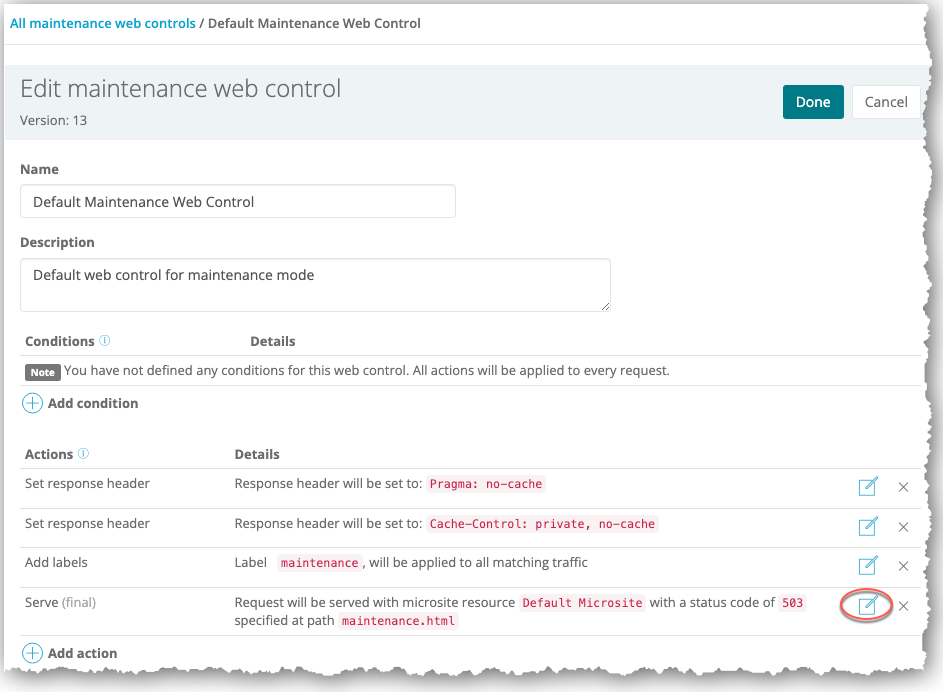
Edit maintenance Web Controls
When you edit a maintenance Web Control, you can modify its name, descriptions, and its conditions and actions. You can also add new conditions and actions.
You can choose for Webscale to display a different maintenance mode page than the default one when editing the maintenance Web Control that serves this page.
To edit a maintenance Web Control
-
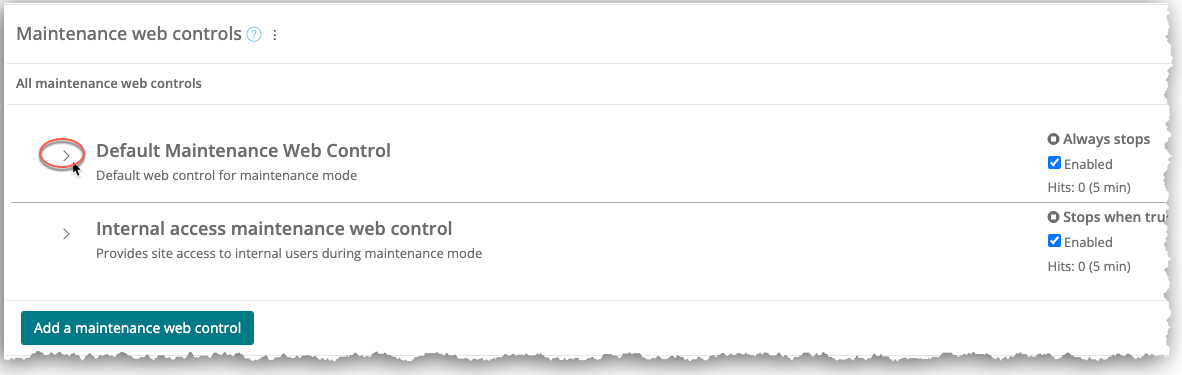
In the Maintenance web controls page, click the icon for the maintenance Web Control.
-
Click the Edit icon.
-
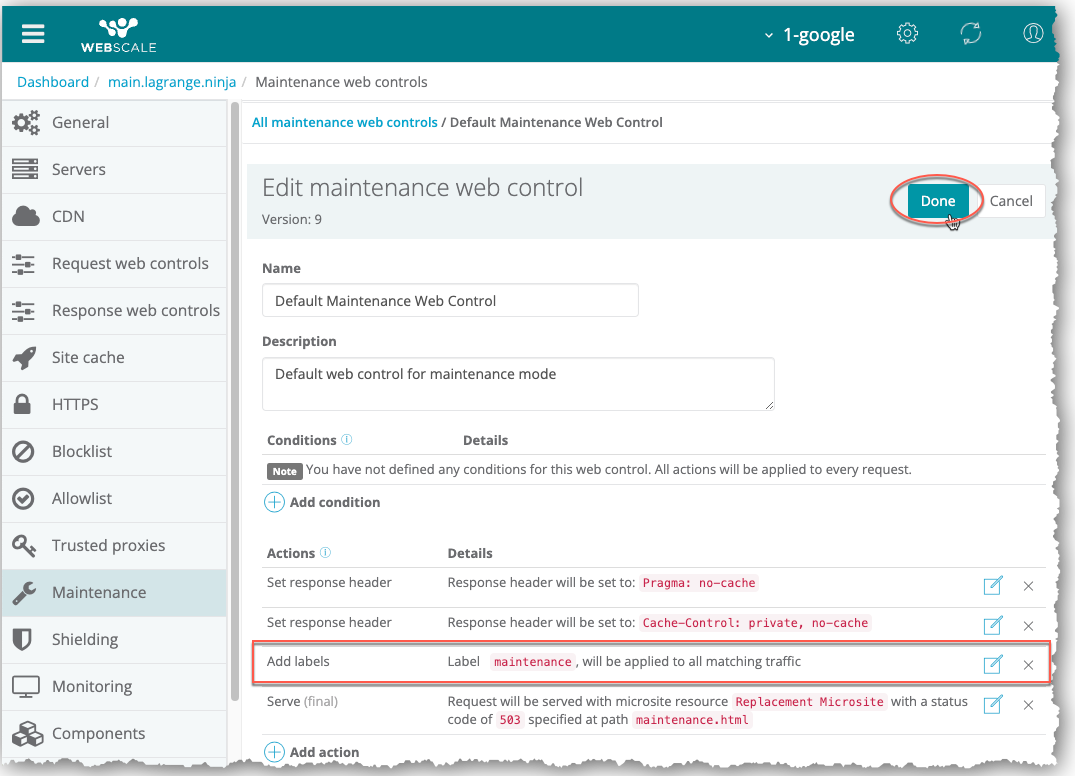
In the sections for configuring maintenance Web Controls that display under the Edit maintenance web control heading, optionally, replace the name and description of the maintenance Web Control.
-
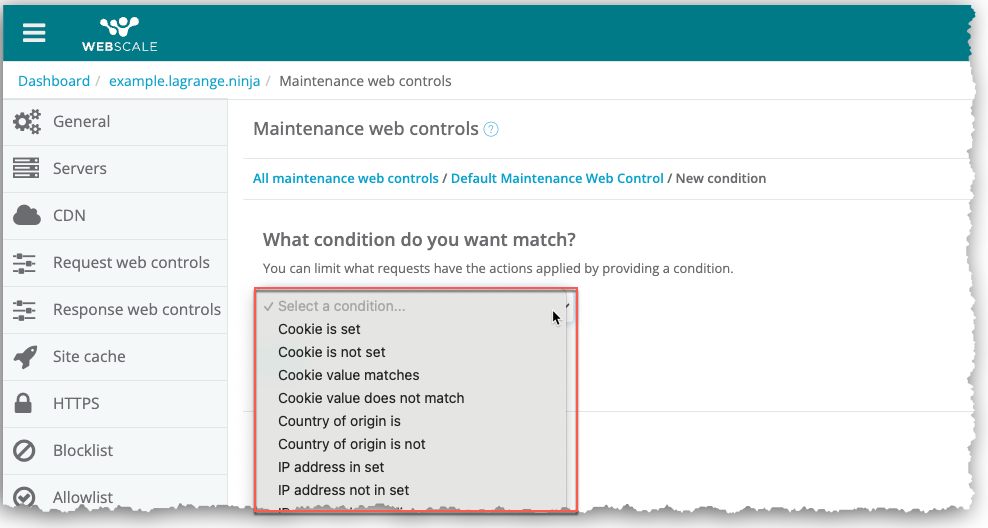
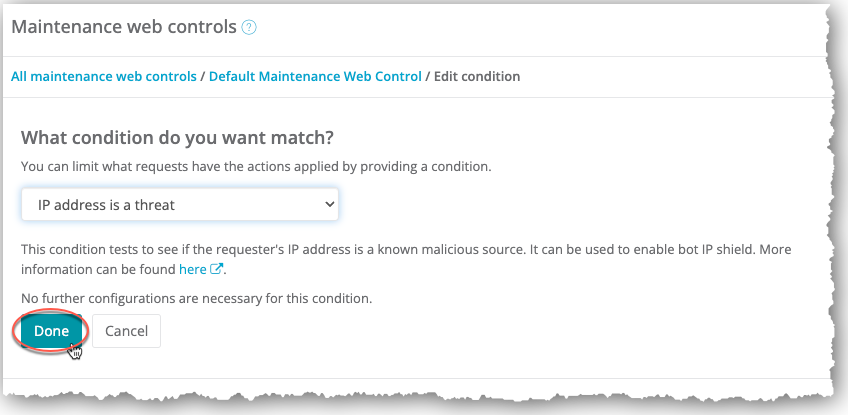
To add a condition: a. Select click Add a condition. b. In the condition drop-down menu, select a condition. The settings for the condition display.
c. Configure the condition, using your setting information. d. Click Done.
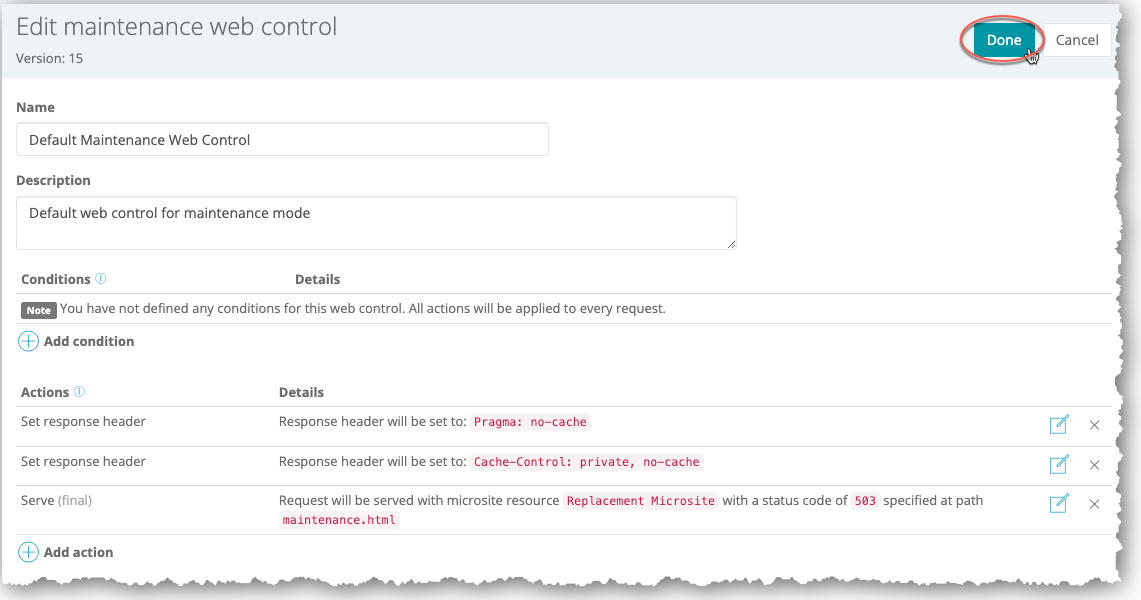
e. Click the Done button that is located to the right of the Edit maintenance web control heading.
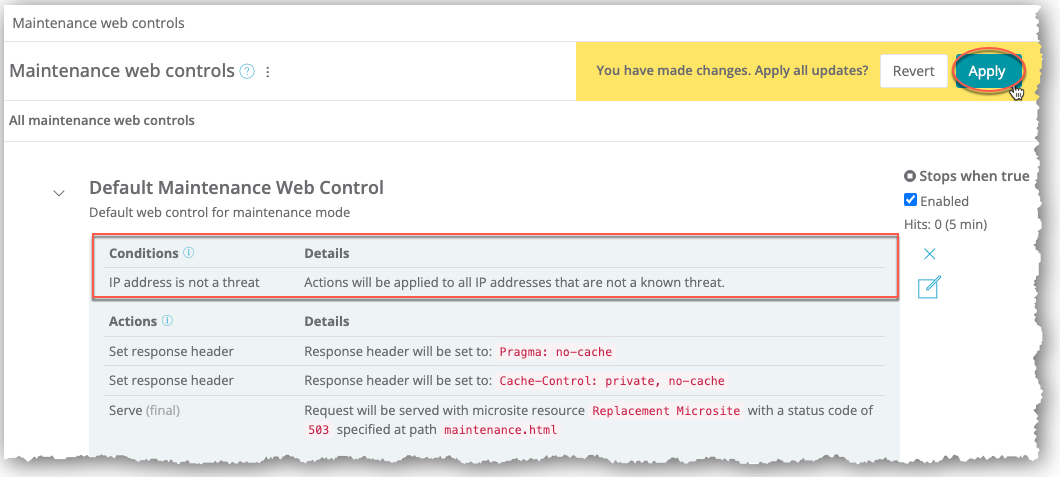
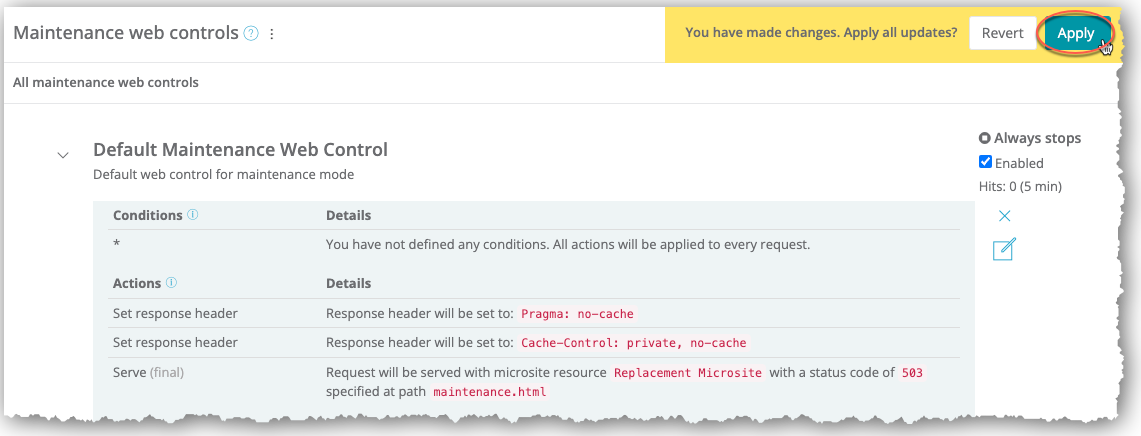
f. Click Apply.
-
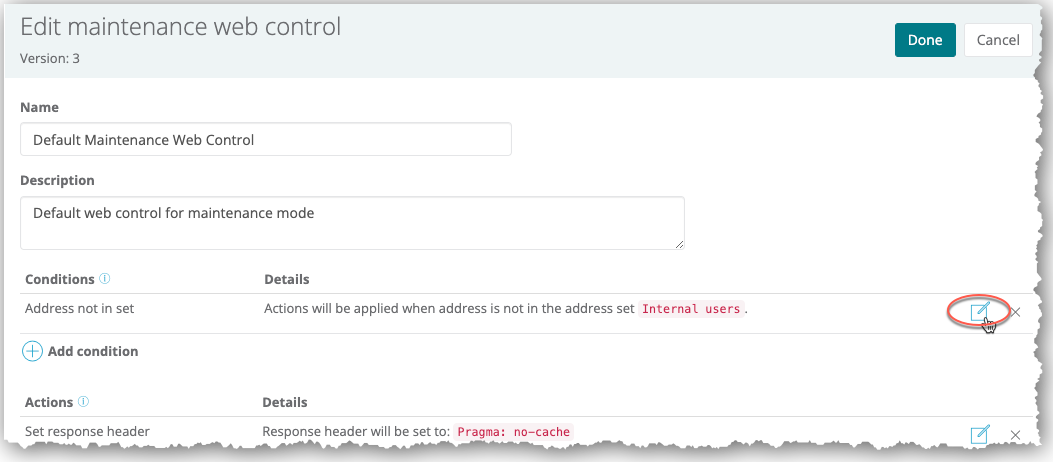
To edit a condition: a. Click the Edit icon for the condition.
b. Modify the setting. c. Click Done.
d. Click the Done button that is located to the right of the Edit maintenance web control heading.
e. Click Apply.
-
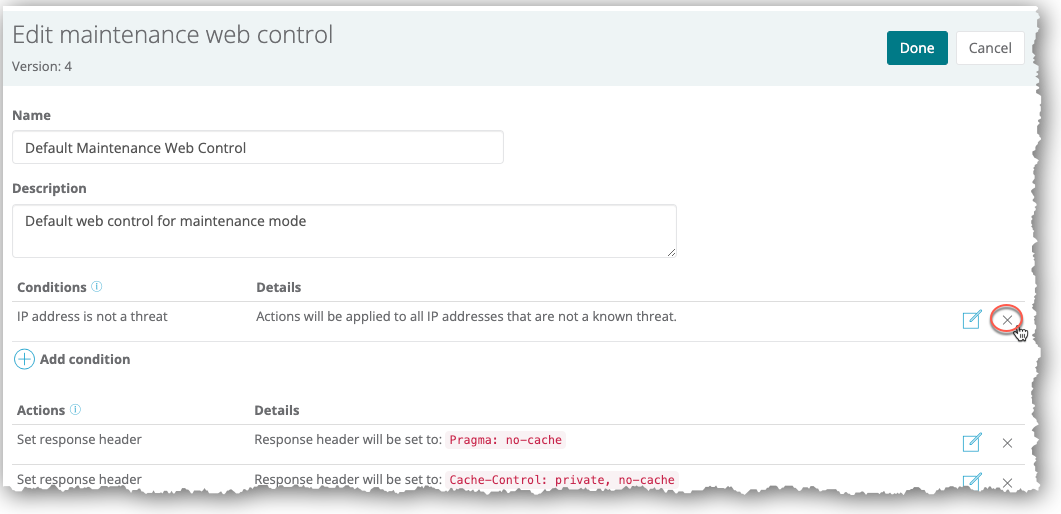
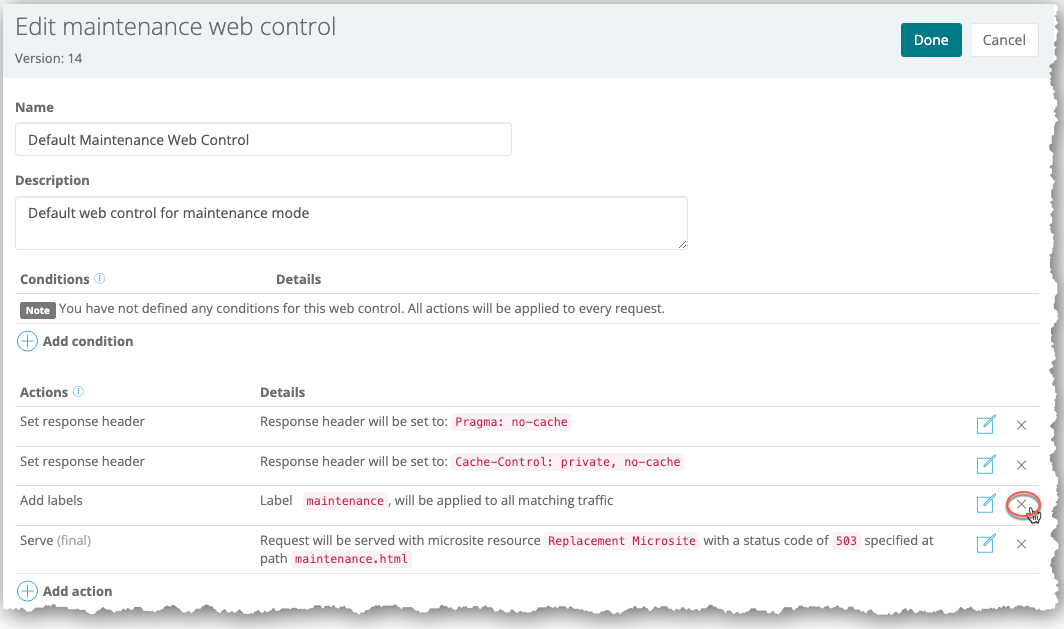
To delete a condition: a. Click the X icon for the condition. The condition entry no longer displays.
b. Click the Done button that is located to the right of the Edit maintenance web control heading.
c. Click Apply.
-
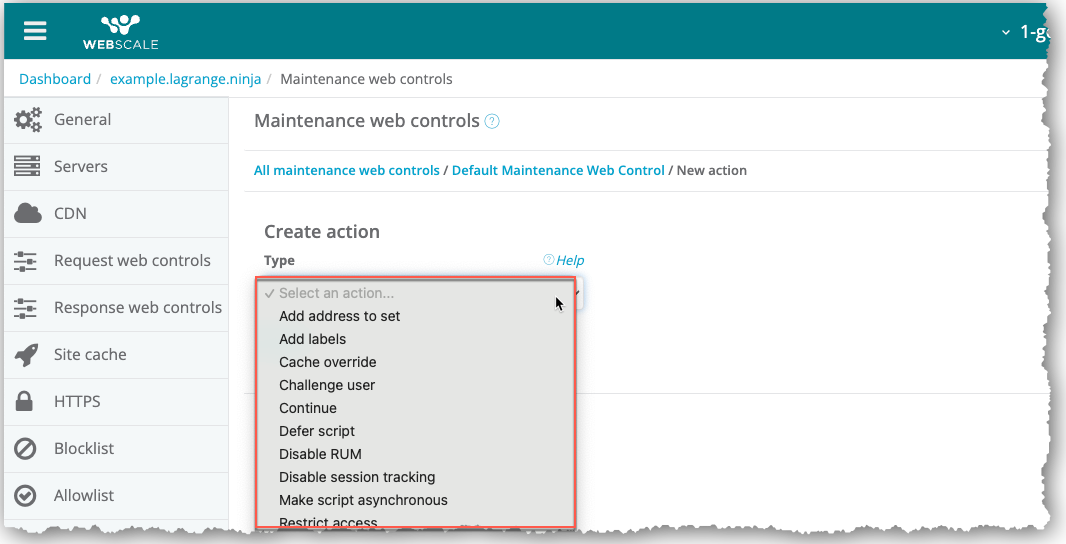
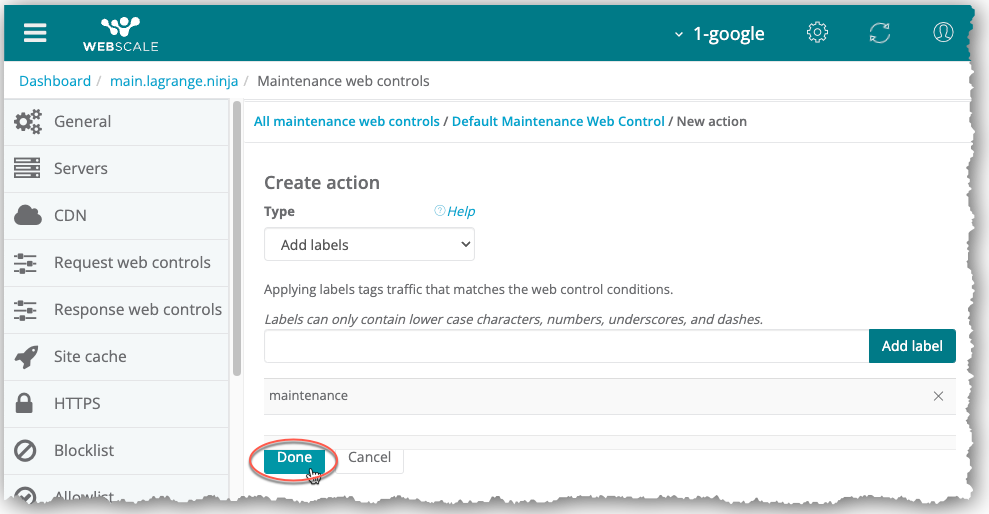
To add an action: a. Click Add action. b. In the Type drop-down menu, select an action. The settings for the action display.
c. Configure the action, using your setting information. d. Click Done.
e. Click the Done button that is located to the right of the Edit maintenance web control heading.
f. Click Apply.
-
To edit an action: a. Click the Edit icon for the action.
b. Modify the setting. c. Click Done.
d. Click the Done button that is located to the right of the Edit maintenance web control heading.
e. Click Apply.
-
To delete an action: a. Click the X icon for the action. The action entry no longer displays.
b. Click the Done button that is located to the right of the Edit maintenance web control heading.
c. Click Apply.
-
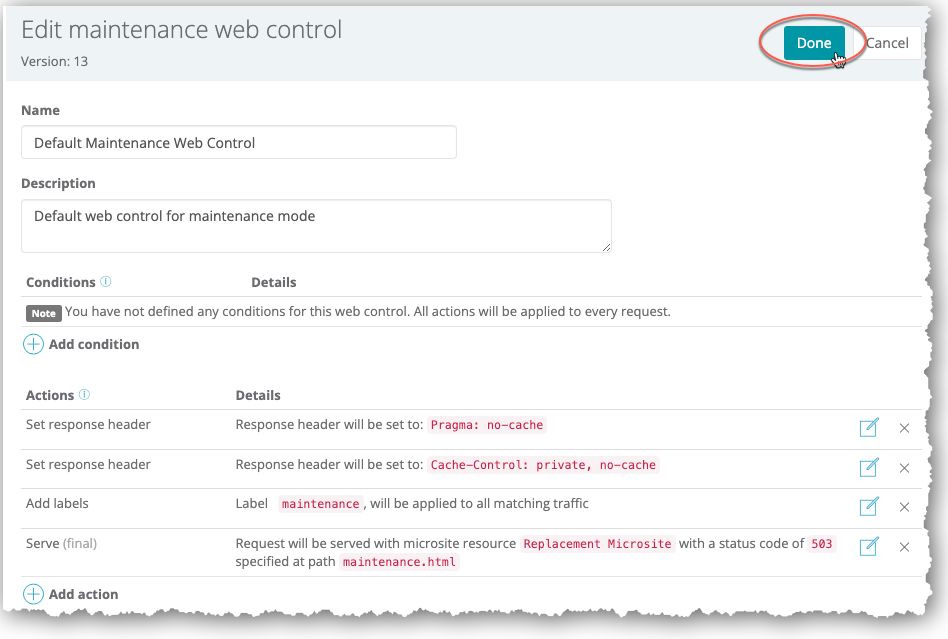
When you have finished editing the maintenance Web Control, click the Done button that is located to the right of the Edit maintenance web control heading.
-
Select the Enabled checkbox to enable the maintenance Web Control if it is not already enabled.
-
Click Apply.

Tip:
To replace the maintenance mode page:
- For the maintenance Web Control that serves the maintenance mode page, click the Edit icon.
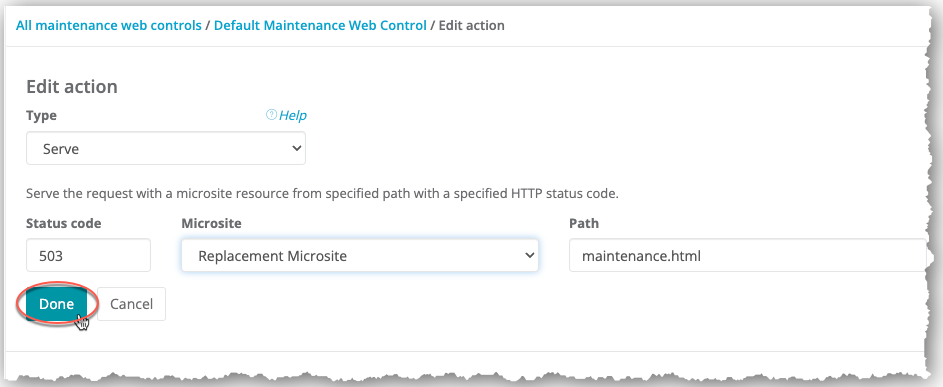
- Click the Edit icon for the Serve action.
- Select a different microsite file and path.
- If the path to the maintenance mode page is different, select the correct path.
- Click Done.
- When you have finished editing the maintenance Web Control, finalize and apply the changes.
Add maintenance Web Controls
You might want to create a maintenance Web Control to configure a series of conditions and actions to occur in addition to preventing site usage and displaying the maintenance mode page.
For instance, a new maintenance Web Control condition could provide site access for specific internal users.
To add a maintenance Web Control
- In the Maintenance web controls page, click Add a maintenance control.
- Enter a name for the maintenance Web Control.
- Optionally, enter a description.
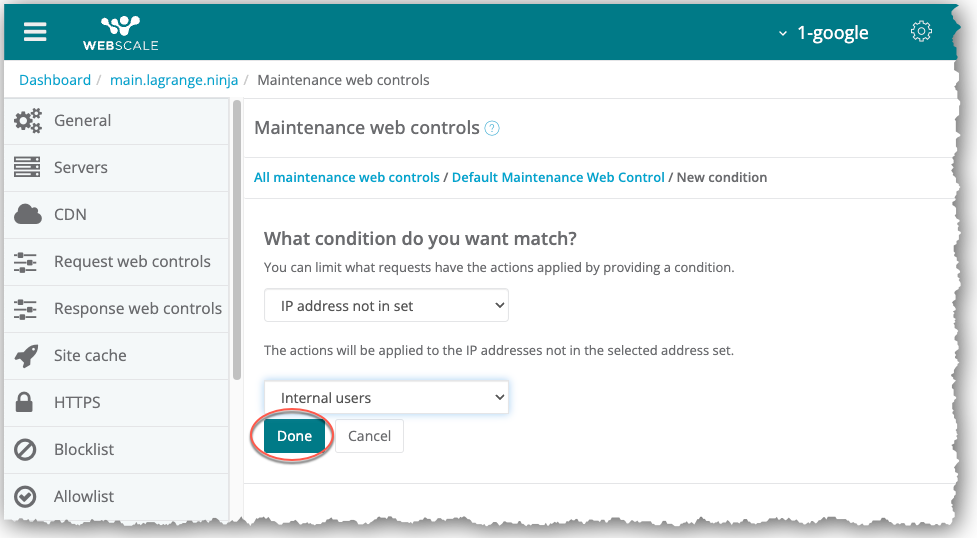
- To add a condition: a. Click Add a condition. b. In the condition drop-down menu, select a condition. The settings for the condition display. c. Configure the condition, using your setting information. d. Click Done.
- To add an action: a. Click Add action. b. In the Type drop-down menu, select an action. The settings for the action display. c. Configure the action, using your setting information. d. Click Done.
- When you have finished configuring the maintenance Web Control, click the Done button that is located to the right of the Edit maintenance web control heading.
- Select the Enabled checkbox.
- Click Apply.
Tip:
To add a maintenance Web Control to enable internal users to access your site during maintenance mode:
- Through the Create address set dialog box, create an address set with the IP addresses of the internal users. For more information on how to add an address set, see Create address sets in Working with Address Sets.
- When creating the maintenance Web Control, add an IP address not in set condition and select the address set that you have created. The serve action (and other actions) will only execute for the site user if their IP address is not in the set.
Delete maintenance Web Controls
If you delete all maintenance Web Controls, Webscale will use the maintenance.html file for the microsite file that is selected on the Maintenance web controls page. Or, if there is no maintenance.html file, it will use the index.html file.
To delete a maintenance Web Control
- In the Maintenance web controls page, click the icon for the maintenance Web Control to delete.
- Click the X icon for the maintenance Web Control.
- In the confirmation box, click Ok.
- Click Apply. The maintenance Web Control no longer displays.
Further reading
- Working with Files
- Working with Microsites
- Protecting Your Site with a Captcha
- Web Controls
- Creating Web Controls
- Managing Web Controls
Have questions not answered here? Please Contact Support to get more help.
Feedback
Was this page helpful?
Glad to hear it! Have any more feedback? Please share it here.
Sorry to hear that. Have any more feedback? Please share it here.