Enabling Bot IP Shield
Bot IP Shield is an add-on feature from Webscale that allows you to protect your application from known attack sources. Webscale has partnered with Webroot’s BrightCloud® IP Reputation Service to maintain IP reputation data that is updated every 5 minutes to reflect the latest attack sources.
After enabling this feature, configure shielding for the application that you want to protect. Then, create Web Controls to handle traffic from sources that you consider a threat. For example, you could configure the Web Control to deny requests from a request IP if it is a known threat.
Note
Contact support for assistance when enabling this feature.Set up Bot IP Shield
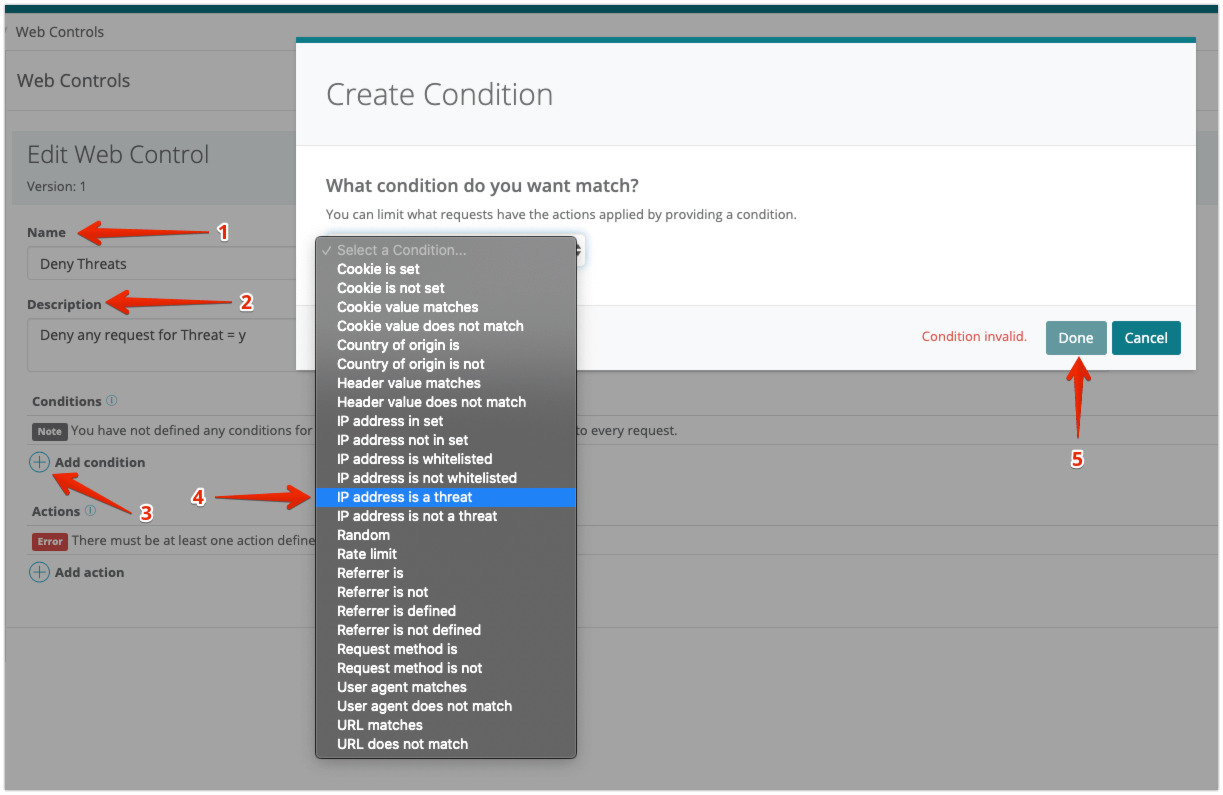
To add the Web Control
|
|
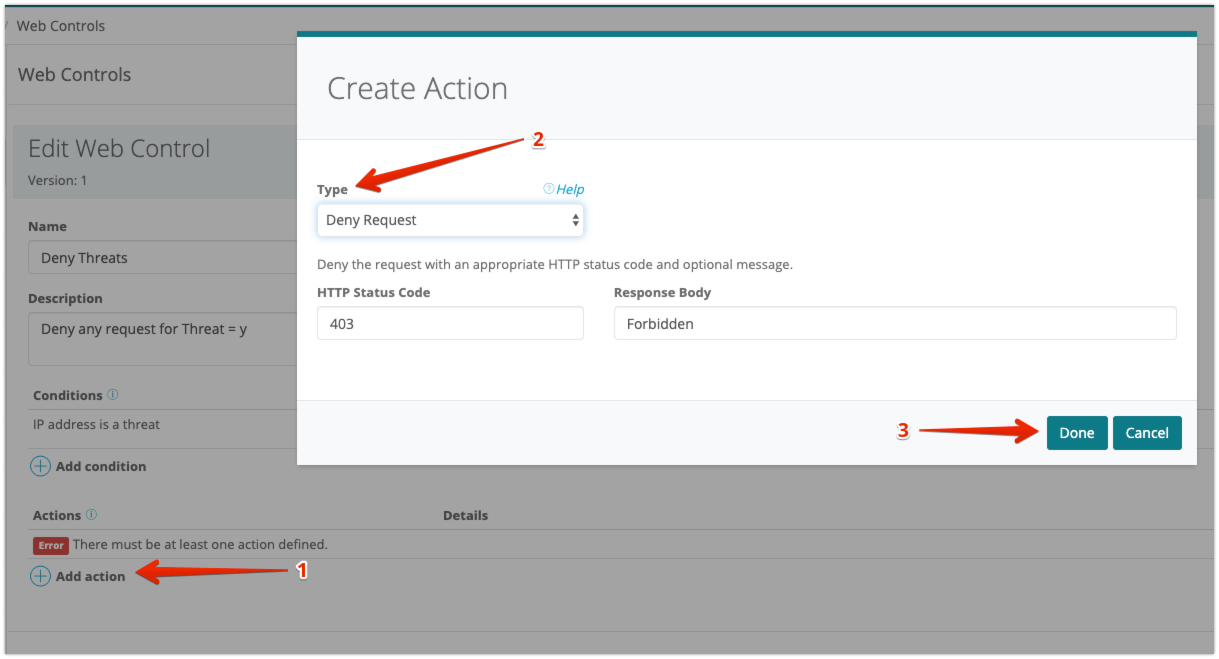
To configure the Web Control action
|
|
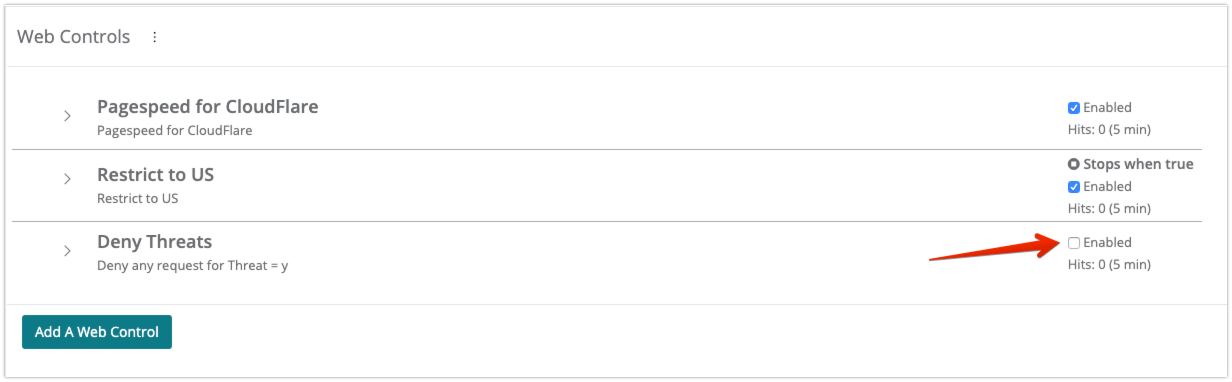
To enable the Web Control
Webscale will now deny any request from an IP flagged as a threat. |
|
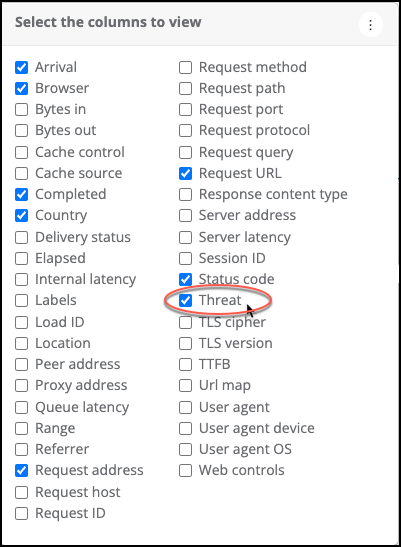
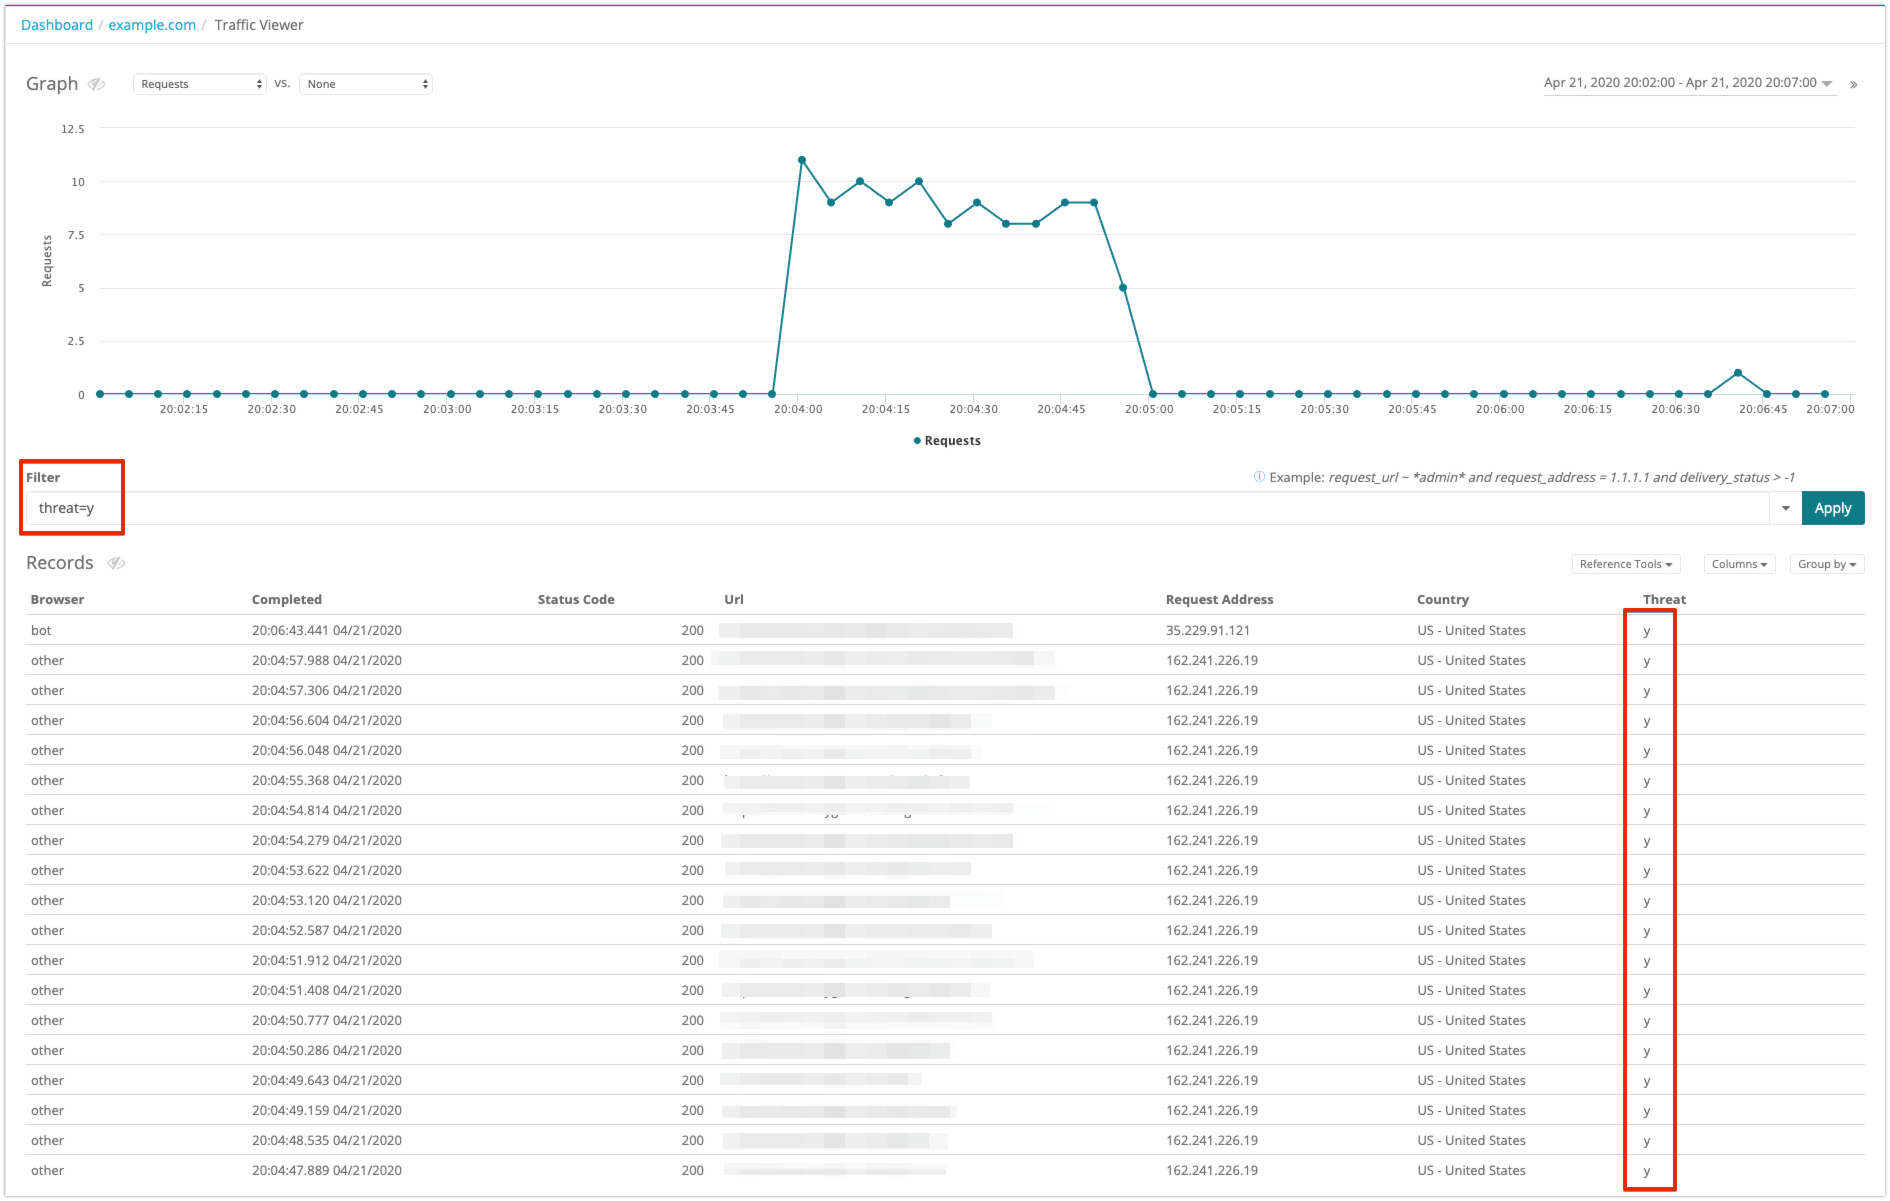
| You can configure Traffic Viewer to view threat requests from Traffic Viewer. For information on how to access Traffic Viewer for your application, see To access Traffic Viewer. To add the threat column
You can now see the Threat label in the traffic data. |
|
| You can filter traffic results to only display requests labeled as a threat. To filter traffic for only requests tagged as a threat
The records view of the query results only displays logs that match the filter criteria. |
Further reading
- Introducing Application Shielding
- Configuring Application Shielding
- How to Create Web Controls
- Using Traffic Viewer
- Building Filters in Traffic Viewer
Have questions not answered here? Please Contact Support to get more help.
Feedback
Was this page helpful?
Glad to hear it! Have any more feedback? Please share it here.
Sorry to hear that. Have any more feedback? Please share it here.