How to Create Roles and Invite Users
After completing the Webscale onboarding process, you will have your own Webscale account. Access to this account is controlled via roles. By default, your new account includes a few important roles to help you get started: Editor and Reader. In general, editors will have access to view, create, modify and destroy resources in the account while readers will only be able to view those resources. A user’s access in the account is determined by the roles to which they have accepted invitations. This guide details how to create your own custom roles and how to invite users to them.
Roles can be used in two separate use cases:
- Webscale Secure Access: an optional web control action used to protect parts of your applications from the general internet.
- Webscale API role-based access: a user’s access to the Webscale API is determined by the access described by the roles to which they have accepted invitations.
Create a role
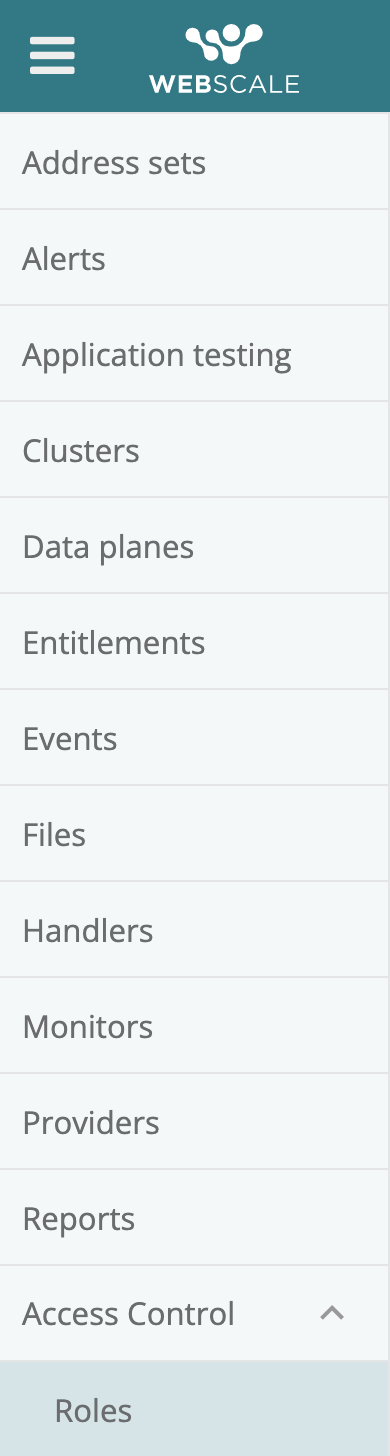
| 1. Login to the Webscale Control Panel and click the three bars in the upper left. Select Roles from the menu. |
|
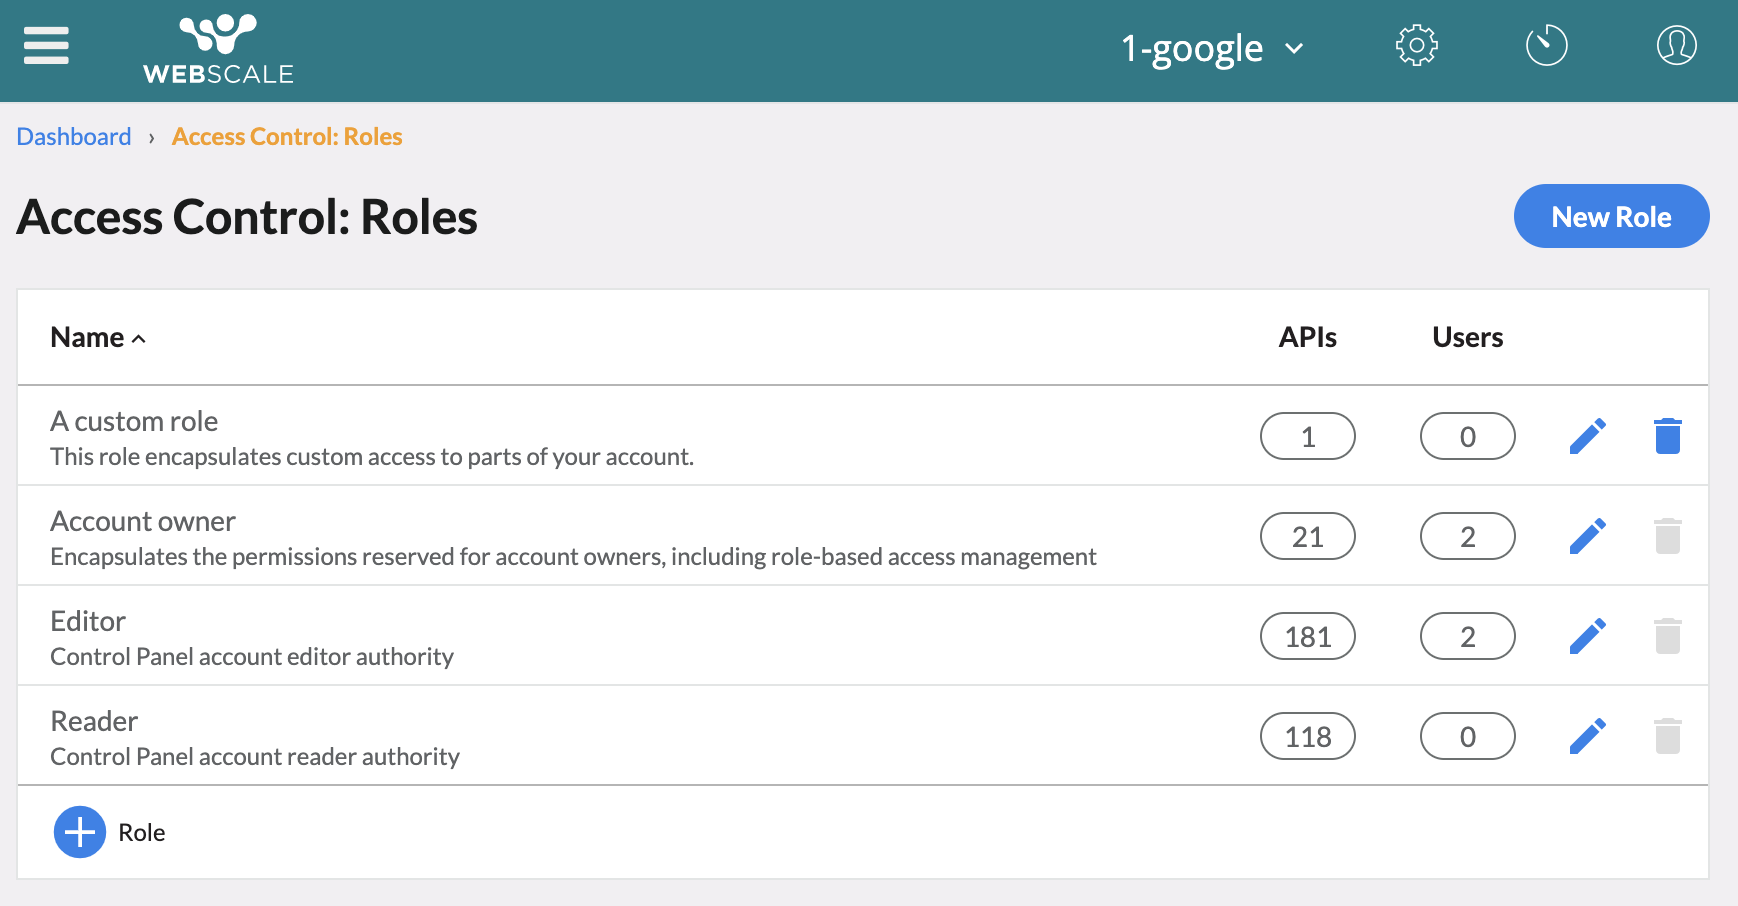
2. Here you view existing roles on the Roles page in the Control Panel.
Note:Predefined roles such as Editor and Reader cannot be deleted. |
|
| 3. For Webscale API role-based access roles, clicking APIs lists the Webscale API access this role provides. | |
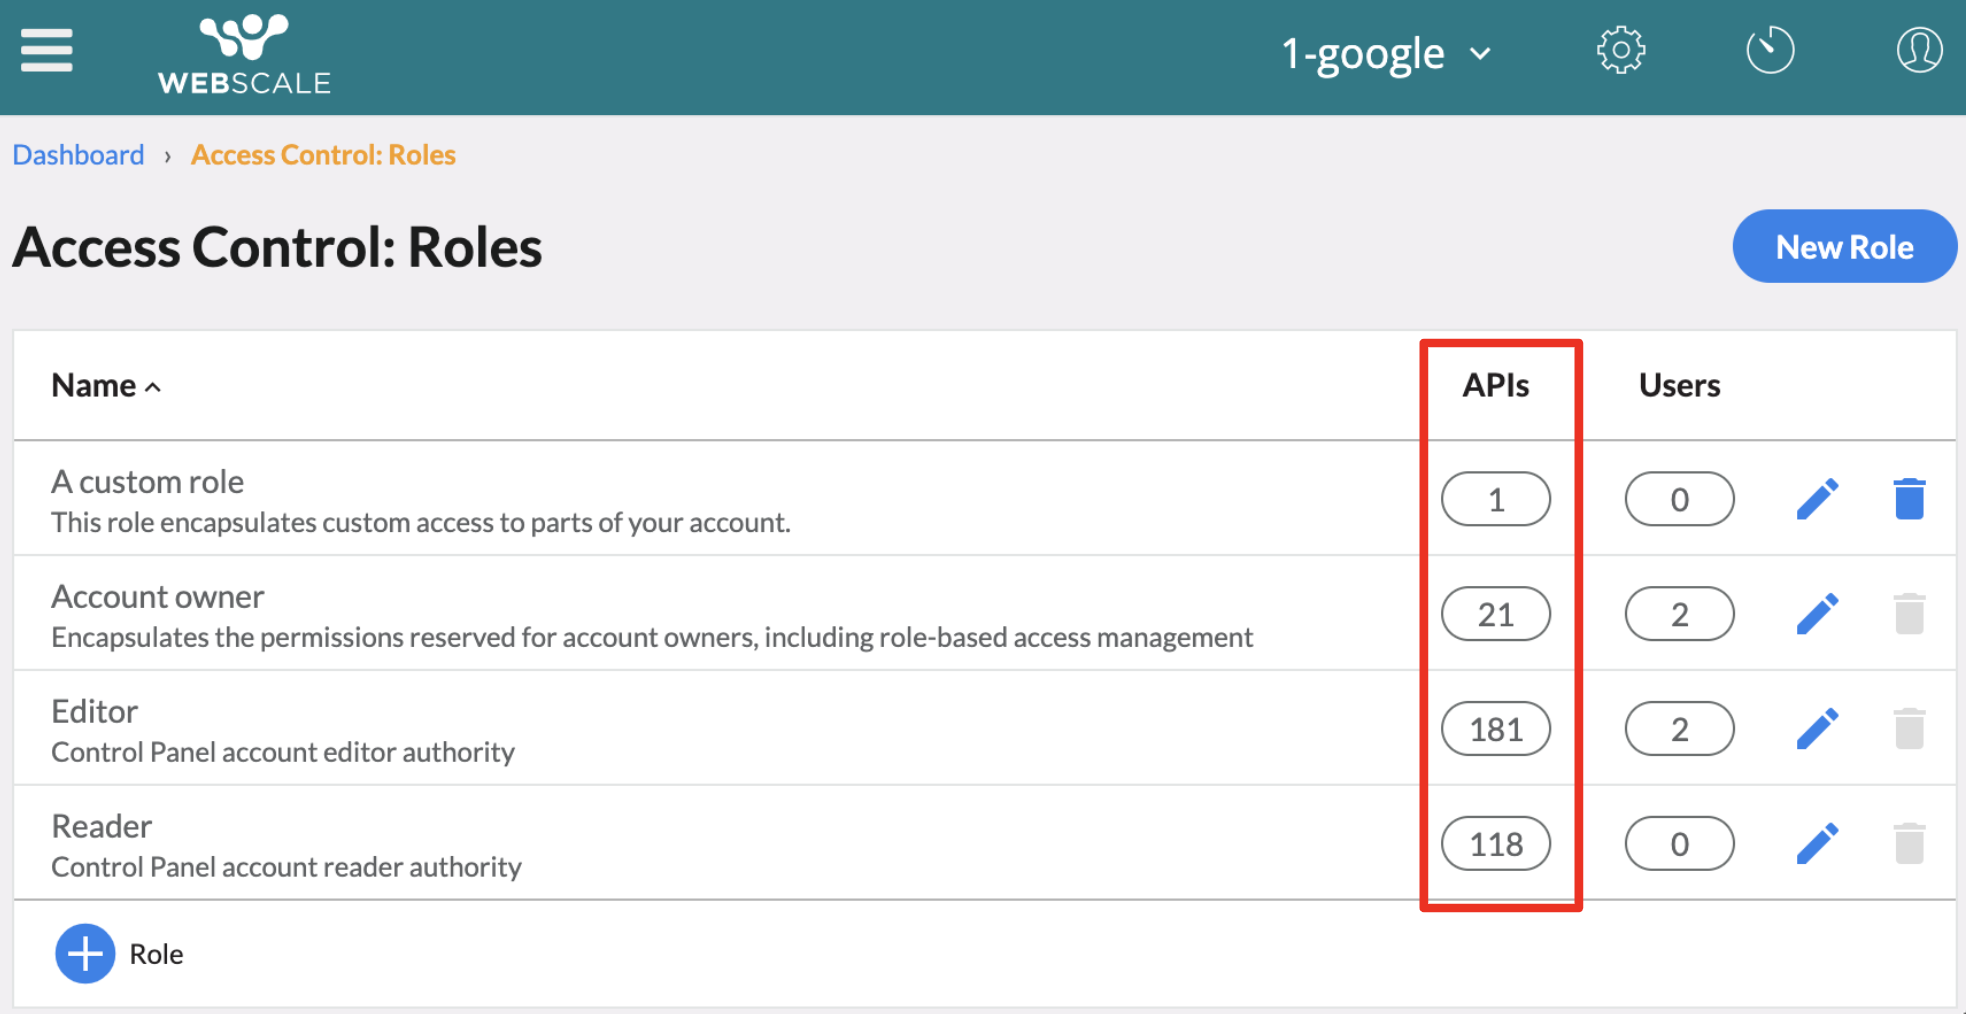
| 4. Clicking Users lists the users that have been invited to assume the role and whether they have accepted, declined or vacated that invitation. | |
| 5. Click Role in the lower left part of the page to create a new role. In the wizard that appears, you’ll be walked through the steps to configure the role. | |
| 6. Roles are fully customizable. It is recommended you set an informative name and description to ease the management of multiple roles. | |
7. Webscale API roles roles can be configured to apply their access to the account in which the role is created or in the sub-accounts of that account, excluding the account itself.
Note:If your account does not have sub-accounts, select ‘Current account’. |
|
| 8. You have control over prerequisites a user must satisfy in order to assume a role to which they have accepted an invitation. These prerequisites are satisfied when the user authenticates with Webscale and include whether multi-factor authentication is required and how often they are required to re-authenticate. | |
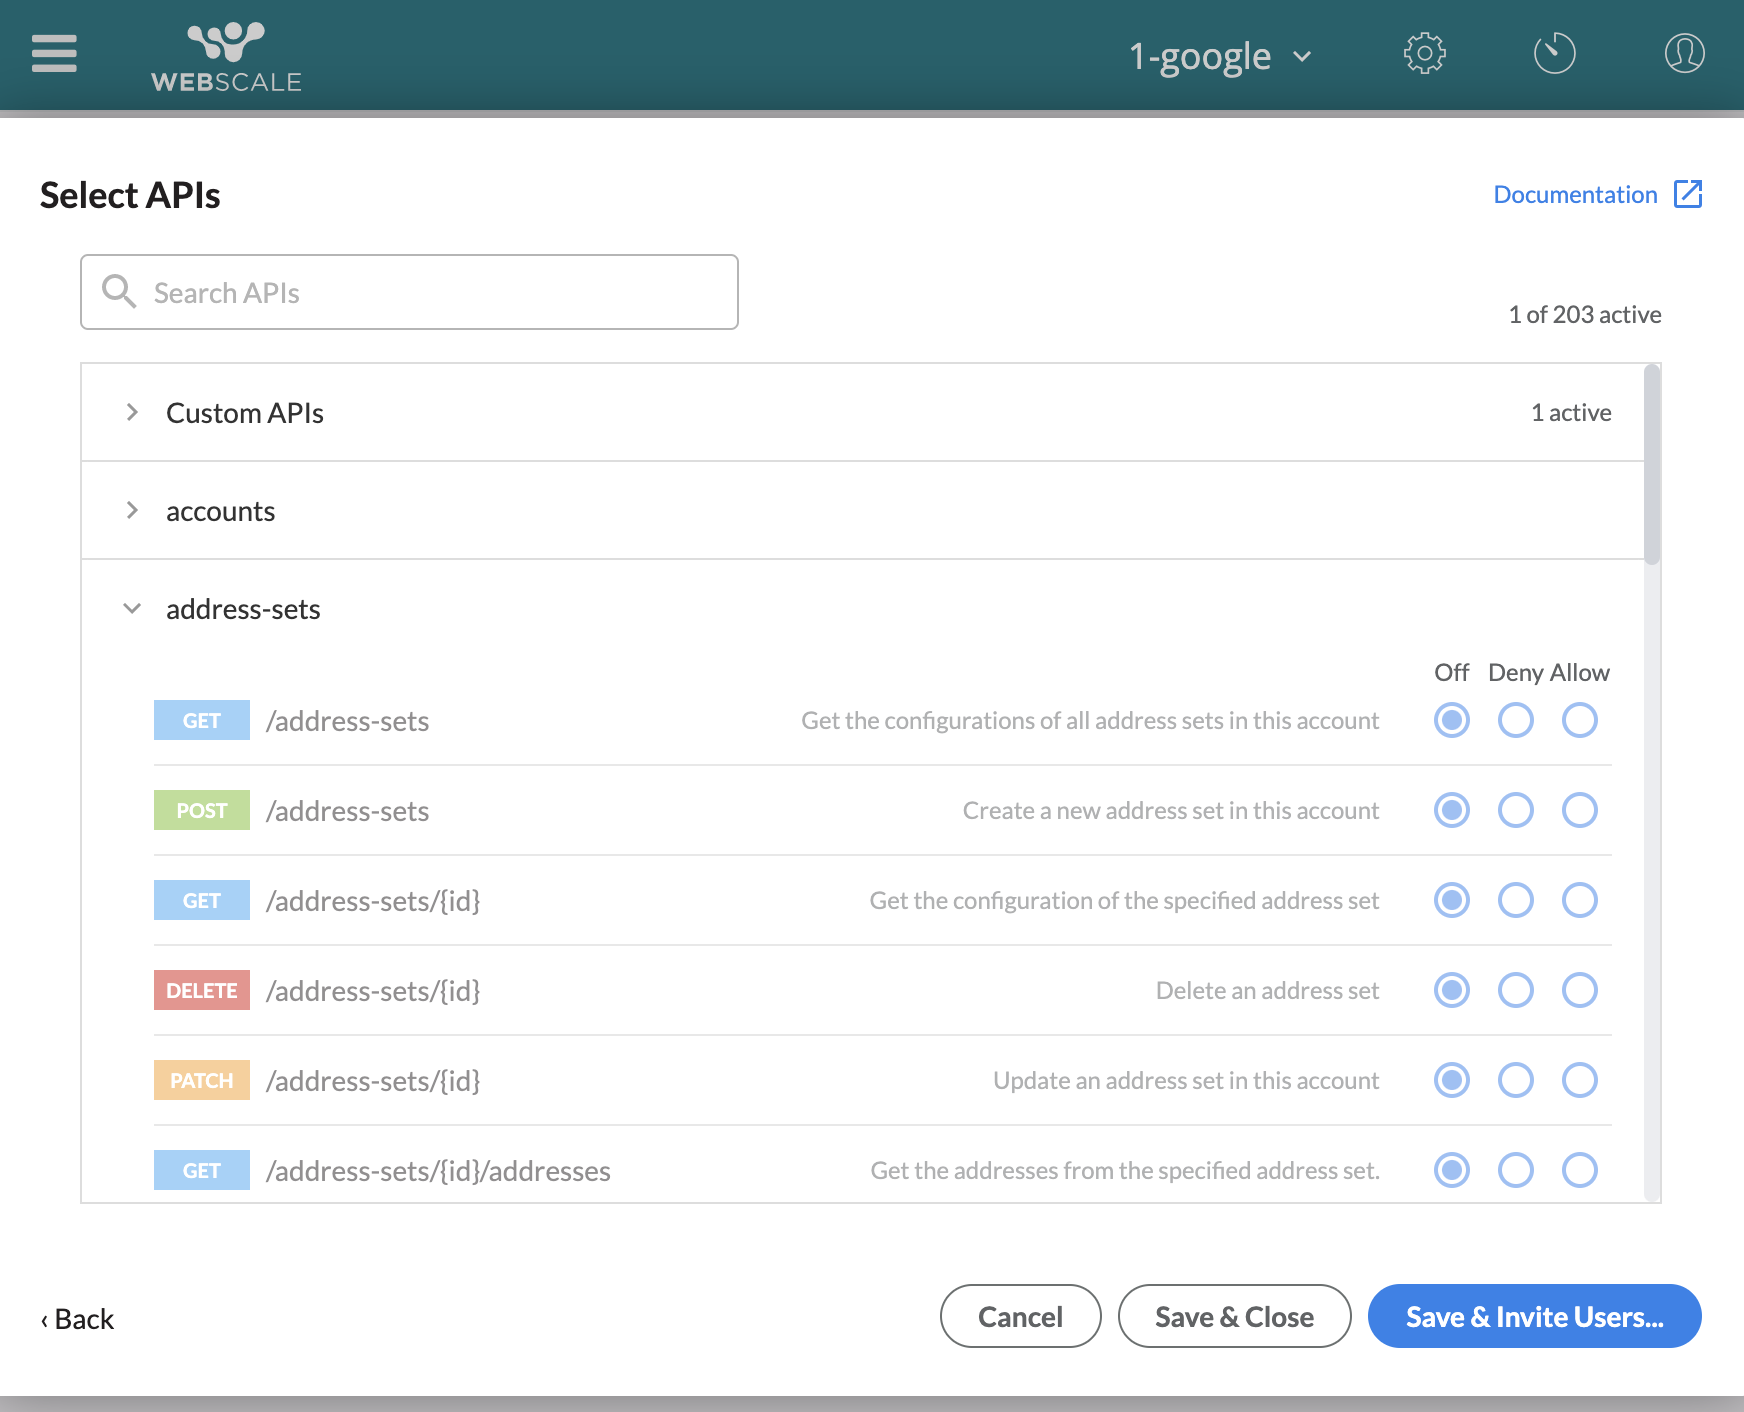
9. Webscale API roles roles are configured with the Webscale API access they permit and deny. The wizard allows you to target entire collections of resources (e.g. /accounts) or collections of sub-resources (e.g. /accounts/{id}/invitations).
Note:Additionally, you can target specific resources using the Custom APIs input. Once you’ve chosen the HTTP method, API and access, click the + button to add the custom API to the role configuration. API wildcards are available to you to help make specifying an API easy: for example,/accounts/* will match any specific account but none of its sub-resources whereas /accounts/** will match any specific account resource and all of its sub-resources.
|
|
10. Lastly, invite users to the role. Confirm the changes you’ve made, then click Save to save the changes. This action creates the role, and sends invitations to any users invited to the role.
Note:If the user invited does not exist, this action will send an email to the user with a link to sign up. Once they complete sign-up (create a password) and log in, they will be taken to the User Profile and can accept the role. |

Invite a user to an existing role
| 1. Login to the Webscale control panel and click the three bars in the upper left. Select Roles from the menu. |
|
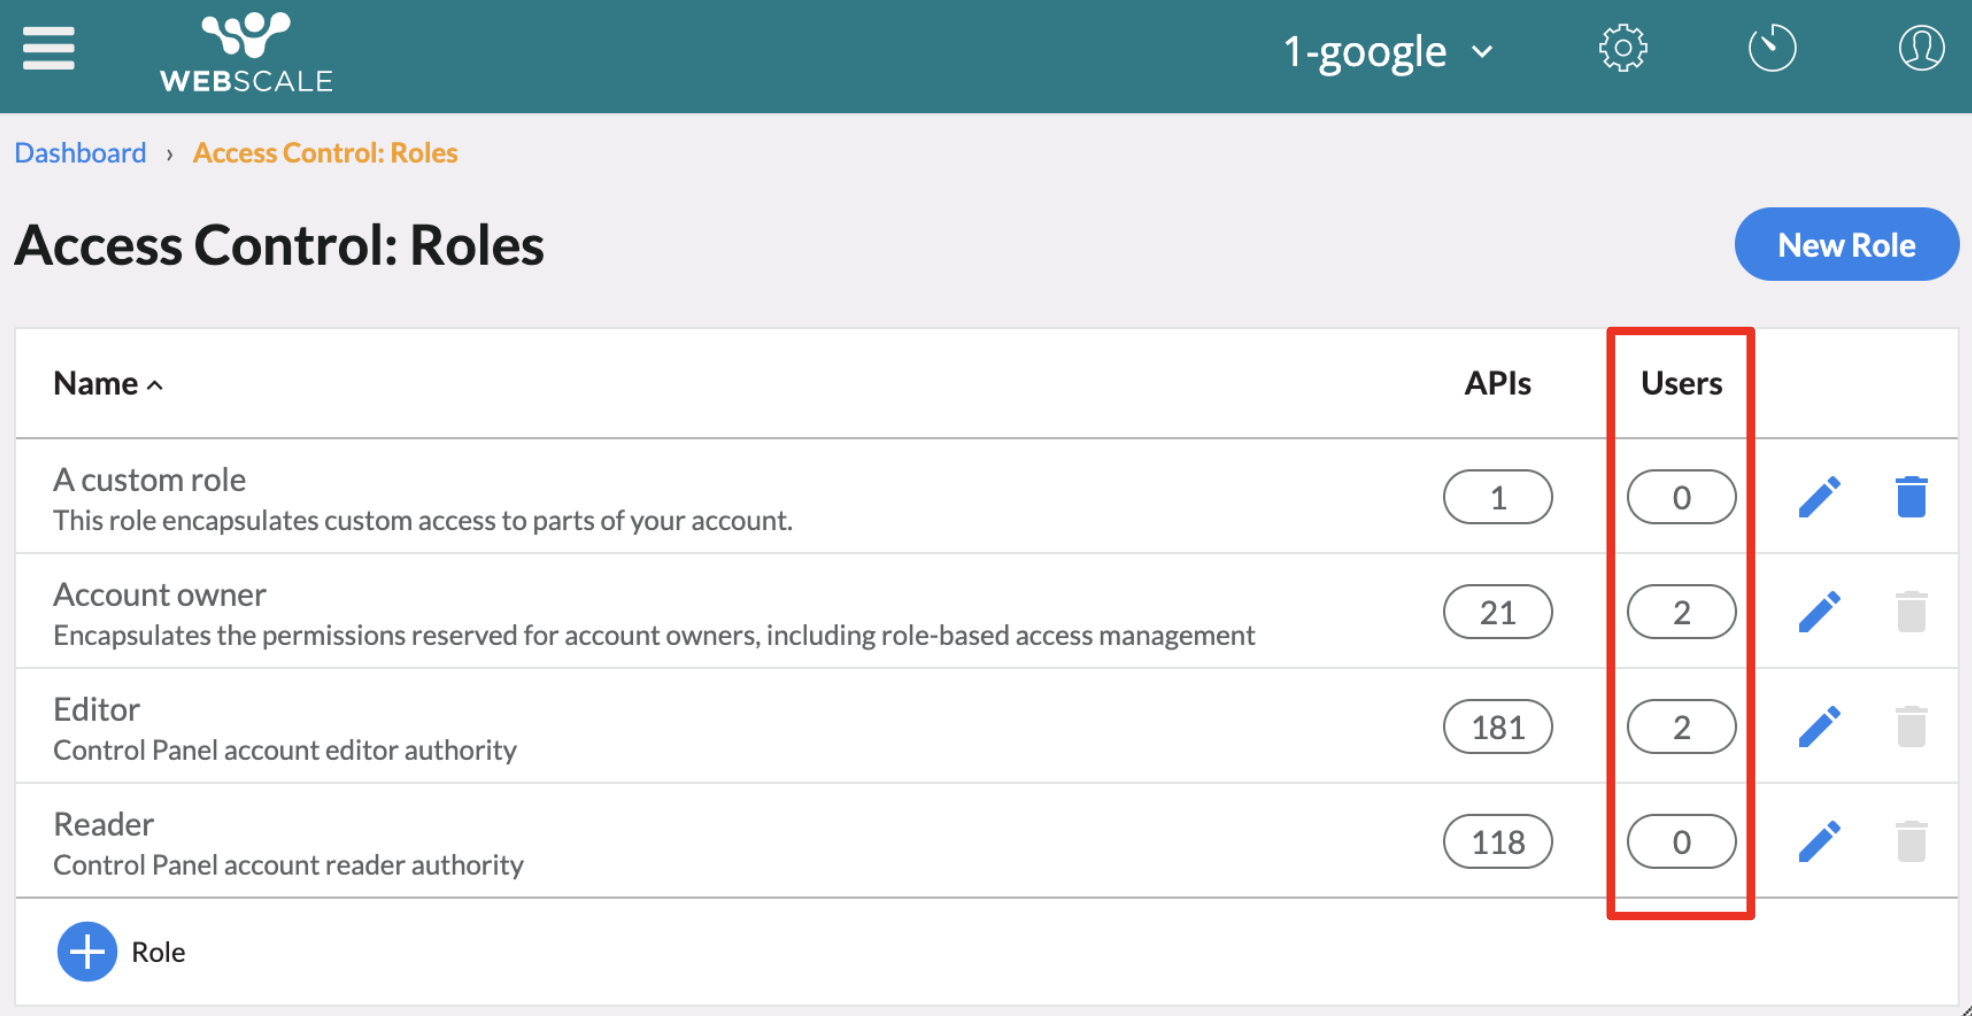
| 2. On this page you see existing roles. To invite a user to the role, click the ‘Users’ button for the role, then click the pencil in the upper right of the expanded panel. | |
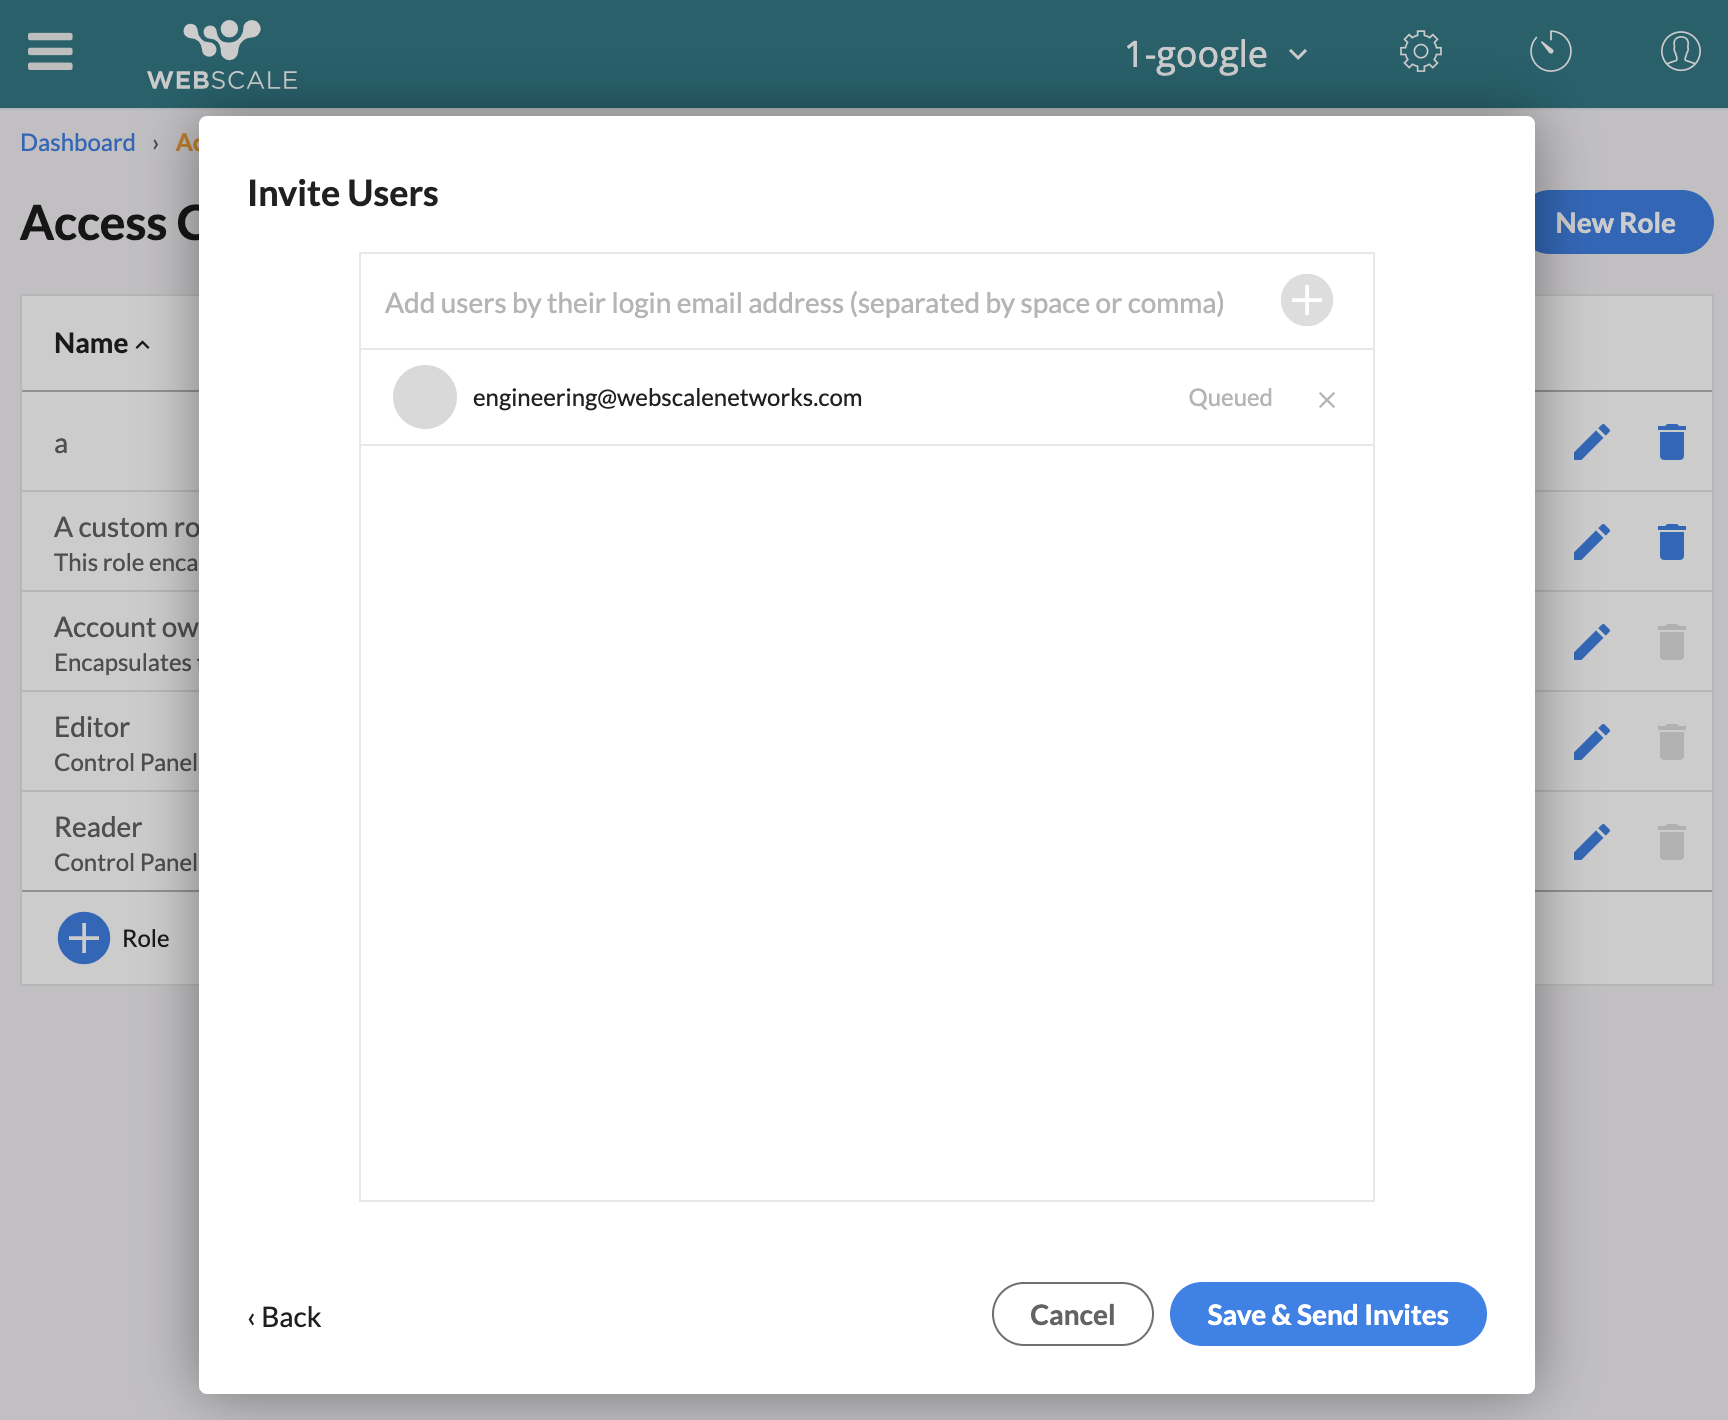
| 3. Enter the user’s email address, and click the + button. A comma-separated list of email addresses can be inputted at a single time. This will send invitations to all the added email addresses. | |
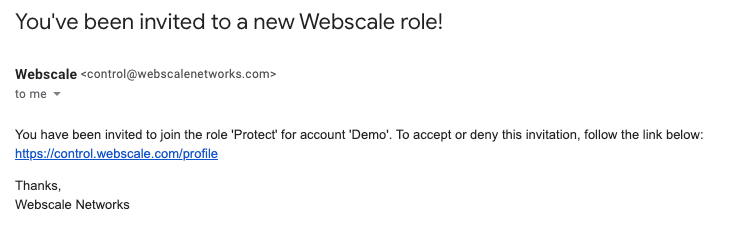
4. The user receives an email from Webscale with a link to the User Profile, where they can accept the role.
Note:If the user invited does not exist, this action will send an email to the user with a link to sign up. Once they complete sign-up (create a password) and log in, they will be taken to the User Profile and can accept the role. |
|
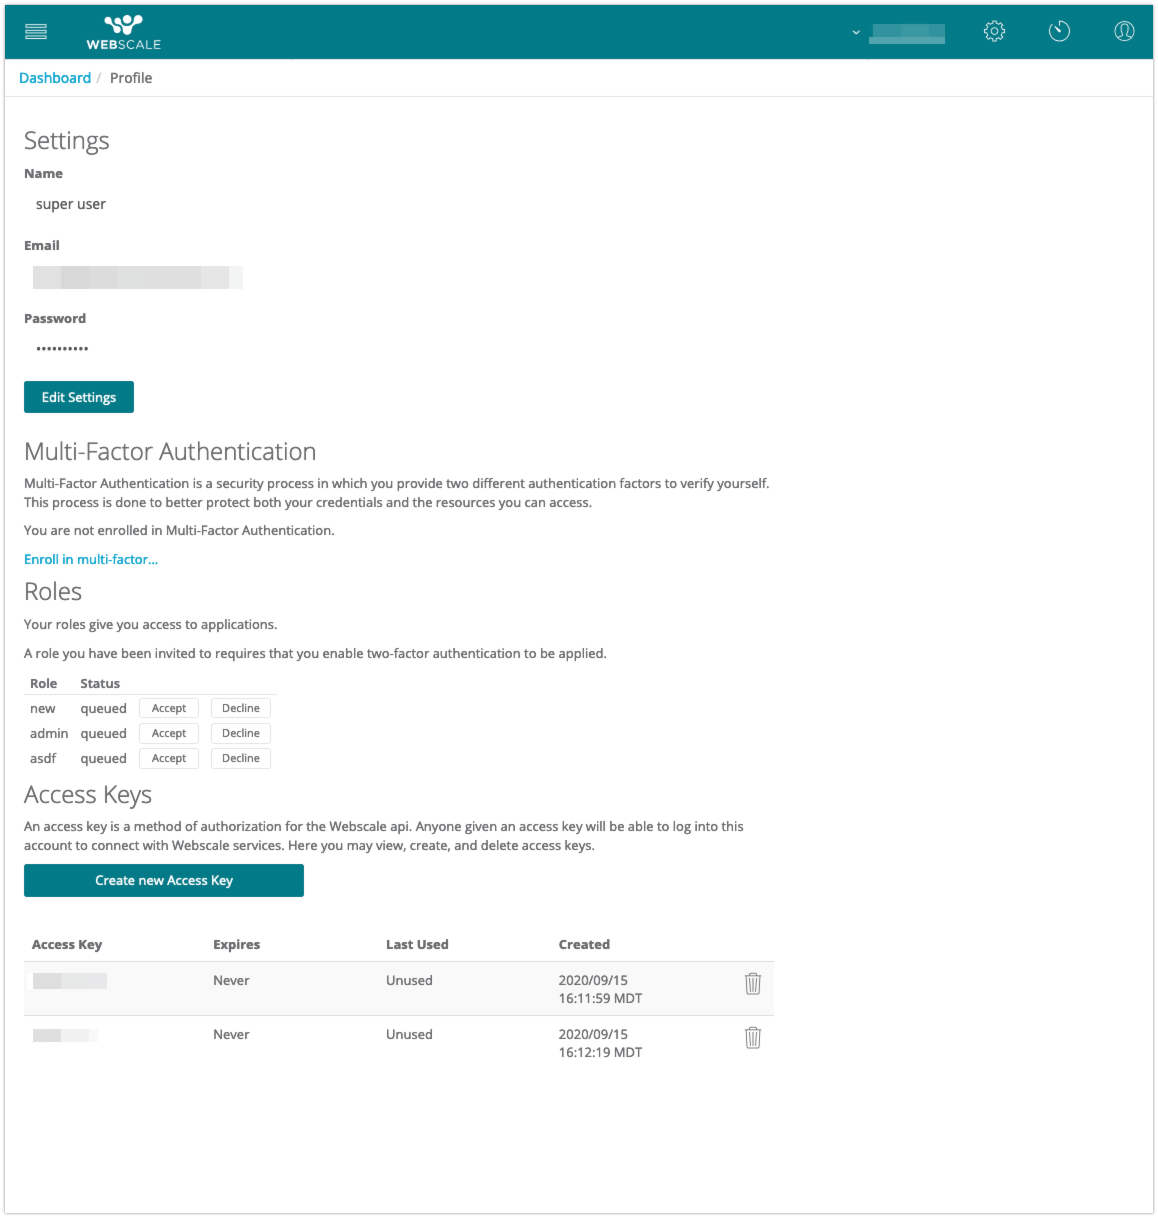
5. In the User Profile the user can manage their password and their multi-factor authentication settings. The user will also see some information about their user account, such as:
Warning:Users can leave a role. In such an event, they must be re-invited to the role if they wish to regain access.Note:If the role the user was invited to does not permit Webscale Control Panel access, the user will only have access to their User Profile. This may be the case if you only want the role to apply to the Webscale Secure Access web control, for example. |
Further reading
- How to Configure Multi-factor Authentication
- Webscale API role-based access
- How to Use Webscale Secure Access
- Web Controls
Have questions not answered here? Please Contact Support to get more help.
Feedback
Was this page helpful?
Glad to hear it! Have any more feedback? Please share it here.
Sorry to hear that. Have any more feedback? Please share it here.