Working with Files
Through the Files page, you can work with files. After you upload files for your account, they are available for all of the account applications.
The CloudEDGE Workers and microsite features both use uploaded files. Information specific to working with handler and microsite files, including previewing files, is located in Working with CloudEDGE Handlers and Workers and Working with Microsites .
CloudEDGE Workers enables you to easily extend your application’s functionality through custom JavaScript without changing your application code. For more information about the CloudEDGE Workers feature, see CloudEDGE Workers Overview .
A microsite is a standalone website that displays for your application.
Topics
- File requirements
- List of files
- Getting started
- Access the Files page
- Upload files
- Work with uploaded files
File requirements
Files must conform to the following requirements with the exception of the maximum file size for handler and microsite files.
- .zip, .tar, or .tar.gz file format
- Maximum file size: 50 MB
- For microsites, links to assets must be relative (pages can also contain links to external websites).
You can also upload WAF rules, bootstrap, and Geodb files for use by legacy functionality. For WAF rules, you can use Web Controls to perform the same functions.
List of files
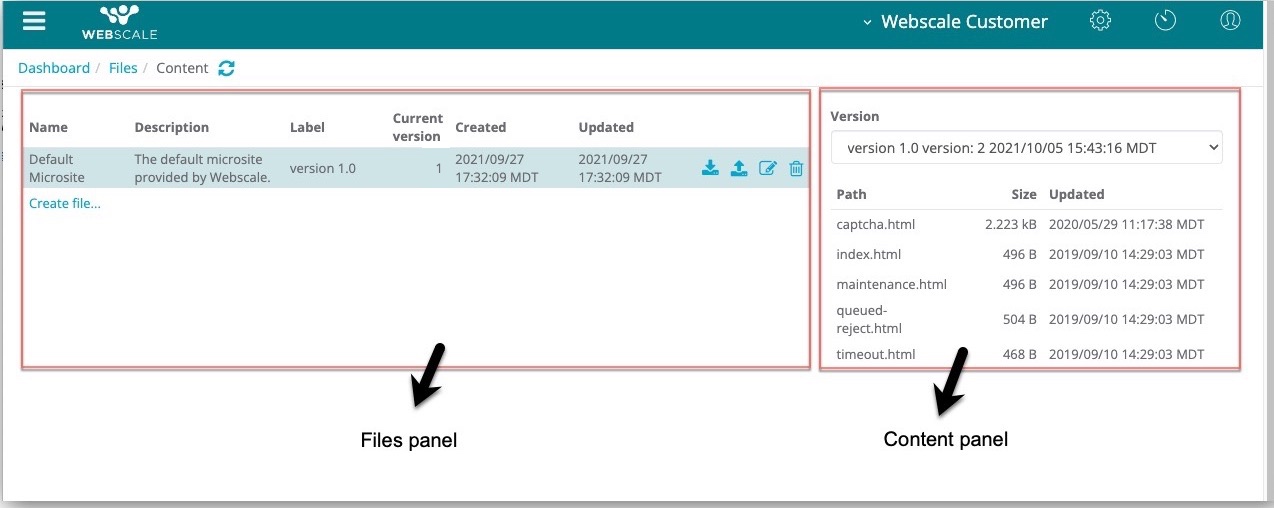
On the Files page, each file lists in the Files panel with the following characteristics.
- Name
- Version
- Creation and updated times
If there is a description and label, they will also display for the file. When you select a file, the file version and contents display in the Content panel. When you select a file in the Content panel, it displays in the Preview panel.
There is a system default file that is named “Default Microsite” unless you change its name. For more information about this file, see Microsites files in Working with Microsites .
Getting started
- On the Webscale Control Panel page, access the Files page.
- If the file does not already display in the list of files, upload it.
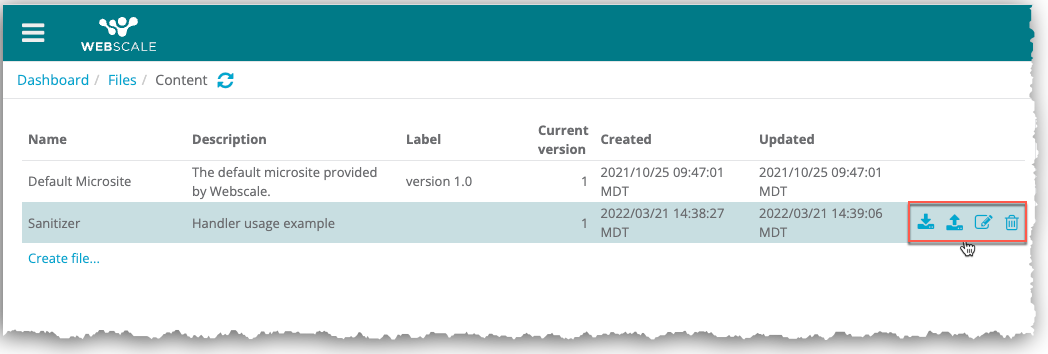
- Select a file in the files panel.
An icon panel that enables you to download, replace, change details, and delete the file displays to the right of the Updated column for the file. - After the above steps, continue with the remaining steps for the relevant operation.
Procedures
The following procedures pertain to all features that involve uploading and working with files. You can use the Files page to perform the following operations.
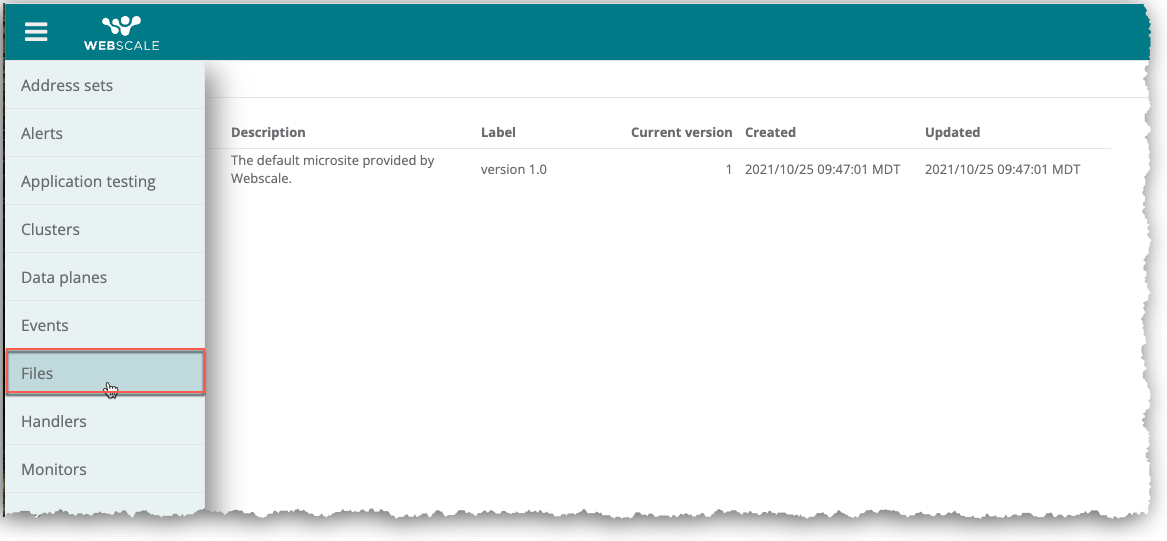
Access the Files page
To access the Files page
On the Webscale Control Panel page, click the menu icon on the upper left of the screen.
On the sidebar menu, select Files.
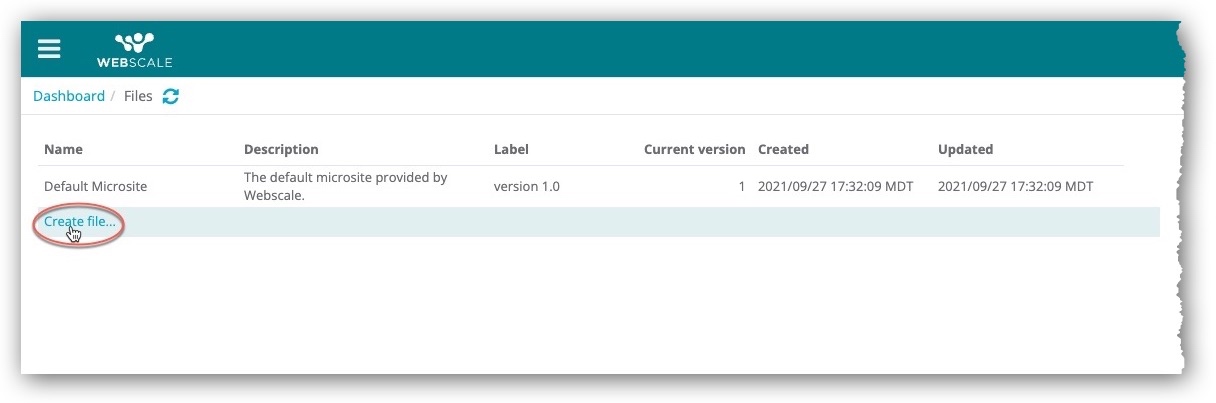
Upload files
To upload a file
On the Webscale Control Panel page, select Files on the sidebar menu.
In the Files page, click Create file.
In the Upload File dialog, click Choose File.
Select a file on your computer and click Open, or drag-and-drop it to the File box.
Optionally, enter a new name and/or label for the file. (The label only applies to this version of the file.)
Select the file type.
Optionally, enter a file description and label.
Click Save.
A new entry displays in the Files page list.
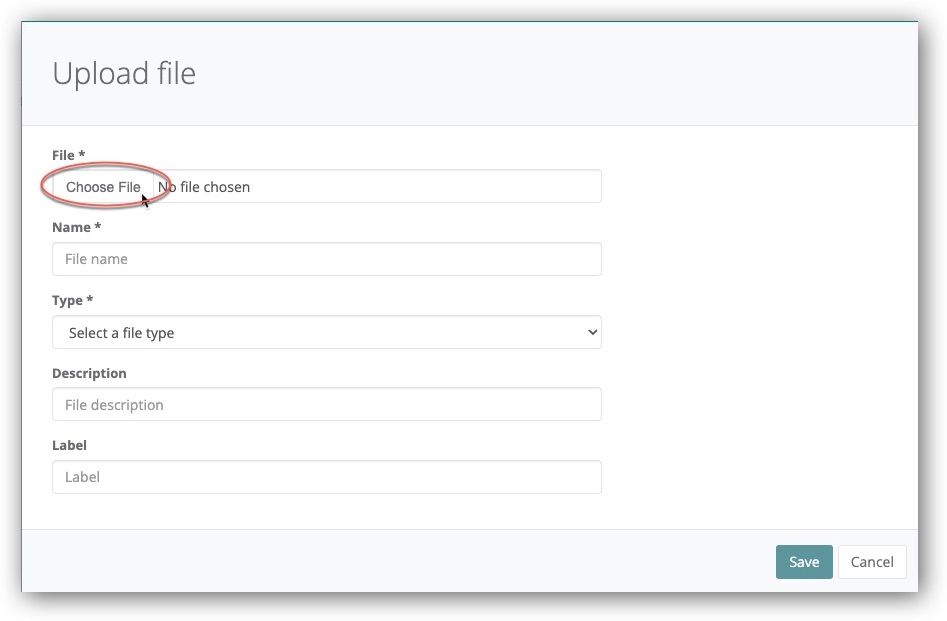
If you cannot save a file, make sure that it meets the file requirements .
Work with uploaded files
For uploaded files, you can perform the following operations.
Download file
To download a file
Click the Download icon in the icon section.
Replace file
To replace a file
To replace the file with a new version of the same file or a different file, perform the following procedure.
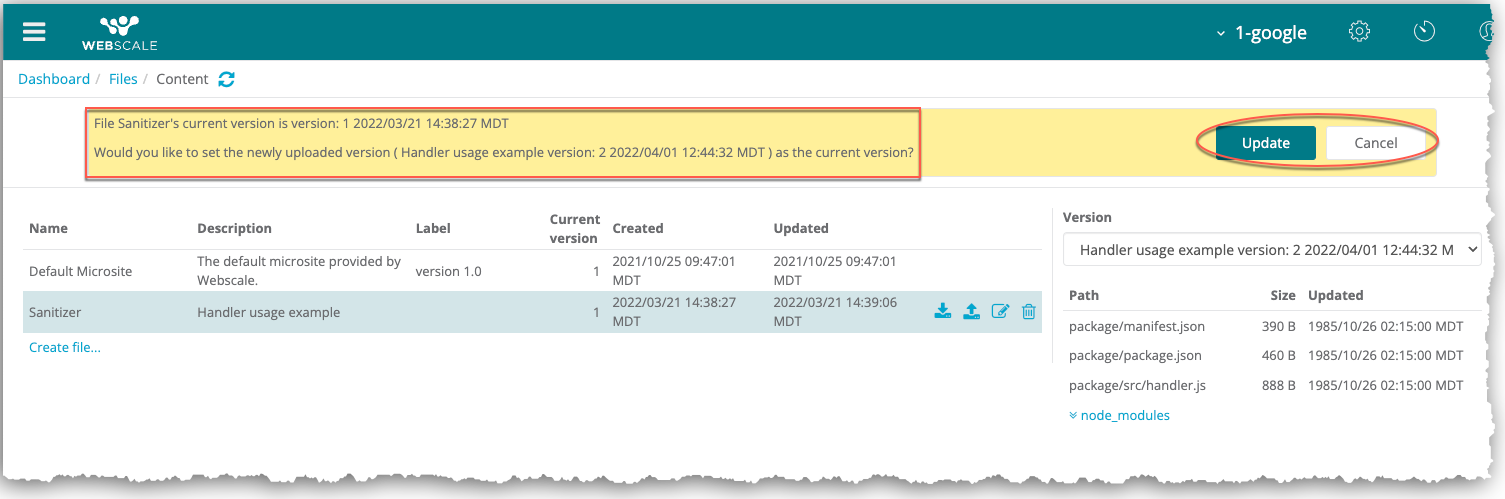
Click the Upload new file version icon .
In the Upload Version dialog, click Choose File.
Optionally, enter a label for this verson of the file.
Click Save.
Click Update to use the uploaded file as your current version.
If you click Cancel, Webscale will upload the file and increment the version number but not use it as your current version.
When you upload a new file, you can upload a new version or a different file.
Edit file details
To edit file details
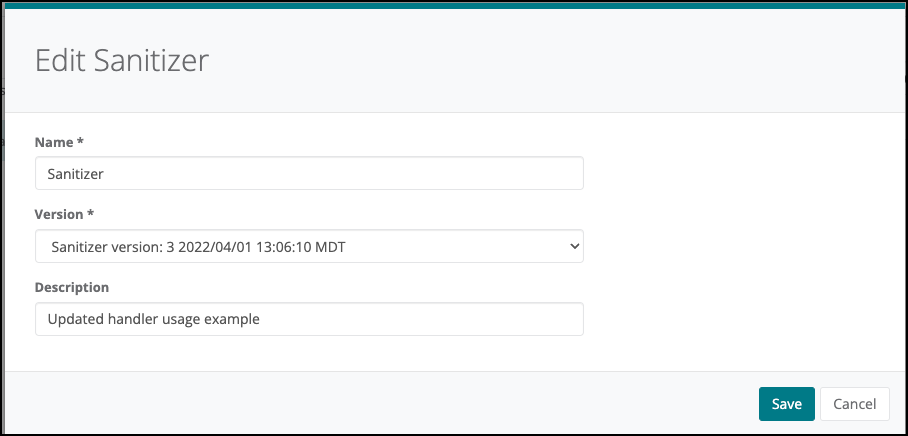
Click the Edit file icon . In the Edit dialog, you can:
- Change the file name
- Update the currently used version of the file
- Optionally, enter a new description or update an existing one.
Click Save when you are finished editing the details.
Delete file
To delete a file
- Click the Delete file icon .
- Click Ok.
The file will no longer display in the Files page list.
Preview files
There are differences in previewing files for CloudEDGE Workers and microsites.
For more information on previewing handler files, see Preview handler files in Working with CloudEDGE Handlers and Workers .
For more information about previewing microsites, see Preview microsites in Working with Microsites .
Further reading
Last modified on June 3, 2026