The Webscale Control Panel Dashboard
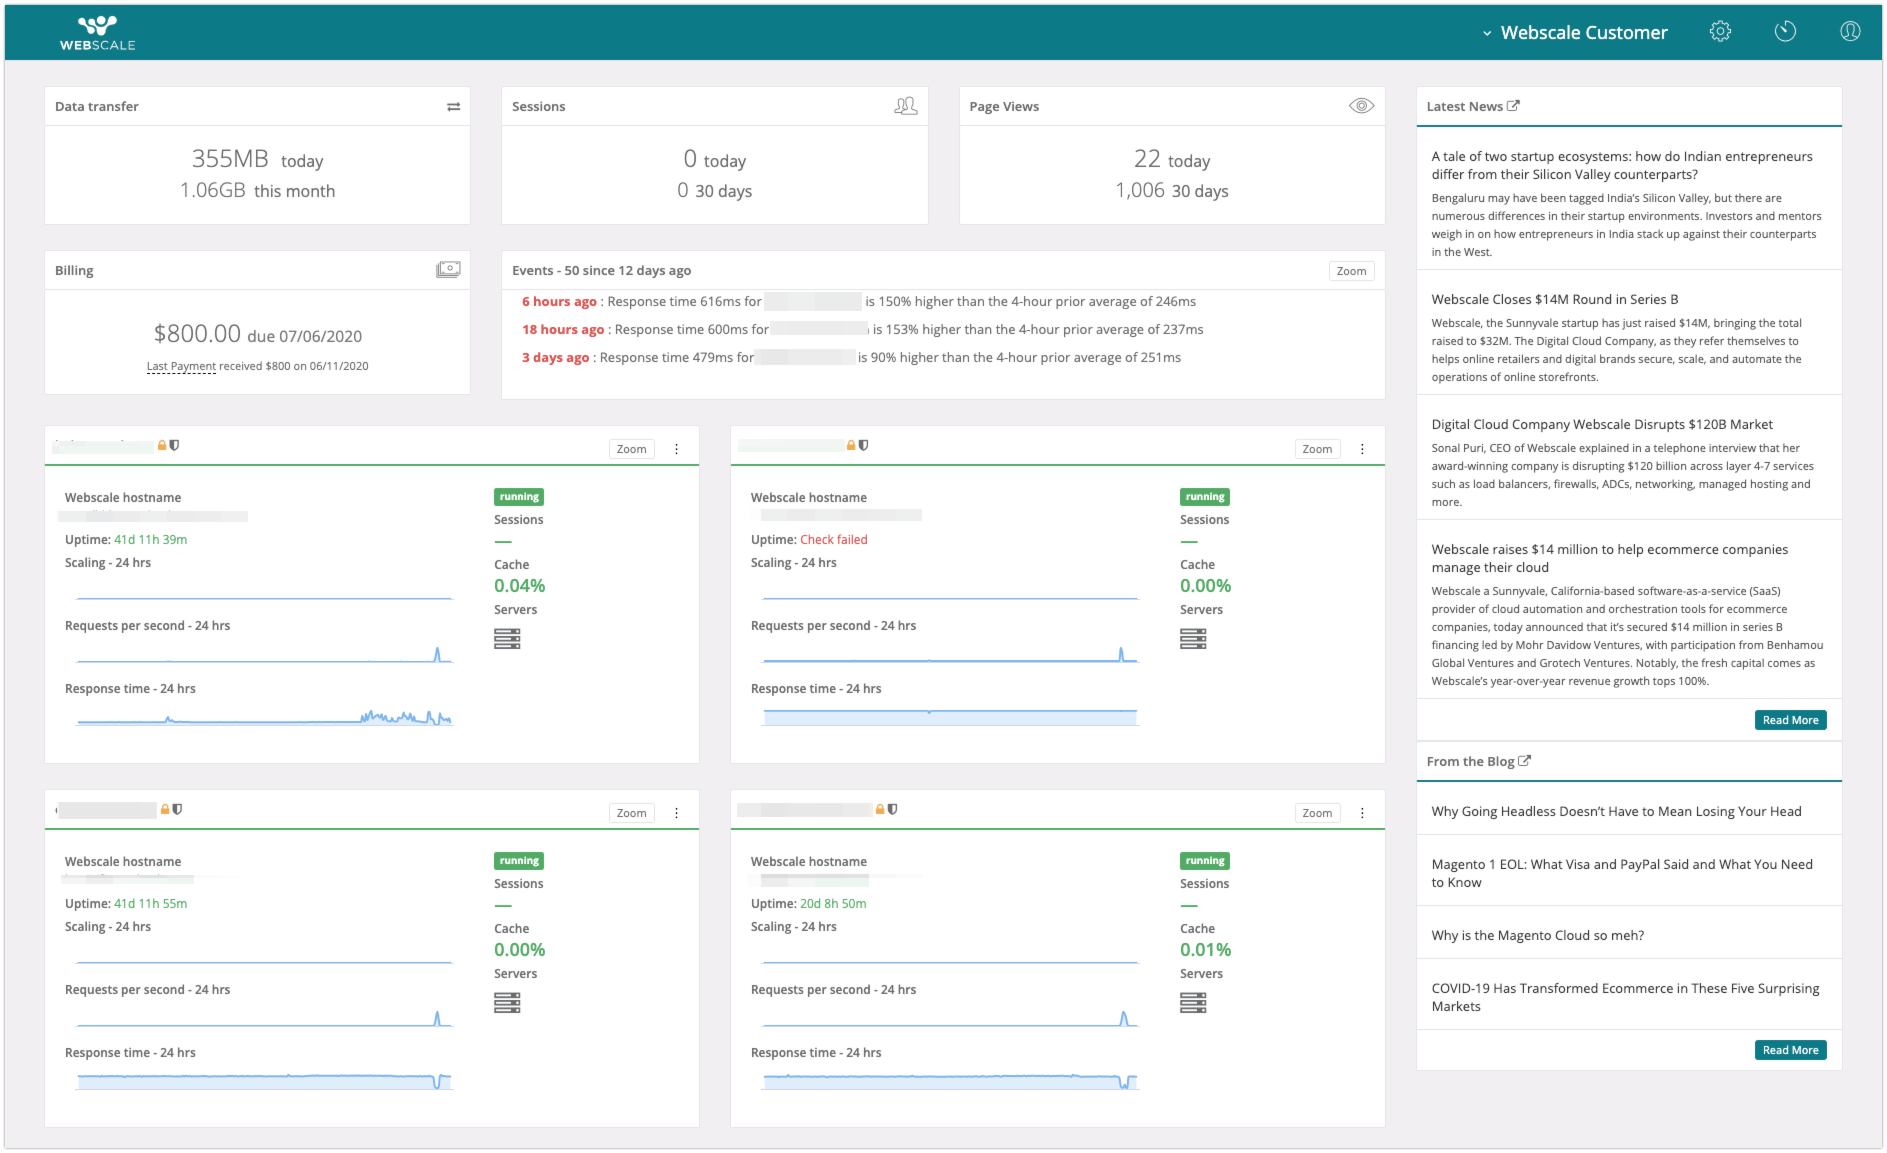
The dashboard is the home page of the Webscale Control Panel and is displayed when you first log in. The dashboard contains links to other important areas of the control panel and includes some essential information about your Webscale account and applications.
Main Navigation
The main navigation bar contains a dropdown menu at the name of the current account - this allows you to choose from the accounts you have with Webscale if you have more than one. Next to this is the gear, which is where you will find the following links:
|
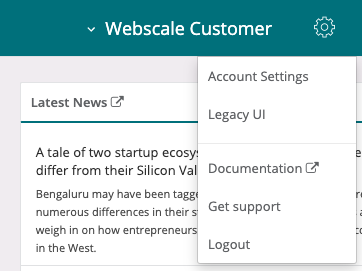
Depending upon the access level of your user account, you may not have all of these options.
The main navigation menu also contains a timer icon and a user icon.
- Click on the timer icon to show the Task Monitor. This shows any tasks that have run in the last 24 hours, and whether they completed or not. Click the Zoom button to go to the full Task Monitor page.
- Click on the user icon to visit the user preferences page. Use the User Editor to make changes to the current user, and click the Access Keys tab to view existing API keys or create a new one.
Page Contents
Under the main navigation bar, the page has several boxes displayed. From left to right, top to bottom, these are:
| Data transfer | Displays the data transfer used by the current account. Contains a daily total and the total for the current month. |
| Sessions | Displays a count of user sessions for the current account. Contains a daily total and the total for the current month. |
| Page Views | Displays the page views for the current account. Contains a daily total and the total for the current month. |
| Billing | Displays the current amount due, the due date, and the amount and date the last payment was received. |
| Events | Displays the most recent events reported for the account. Click the Zoom button to get more detailed information about these events. On the Events page, you can also click Search to search the events, and click Time to view events for a specific time frame. Click Dashboard on the upper left to return. |
| Application Boxes | The top of the application box contains the hostname of the application, as well as icons indicating the status of the application’s SSL and the Webscale Shield. Mouse over either icon for more information. Click the Zoom button to go to the control panel for the application. Click the 3 vertical dots to display a menu showing many of the options that are also on the application’s control panel. More details about this menu are below . The application boxes also display some information about your applications at a glance, including:
|
Application Box actions menu
Click the 3 vertical dots on the upper right corner of the Application box to display the actions menu for your Application.
|

Further Reading
- How to Invite Users
- How to View Webscale Application Server Information
- How to Manage Web Controls
- Webscale FAQ
Last modified on June 3, 2026