Working with CloudEDGE Handlers and Workers
The CloudEDGE Workers feature adds programmability and on-arrival code execution to CloudEDGE CDN (also known as Webscale CDN). It extends your application’s functionality using custom JavaScript without changing your application code. When you use CloudEDGE Workers, it augments a request that Webscale CDN forwards to origin after a cache miss or a response that origin returns to Webscale CDN.
The CloudEDGE Workers feature uses the following components.
- Handler files that include custom JavaScript source files
- Handlers that incorporate the handler files
- Workers that run the JavaScript code according to CloudEDGE CDN caching policies
Configuring CloudEDGE workers (also known as workers) involves the following process.
- Create a handler file with one or more JavaScript source files
- Configure a handler, which incorporates a handler file
- Associate a handler with a CDN control, which results in a worker
For more information about the CloudEDGE Workers feature, see CloudEDGE Workers Overview.
For more information about CDN caching, see Configuring CloudEDGE CDN Caching Policies.
Topics
Handler files
Each handler file is structured as a NPM package. It includes your JavaScript source code and all of the third-party dependencies (also known as node modules) needed to run your code.
In addition, the handler package file (also known as a handler file) must include two files specific to Webscale: package.json and manifest.json. These files must exist in the root directory of the handler file.

You must upload a handler file before you can create handlers. The Files page enables you to upload and manage files. With one exception, the CloudEDGE Workers feature follows the same procedures for uploading and managing files as other Webscale features that use uploaded files. The procedure for previewing handler content files is specific to CloudEDGE Workers.
For more information about CloudEDGE handler files, see Creating CloudEDGE Handler Files.
JavaScript functions
For the JavaScript source files, exported functions can process requests or responses (but not both) and must conform strictly to the handler interface. A JavaScript file can have more than one function and a mix of request and response functions.
Uploading and other shared files procedures
Webscale features that use uploaded package files, such as CloudEDGE Workers and microsites, share the same procedures for uploading and managing files. An exception is previewing content files. Working with handler and microsite files includes procedures for the following shared operations.
For more information about uploading and managing files, see Working with Files.
File requirements
Through the Files page, you can upload handler files. A handler file must fulfill the following requirements.
- .zip, .tar, or .tar.gz file format
- Under 50 MB in size
package.jsonandmanifest.jsonfiles
Preview handler files
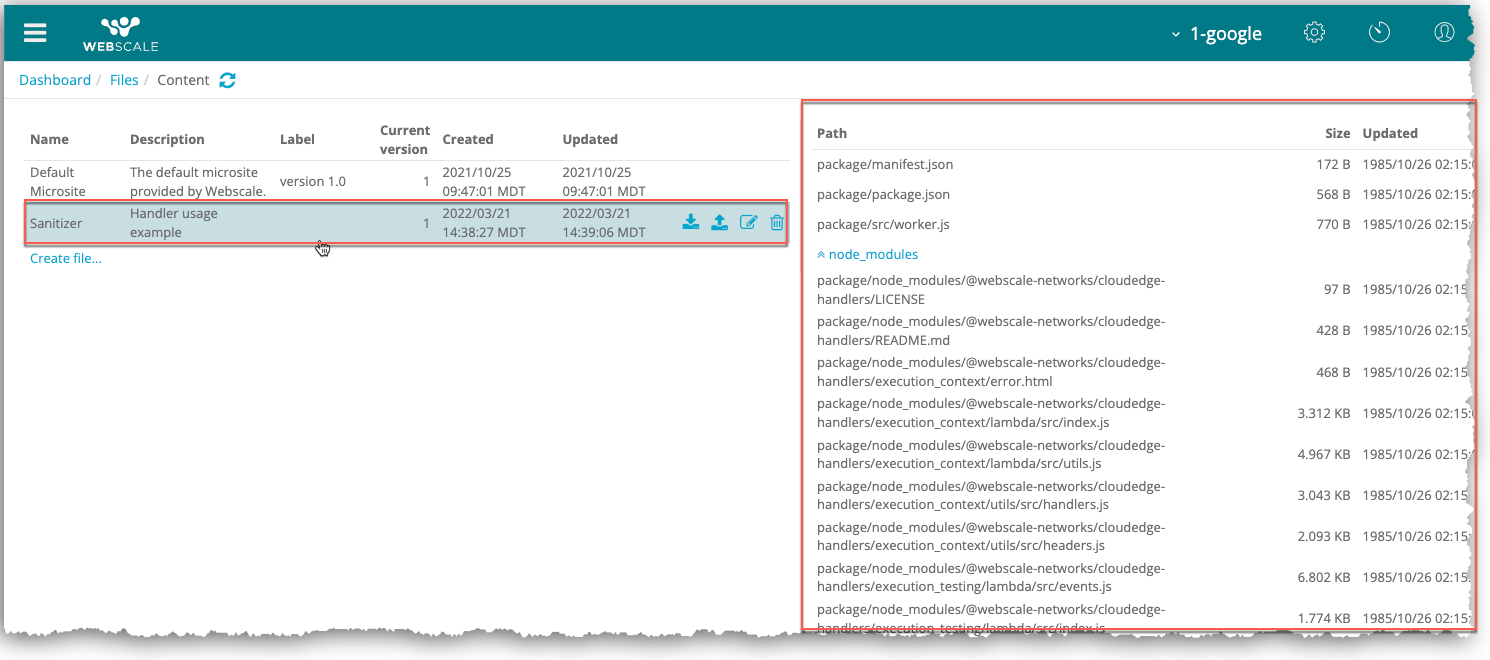
After you upload a handler file, you can preview its content files in the Files page. While previewing a handler file, you can view a list of the files that it contains, including the JavaScript, package.json, and manifest.json files and node modules, in the Content panel. You can also choose to view the contents of a listed file.
By previewing, you can verify that the handler file contains the correct content files. If not, you can edit, replace, or delete handler files through the shared procedures for working with uploaded files. For more information, see Work with uploaded files in Working with Files.
Note:
You can add or replace content files by creating or modifying a handler with the correct content files, then uploading the handler file.For more information about handler content files, see Handler files in Creating CloudEDGE Handler Files.
To preview handler files
-
On the Webscale Control Panel page, click the menu icon on the upper-left of the screen.
-
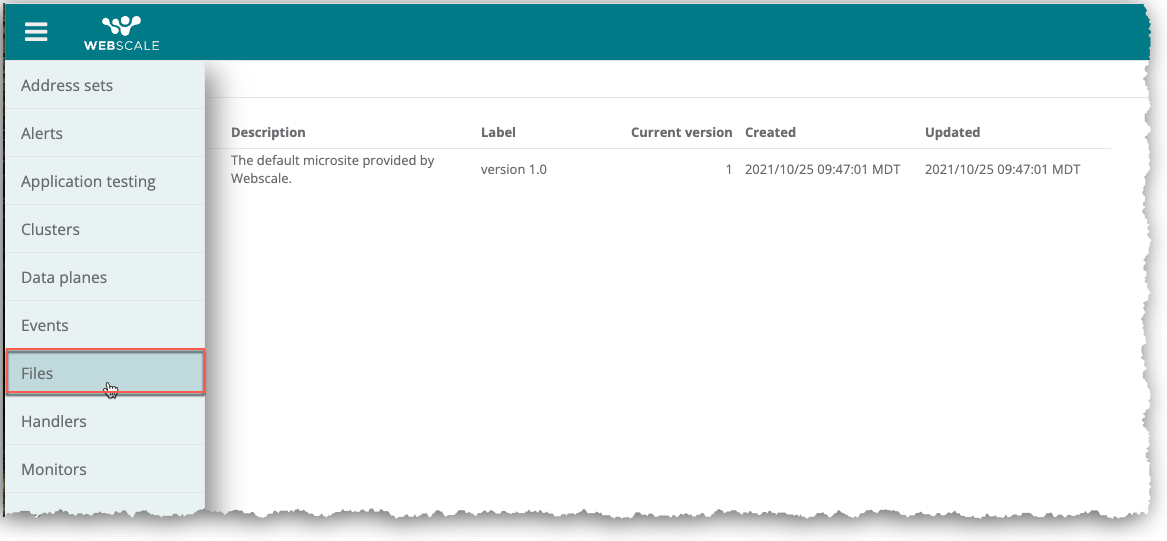
On the sidebar menu, select Files. The Files page displays.
-
In the Files page, select a file in the Files panel.
The handler files display in the Content panel. -
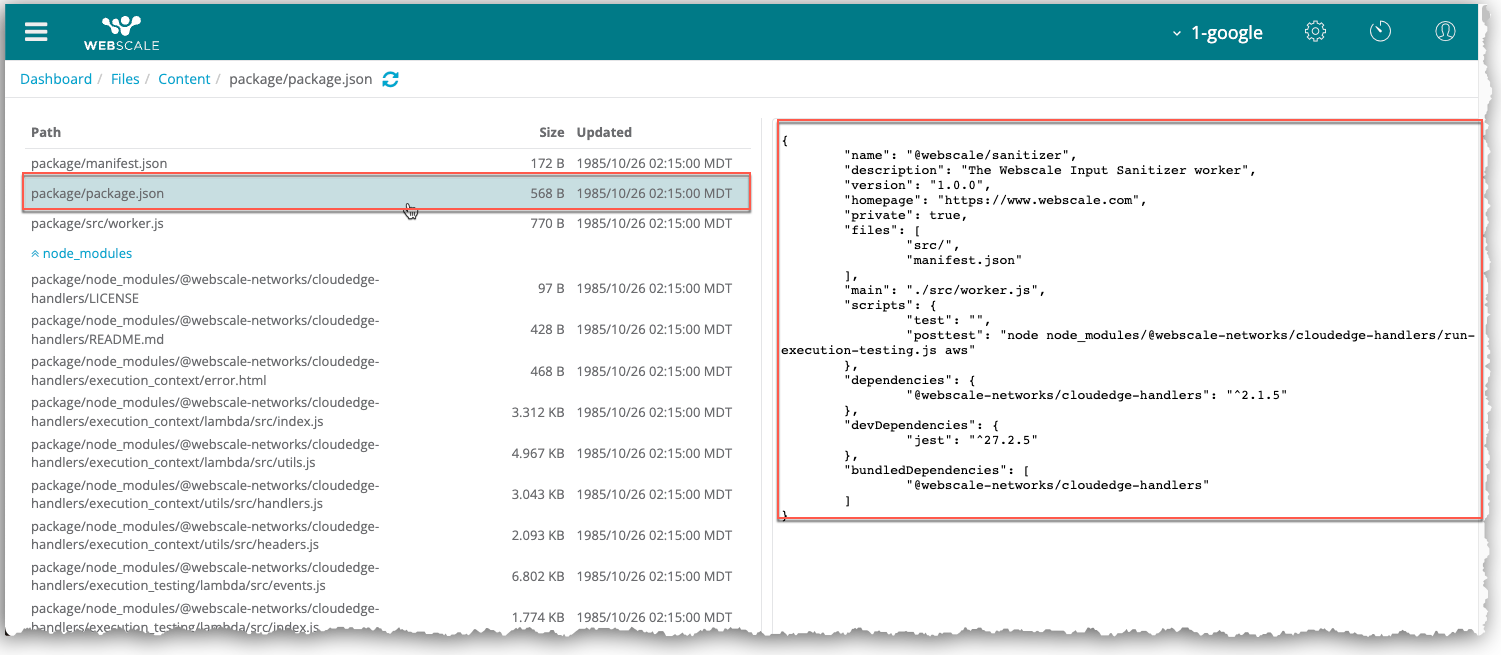
In the Content panel, click on a content file.
The Preview panel displays a preview of the file contents. For example, if a file contains JavaScript, the code will display. -
To return to the Files panel, click Files in the navigation path.
Handlers overview
Note:
You must create the lambda_basic_execution role for your AWS account before creating your first handler. Contact support for assistance or if you have questions about creating this role.When you create a CloudEDGE handler for your account, you select the following items for it.
- Provider for which the CloudEDGE Workers feature is enabled
- Uploaded handler file
- Request or response JavaScript handler function
The Handlers page enables you to perform the following procedures. After you create a handler for your account, it is available to all the applications in the account.
Access the Handlers page
The Handlers page enables you to work with handlers.
To access the Handlers page
-
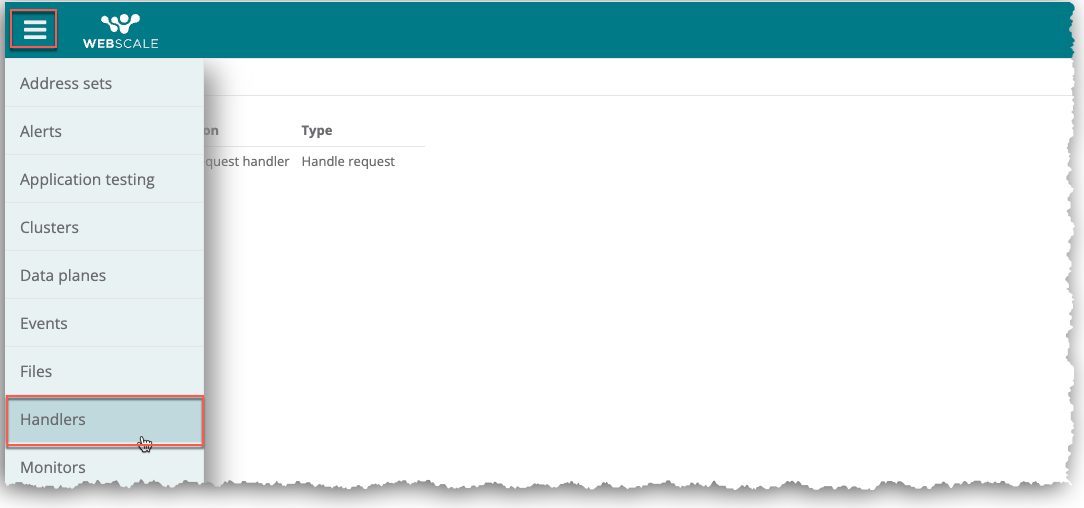
On the Webscale Control Panel page, click the menu icon on the upper-left of the screen.
-
On the sidebar menu, select Handlers. The Handlers page displays.
Create handlers
A handler is a request or response handler based on the type of JavaScript function that you select when you create the handler. As such, Webscale will use it for either requests or responses. You can create several handlers with the same handler file. If the handler file contains multiple functions, you could create a handler for each function.
Only Amazon EC2 providers that are enabled for use with CloudEDGE Workers display in the Create handler dialog box. For more information on configuring providers, see Working with Providers.
Handler memory refers to the memory that the cloud provider allocates to a handler function when it runs it. You can modify the amount of allocated memory according to the amount of memory that a handler function needs to run.
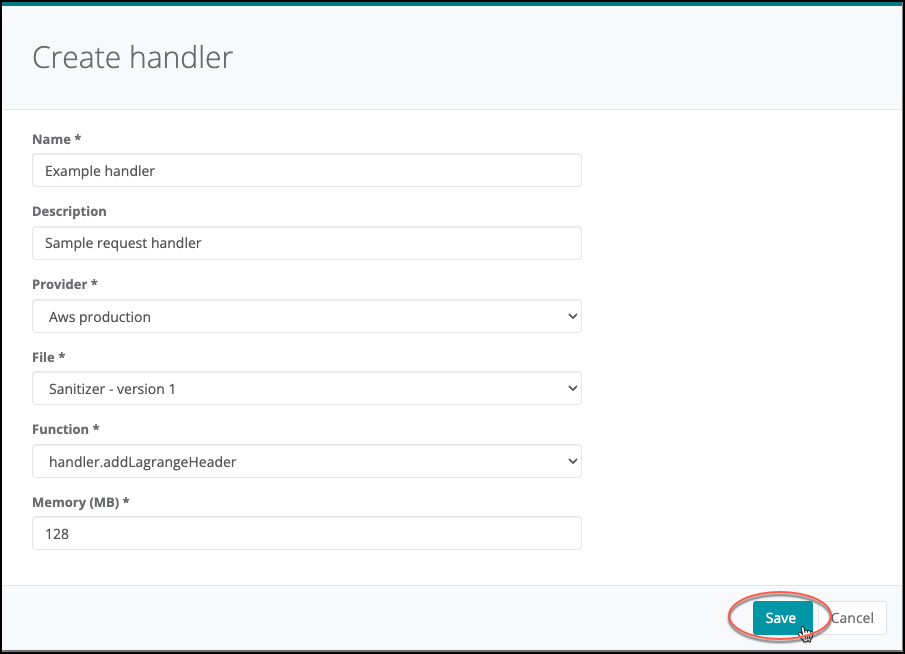
To create a handler
-
On the Handlers page, click the Create handler link.
-
In the Create handler dialog box, enter a name and, optionally, a description.
-
Select a provider from the Provider drop-down menu.
-
Select a handler file from the File drop-down menu.
-
Select a JavaScript function from the Function drop-down menu. In the drop-down menu, the functions display in one of two groups: request or response functions.
-
If necessary, replace the default amount of memory in the Memory (MB) field.
-
Click Save.
The handler displays in the handlers list in the Handlers page.

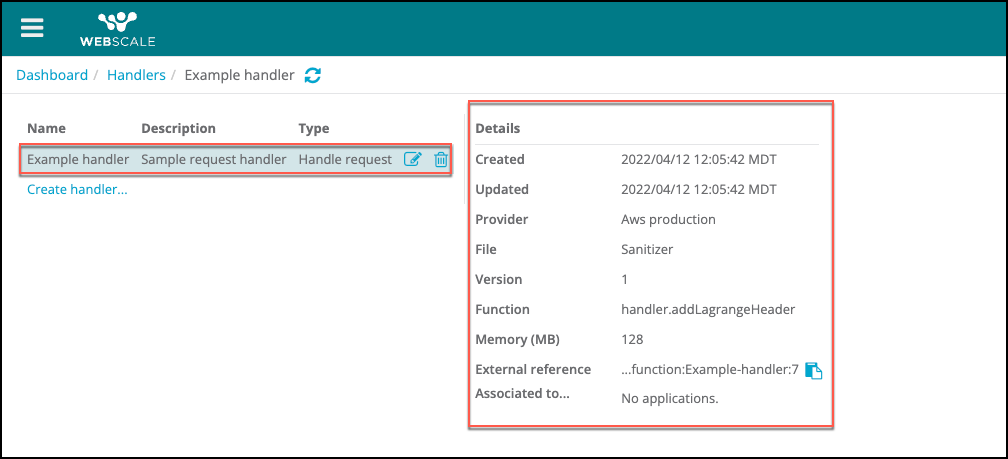
View handler details
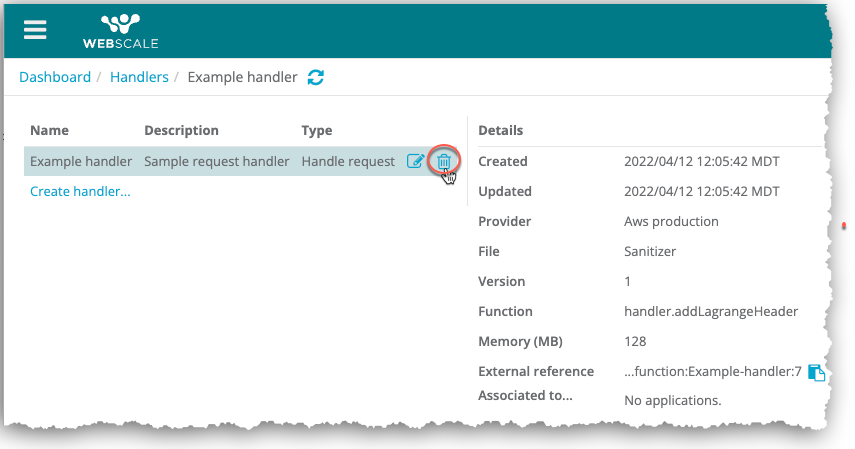
You can view the following details for handlers.
- Created: Handler creation timestamp
- Updated: Timestamp for the last time that you edited the handler
- Provider: Provider selected for the handler
- File Name: Handler file name
- Version: Version of the selected handler file that you specify
- Function name: Name of the JavaScript function that the cloud provider executes
- Memory: Amount of memory allocated for a handler function when a cloud provider runs it
- External reference: Cloud provider-specific URL to the function that encapsulates the handler function
- Associated to: When you have associated the handler to a CDN control, name of the application for the CDN control
To view handler details
On the Handlers page, select a handler. Detailed information for the handler displays in the Details pane.
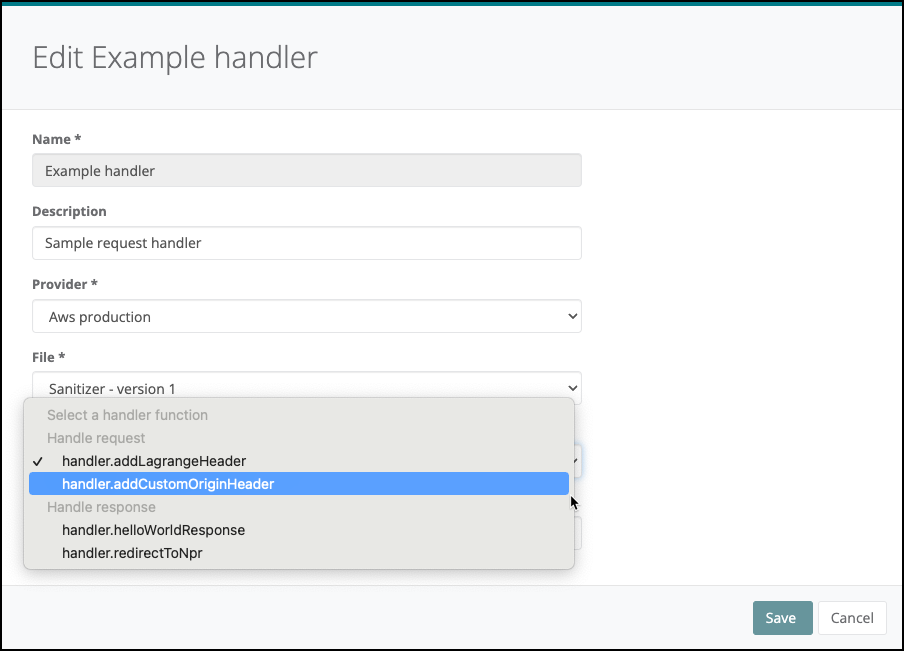
Edit handlers
You can modify everything about a handler, including the handler file, except for its name.
When you edit a handler that is associated with a CDN control, you can select a different function for the handler. However, you can only replace it with a function that has the same type (request or response) as the current selected function.
To change the function type, remove the handler from the CDN control. Then, choose any function that you want, including one with a different function type.
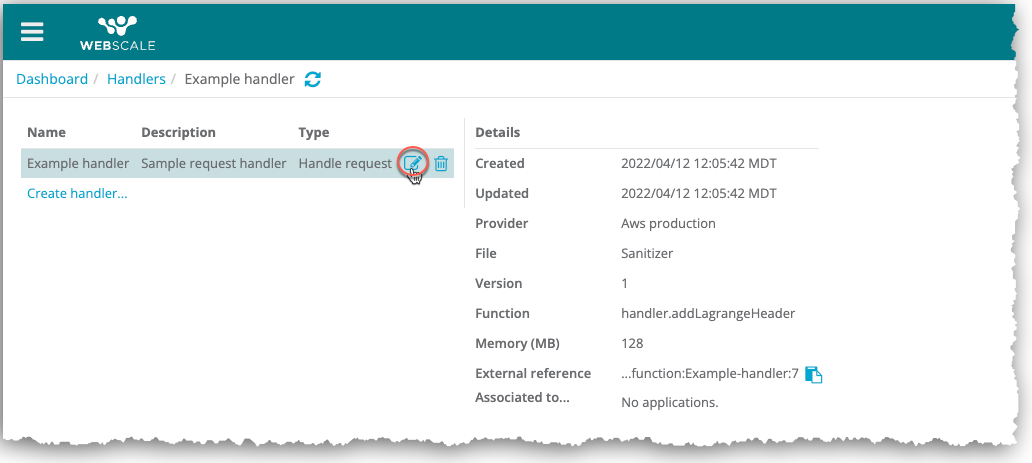
To edit a handler
-
On the Handlers page, select a handler.
-
Click the edit icon for the handler.
-
In the Edit dialog, modify the desired settings.
-
Click Save.
Delete handlers
If a handler is associated with a CDN control, you cannot delete the handler until after you have removed it from the CDN control.
To a delete handler
-
On the Handlers page, click the delete icon for a handler.
-
Click Ok.
The file will no longer display in the Handlers page list.
Workers overview
Workers run handler functions after cache misses. To create a worker, associate a handler with a CDN control when you create or edit the control. A worker with a request function executes before Webscale CDN forwards the request to origin. A worker with a response function runs in conjunction with the origin response.
CDN controls configure the Webscale CDN caching policies that determine when workers run. When configuring a CDN control, you can associate up to two handlers with the control (one for requests and the other for responses). For information about caching policies, see Configuring CloudEDGE CDN Caching Policies.
You can configure CDN controls through the Controls section of the CDN page for your application. This section only displays after you enable Webscale CDN. For more information on Webscale CDN, see CloudEDGE CDN Overview.
Create workers
This procedure provides instructions for creating workers by adding handlers while creating CDN controls.
To create a worker
-
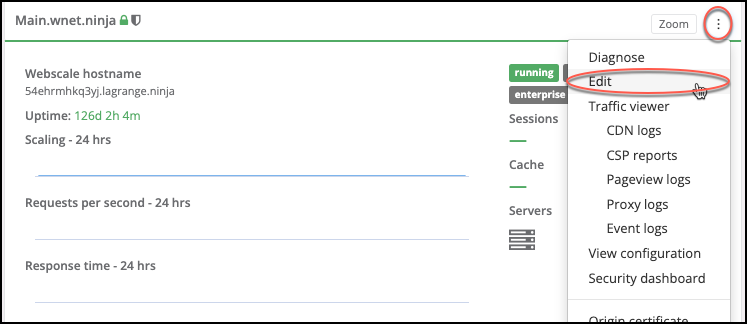
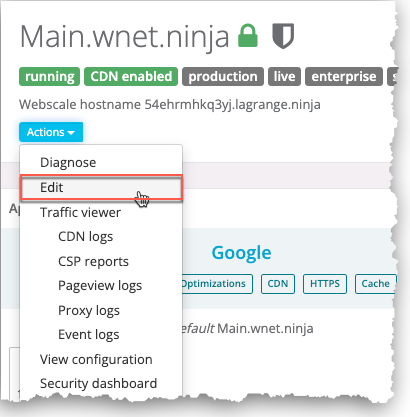
Click the three vertical dots menu icon on the upper-right corner of the application box and select Edit.
-or-
On your application page, click the Actions menu icon and select Edit.
-
On the sidebar menu, click CDN. The CDN page displays.
-
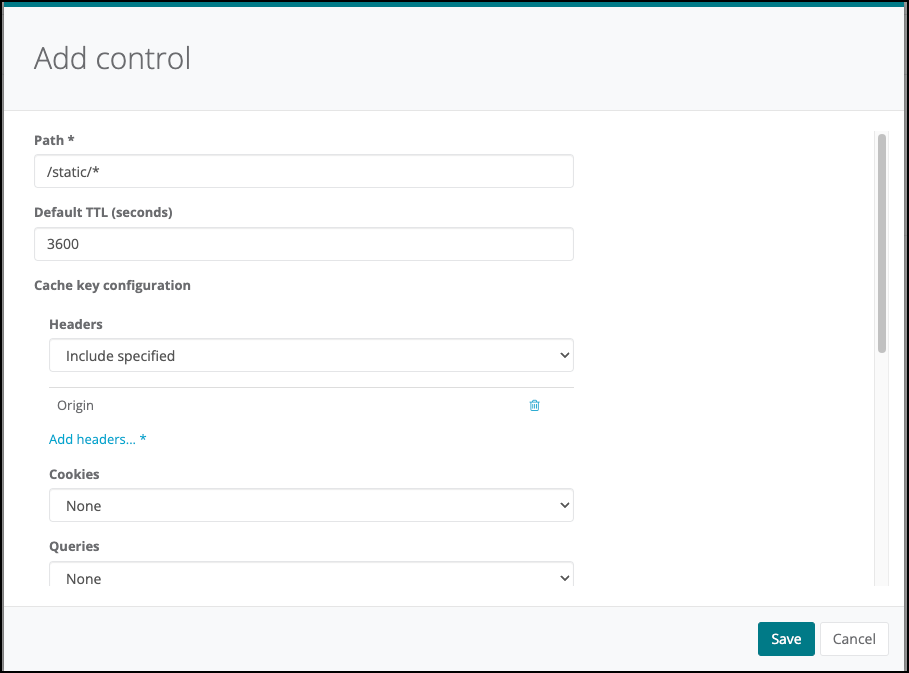
In the Controls section of the CDN page, click on the Add control link.
-
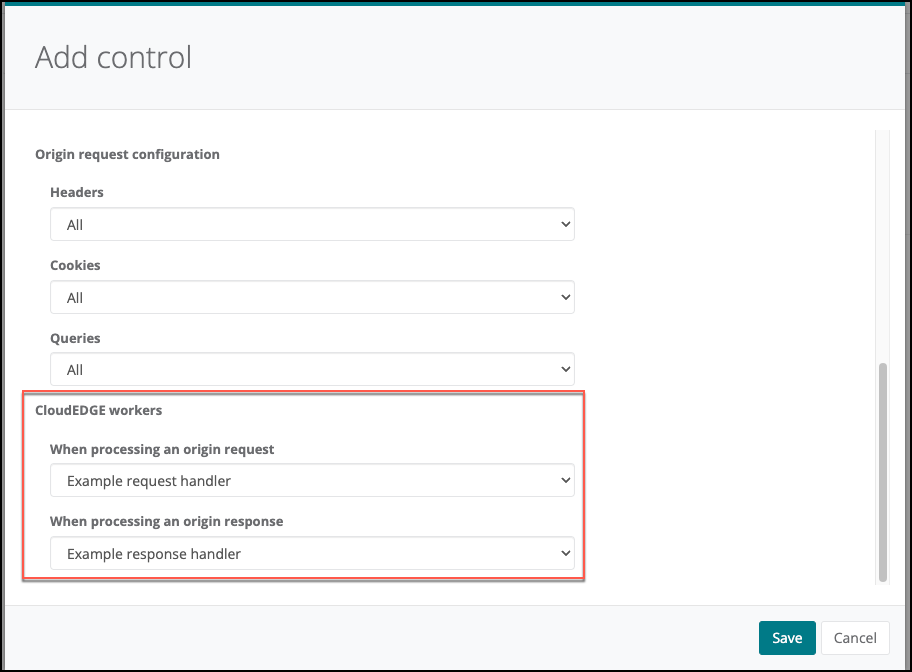
In the Add control dialog box, enter a path for the CDN control. Then, except for the CloudEDGE Workers settings, configure the desired optional settings.
-
In the CloudEDGE Workers section, select a handler in the When processing an origin request drop-down menu.
-
Select a handler in the When processing an origin response drop-down menu.
-
Click Save.

Further reading
- CloudEDGE Workers Overview
- Creating CloudEDGE Handler Files
- CloudEDGE Workers Usage Example
- CloudEDGE CDN Overview
- Configuring CloudEDGE CDN Caching Policies
- Working with Files
Have questions not answered here? Please Contact Support to get more help.
Feedback
Was this page helpful?
Glad to hear it! Have any more feedback? Please share it here.
Sorry to hear that. Have any more feedback? Please share it here.