Working with Address Sets
An address set is a list of IP addresses that Webscale manages and uses in features like Trusted Proxies, Traffic Viewer, Web Controls, and Allowed and Blocked lists. For instance, you must select address sets for the trusted proxies to enable and use the Trusted Proxies feature.
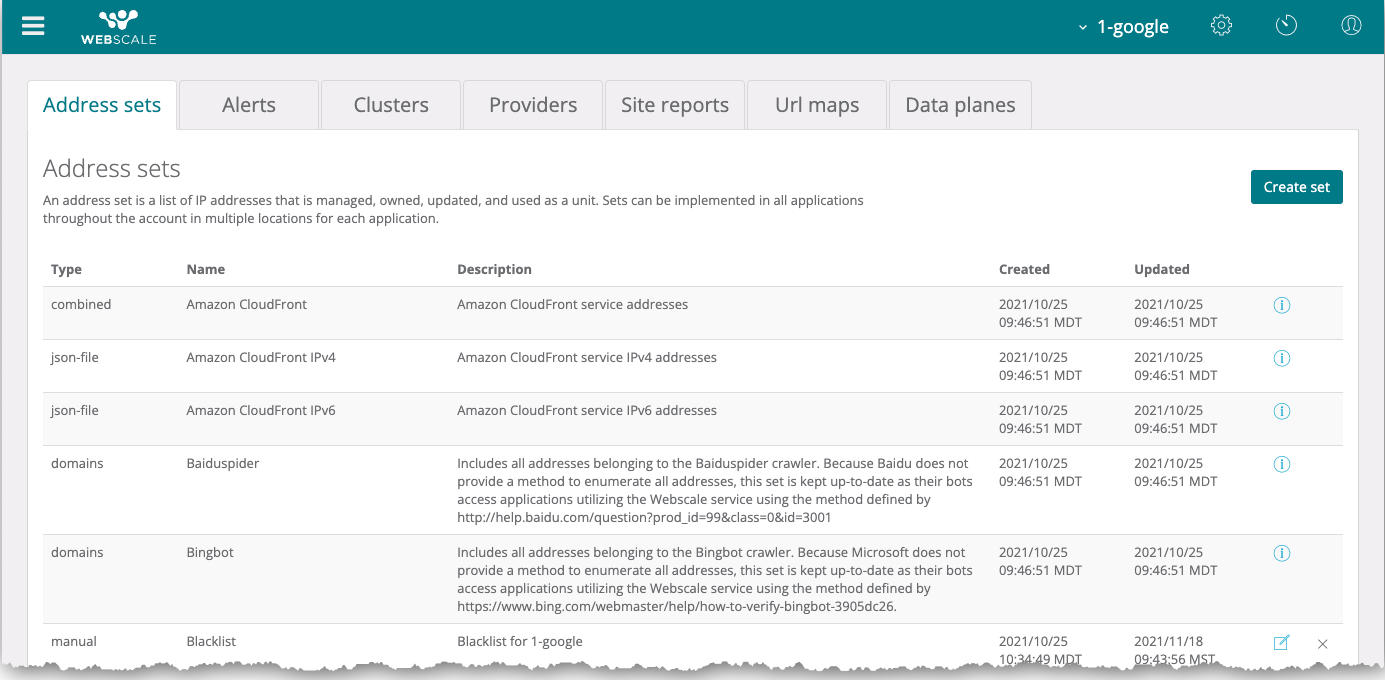
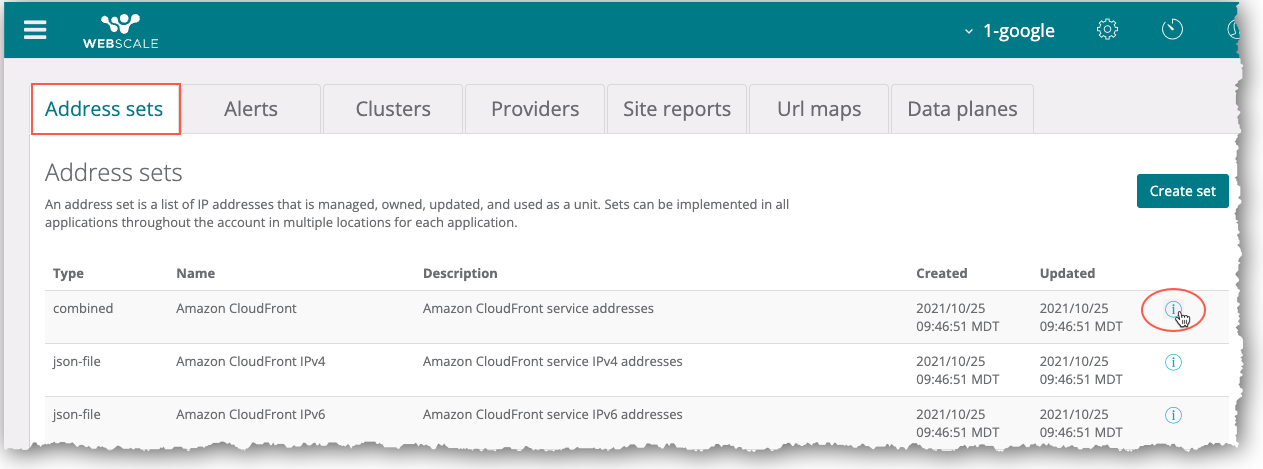
All applications for the account can use the address sets. The Address sets tab of the account settings page enables you to work with address sets through the Webscale Control Panel page. Each address set is listed in the table as a separate entry.
Topics
- Address set types
- Create address sets
- Delete address sets
- Add IP addresses to address sets
- Edit or remove individual IP addresses from address sets
Address set types
There are several types of address sets, which correspond to different ways of retrieving IP addresses. Following are the address set types.
- Combined: Comprised of other address sets
- Domains: Determines and retrieves its IP addresses via a DNS lookup of specified domains
- Dynamic: Added with only a name and optional description (defining the add to address set Web Control action adds IP address, which can change over time)
- json-file: Contains IP addresses that are populated from a JSON file fetched from a specified URL
- Manual: Contains IP addresses that users manually add and update
- Text file: Contains IP addresses that are populated from a text file fetched from a specified URL
You cannot delete combined, domains, json-file, and text file address sets. You can view the details of one of these address sets by clicking the information icon to the right of the address set.
Note:
For json-file address sets, you can also specify a JMESPatch expression to parse and filter the json object for addresses. Additionally, you can specify a fetch interval to configure the frequency (in seconds) of auto-updates from the URL.Note:
For text file address sets, you can also specify an interval (in seconds) to configure the frequency of auto-updates from the URL.For information on dynamic address sets, see Using Web Controls for Rate Limiting.
Create address sets
After you select one of the address set types, the Create address set dialog box adds fields specific to the type.
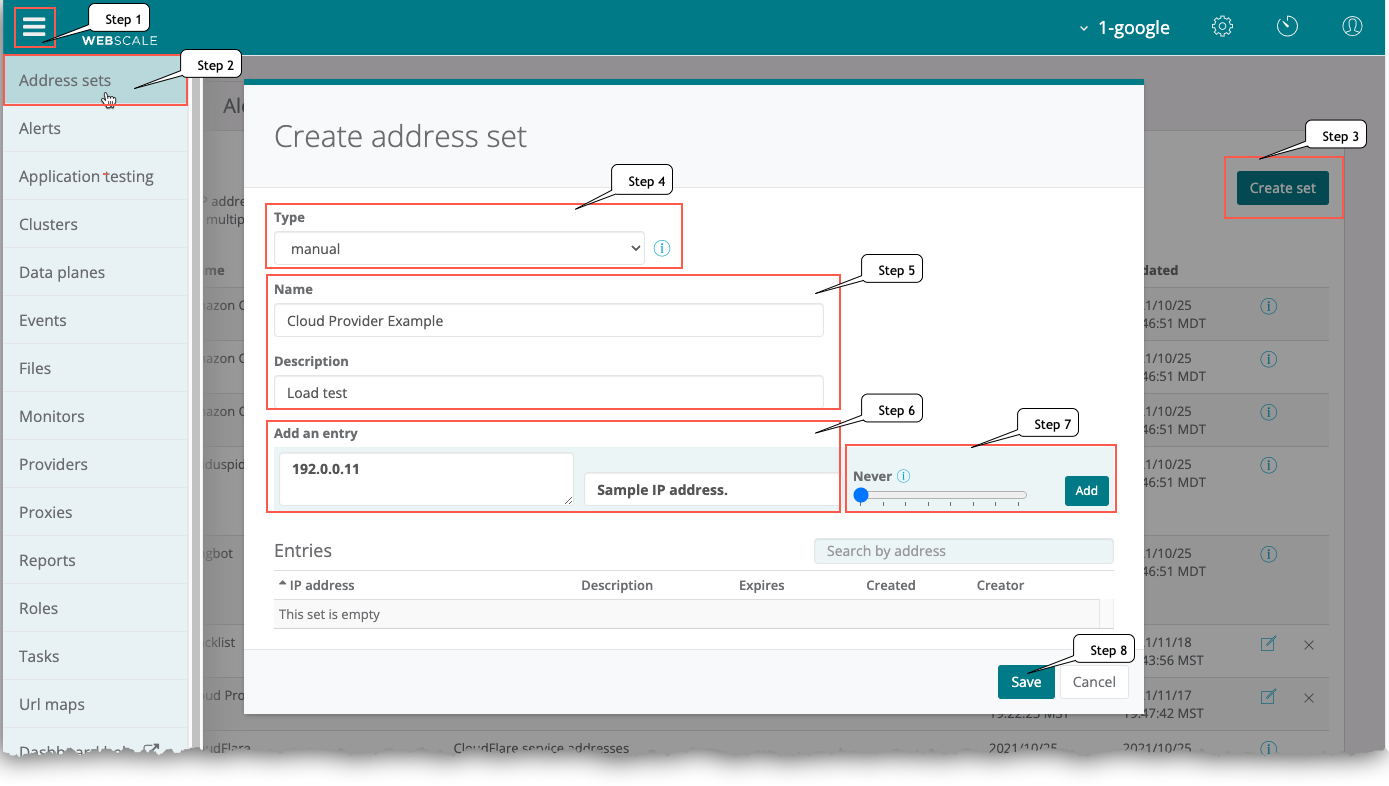
To create an address set
-
On the Webscale Control Panel page, click the menu icon on the upper left of the screen.
-
On the sidebar menu, select Address sets.
-
On the Address sets tab, click Create set.
-
On the Create address set dialog box, select the address set type.
-
Enter a name and description.
-
Add information or upload files specific to the address type:
- Add IP addresses or domains
- Upload a json or text file
-
To change an IP address expiration date, choose another date on the slider and click Add.
Note:
By default, the address set’s expiration slider is set to Never. It will not expire unless you specify an expiration time or delete the address set. You can change the default by sliding to a pre-selected time. The expiration times are incremented by days, weeks, months, and a year from the time that you added the IP address. -
Click Save.
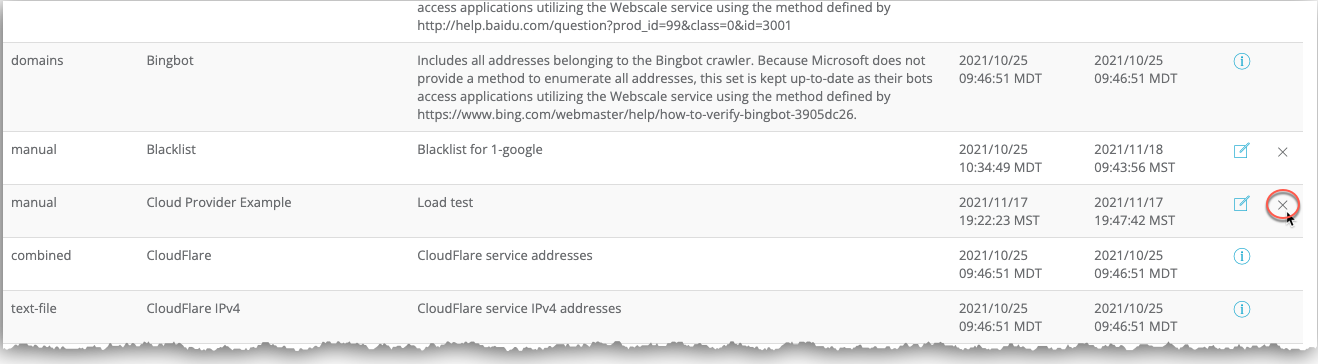
Delete address sets
You can delete manual address sets as well as dynamic address sets that are not in use.
To delete an address set
-
On the Webscale Control Panel page, click the menu icon on the upper left of the screen.
-
Select Address sets on the sidebar menu.
-
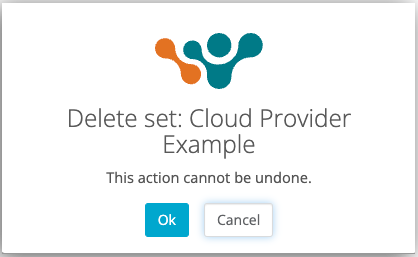
Click the X icon at the end of the address set entry.
-
Click Ok in the confirmation box.
Add IP addresses to address sets
You can add IP addresses to manual address sets.
To add an IP address
-
On the Webscale Control Panel page, click the menu icon on the upper left of the screen.
-
On the sidebar menu, select Address sets.
-
On the Address sets tab, click the edit icon for the manual address set.
-
In the dialog box for the address set, enter an IP address, optional description, and click Add.
-
Click Apply to add the IP address. Or, Revert if you do not want to add it.
-
Repeat the steps if you want to add another IP address.
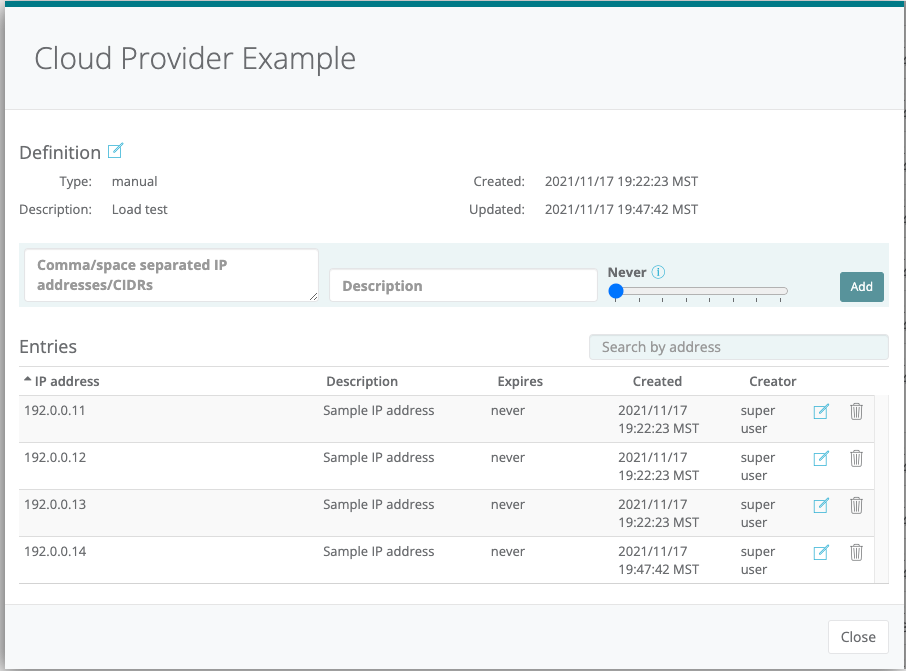
Edit or remove individual IP addresses from address sets
You can edit and remove existing IP addresses for manual address sets. When you edit an IP address, you can modify its description and expiration date.
To edit or remove an IP address
- On the Webscale Control Panel page, click the menu icon on the upper left of the screen.
- On the sidebar menu, select Address sets.
- On the Address sets tab, click the edit icon for the address set.
- In the dialog box for the address set, to edit an IP address set:
- Click the edit icon for an IP address.
- Modify its description and/or expiration date.
- Click Update.
- Click Apply.
-or-
To delete an IP address, click the delete icon for the IP address.
Further reading
- Configuring Trusted Proxies
- Using Traffic Viewer
- Web Controls
- Editing the Allowlist
- Editing the Blocklist
- Configuring Web Controls for Rate Limiting
Have questions not answered here? Please Contact Support to get more help.
Feedback
Was this page helpful?
Glad to hear it! Have any more feedback? Please share it here.
Sorry to hear that. Have any more feedback? Please share it here.